
This post may contain affiliate links. See my full disclosure. As an Amazon Associate, I earn from qualifying purchases.
These hand-rolled sourdough croissants require simple ingredients and only two lamination folds after locking in the butter block. No stand mixer required! They are akin to what you would find at a bakery but with all the benefits of sourdough with a long fermentation.

If you’ve been around here long, you know that I love using my sourdough starter for many applications like Sourdough English Muffins, Sourdough Brioche, and Sourdough Raised Donuts.
I also love baking pastries with my sourdough starter!
Shortly after developing my Sourdough Danish Pastries, I was determined to work out a homemade sourdough croissant recipe that gave consistent results.
These hand-rolled croissants use no commercial yeast as leavening, just sourdough starter.
They are buttery and flavorful with a lightly crisp and flaky exterior. They are a fun project and well worth the time spent on the dough!
What is a croissant?
Croissant dough is laminated which means it is thinly layered with butter. This is done in a process of rolling and folding the dough after locking in a butter block that you form first.
Lamination creates those amazing flaky layers and light texture.
There are different ways this layering can be done. I use two folds: a book fold followed by a tri-fold (letter fold). This creates 25 layers in the sourdough croissants.
Bakers like Claire Saffitz and Peter Jespersen (Simpel Surdej) use this particular combination of folds.
Lamination takes some practice, but I will show you step-by-step how the process works. The trick is managing the temperature of your dough and butter to get the best layers.
The dough is then cut and shaped. The croissants are brushed with an egg wash after proofing to make them deeply golden and shiny out of the oven.

Does using sourdough starter make the process more difficult?
The process of mixing and laminating the dough is similar whether you use commercial yeast or sourdough starter.
The only difference is a the long ferment time in between making and laminating the dough (though many yeasted croissant recipes also call for an overnight rise).
I don’t mind this extra time, though. I mix my dough on day one, allow it to ferment at room temperature for 4 hours, and then pop it in the fridge. The next day, I’m ready to continue the process when it fits in my schedule.
You can also hold the dough in the fridge for an extra day before or after lamination. The croissants generally end up with a more open honeycomb interior and a slightly more sour flavor this way.
Sourdough Beginner Guides:
- How to Feed and Maintain a Starter (Easy Refrigerator Method)
- Essential Sourdough Bread Making Tools
- Sourdough Baking Terms for Beginners
- Milling Flour at Home: A Beginner’s Guide
Do I have to use unsalted butter?
Definitely use unsalted butter. Salted butter will pull moisture from the dough, making the layers in the croissant less defined.
High quality butter with a higher fat content (82% fat), like Kerry Gold or another European butter, will give you the best result.
The higher fat content makes the butter more pliable at a colder temperature which will work in your favor during lamination.
These butters have a deeper yellow color and are cultured as well.
All this to say, you can use a store brand unsalted butter which I have done in this tutorial, but a higher quality butter will be a little more forgiving.
It will ultimately impart more flavor and color to your sourdough croissants.
Sourdough Croissants Baking Schedule
*The strength of your starter, the temperature in your home, and other factors will affect how long each step in the recipe will take.
Approximate timing:
- Mix and warm ferment: 4 hours, 10 minutes
- Cold ferment: 12 hours
- Creating butter block and laminating dough: 1 hour, 50 minutes (including chilling time)
- Shape and proof: 5 hours+
- Egg wash and bake: 30 minutes
Feed your starter several hours prior to baking the recipe and allow it to peak.
Start the dough on day 1, leaving about 4 hours of time for fermenting at room temperature. Refrigerate until the next day. Finish croissants on day 2, remembering to leave extra time for proofing just in case.
Tips for Success When Making Sourdough Croissants
- Use active starter that has just come to its peak after a fresh feeding.
- When laminating croissant dough, you want your butter the same consistency as your dough. Your dough should be chilled. Your butter should be cold as well but still very pliable if you bend your butter block. If the butter becomes too warm and melts at any point, the butter will meld into the dough and you will lose your layering (you’ll end up with bread-like crescent rolls). Wrap and chill your dough when necessary during lamination if your butter and dough become too soft or your dough begins to resist being rolled out.
- If you attempt to roll your dough when it is too cold, your butter will crack beneath the surface of the dough when you roll it. Allow the dough to sit at room temperature for 10-20 minutes before rolling to allow the butter to become pliable again.
- Avoid over-handling your dough. Take your time. Be careful not to poke any holes in the dough with your fingernails or due to the dough sticking to your countertop.
- Make sure you allow enough time for the croissants to proof before baking. They should have doubled in size and “wobble” like marshmallows if you bump the baking tray. You should begin to see some separation in the layers when they are done proofing. Under-proofed croissants will leak butter during baking, giving the croissants a heavy texture, dense middle, and layers that are overly thick and defined.
- I’ve also learned through trial and error that croissants should be proofed slowly at room temperature (don’t exceed 75°F!) If the proofing temperature is too warm you’ll have similar problems with your butter leaking during baking and the layers turning out thick or overly defined like a crunchy crescent roll. You can even chill your croissants prior to baking to help with this.

Recommended Equipment
- Digital kitchen scale
- Parchment paper
- Plastic wrap
- Half sheet baking pans
- Measuring tape or ruler
- Pastry brush
- Bench scraper
- Rolling Pin
- Cooling rack
How to Make Sourdough Croissants
Step 1 – Make and Ferment Sourdough Croissant Dough
Add your starter, sugar, kosher salt, melted butter, milk, and flour to a large bowl. The ingredients are listed by weight in grams for consistency.
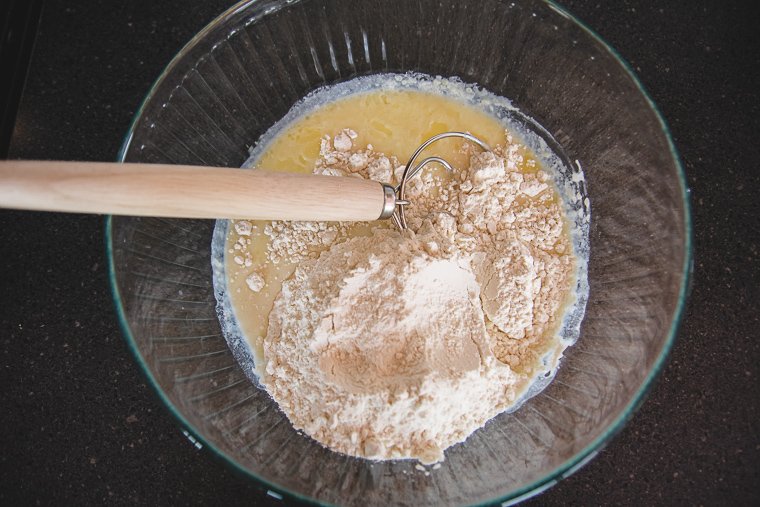
Stir until a shaggy dough forms. I like to use my Danish dough whisk whenever I’m mixing a dough.
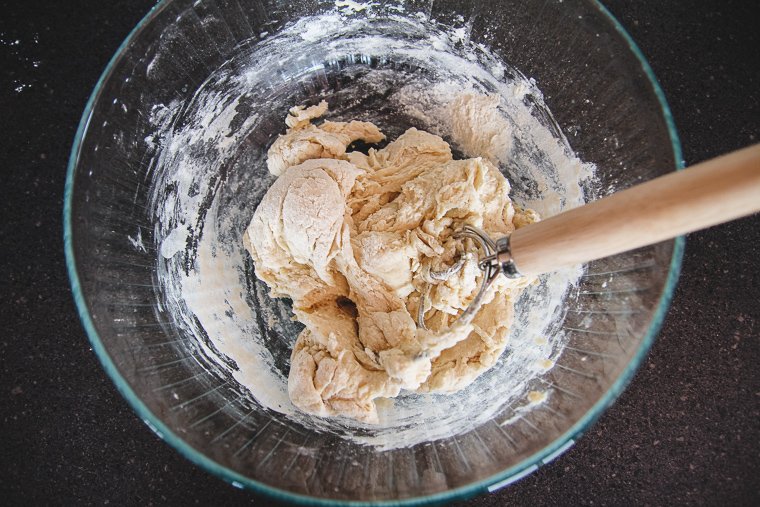
Remove dough to a clean countertop. Knead the dough for a few minutes until it becomes smooth. Since the kneading goes quickly, I usually don’t use my mixer for this recipe.
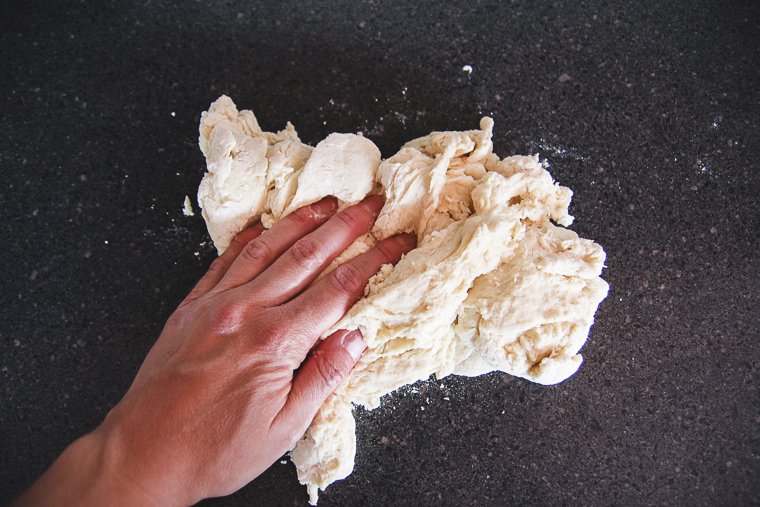
The dough should be tacky when it’s finished, but not sticky!
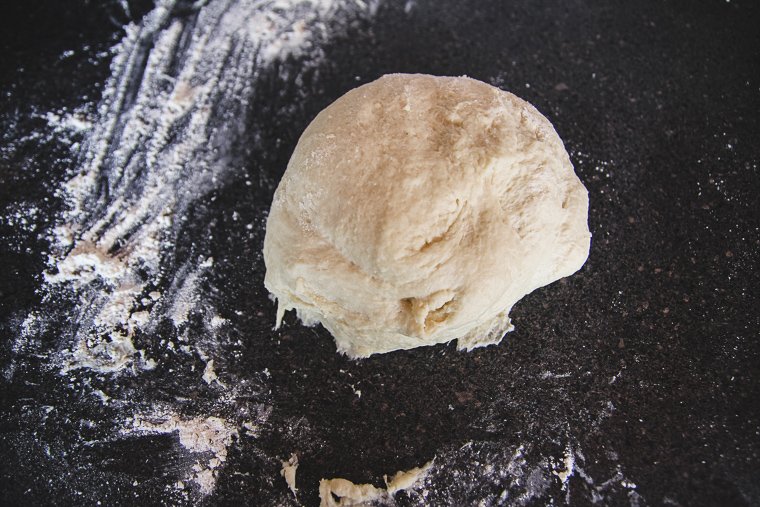
Form the dough into a ball. Place the ball in a bowl and prop a lid on the top or cover in plastic wrap.
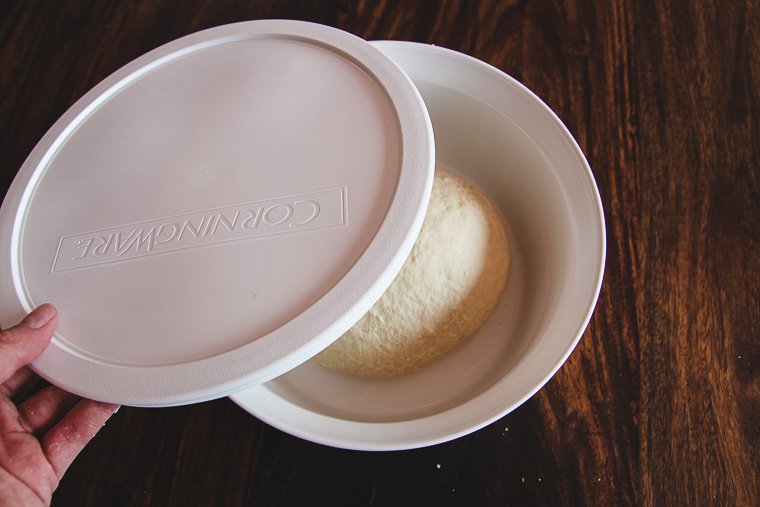
Leave the dough in a warm place to ferment for about 4 hours or until the dough is just shy of doubling. I usually use my microwave or oven with the light turned on for a warm place to ferment.
Then cover and transfer to the refrigerator overnight.
Step 2 – Make Butter Block
The next day, you are ready to laminate the dough. The first step is to make the butter block.
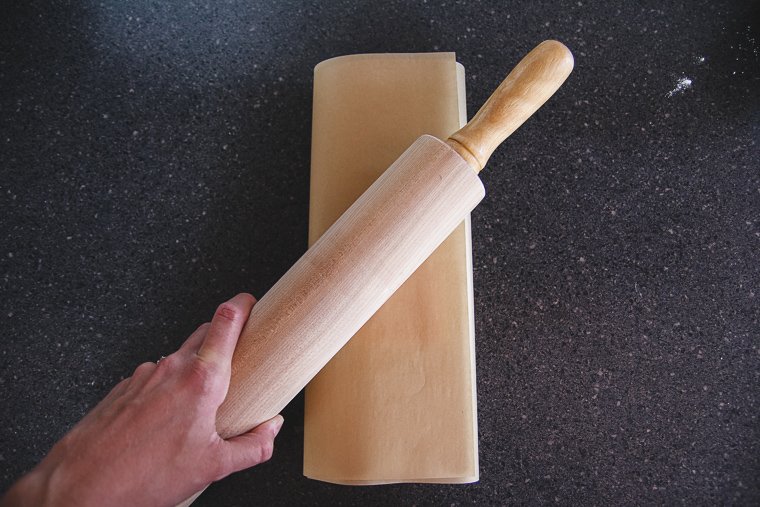
Place your cold butter on a sheet of parchment paper and sprinkle with the flour.

Loosely cover the butter with the edges of the parchment paper. Beat your butter with your rolling pin until it begins to flatten. If it won’t budge, let it sit for a few minutes to warm slightly and try again.
Next, make a rectangular pouch out of your parchment paper that measures 6 x 8 inches. I crease the the sides to 6 inches first. (Update: I have found it’s easier to measure and fold the parchment before placing the butter inside!)

Then I fold the top down and the bottom up, adjusting it to 8 inches as I measure it.

Now flip the whole pouch over so the folds stay closed.
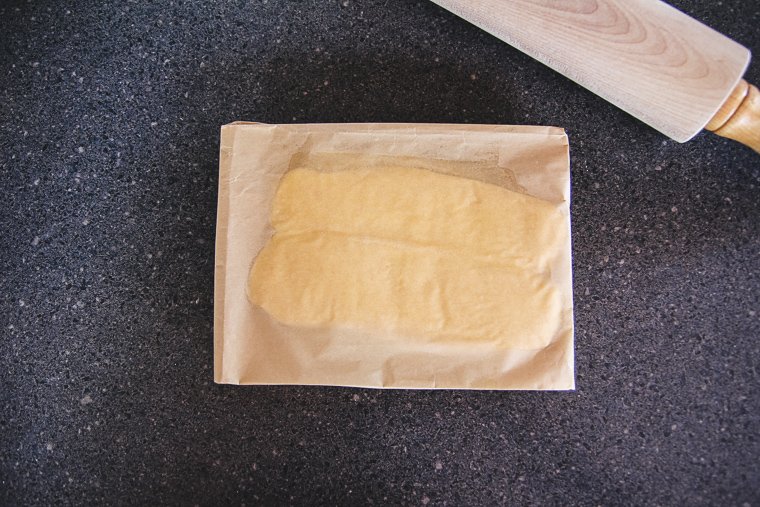
Use your rolling pin and your fingers to press the butter evenly into the pouch, making sure it fills the corners as well.
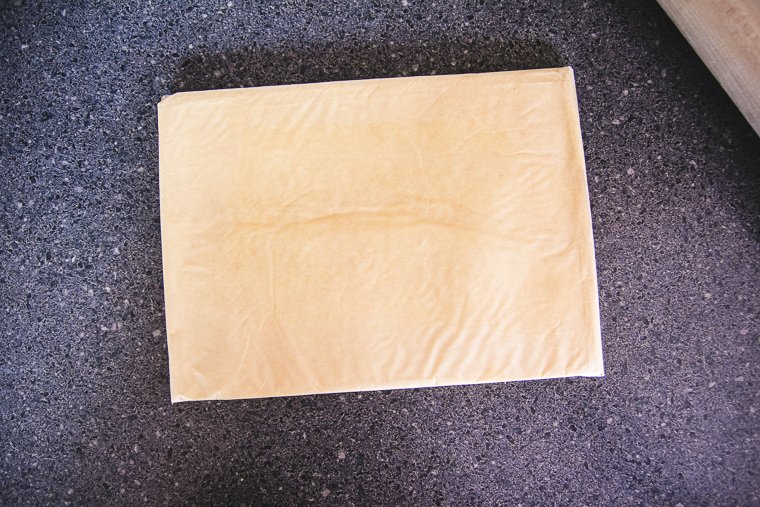
Now check your butter. If it’s melty and greasy on the edges, place it in the refrigerator for a few minutes to chill. If it’s still cold, but very pliable when you bend the package, you are ready for the next step.
Step 3 – Lock in Butter Block
Remove your chilled dough from the fridge. Place it on a lightly floured surface and press it into the shape of a rectangle. Pinch the corners to help shape them.
The more accurate you are at these beginning stages of lamination, the easier your dough will come together. Take your time and enjoy yourself!
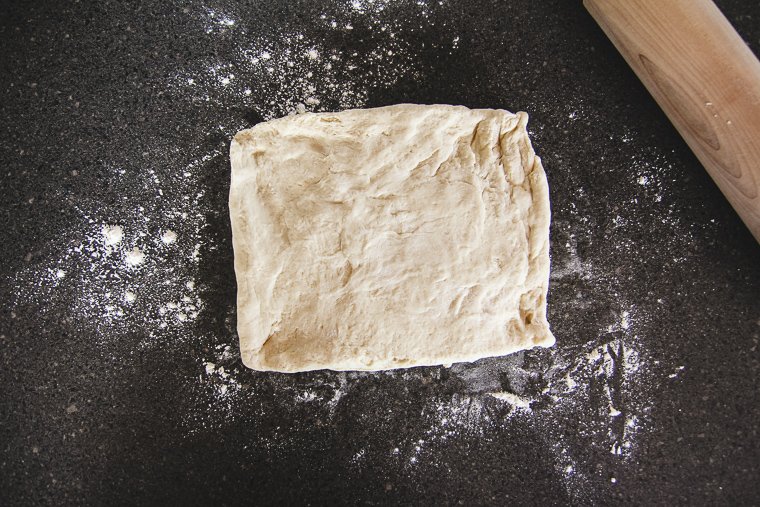
Roll the dough to a 13 x 9-inch rectangle. Unwrap your butter block and place it in the center of your dough with a short side facing you.
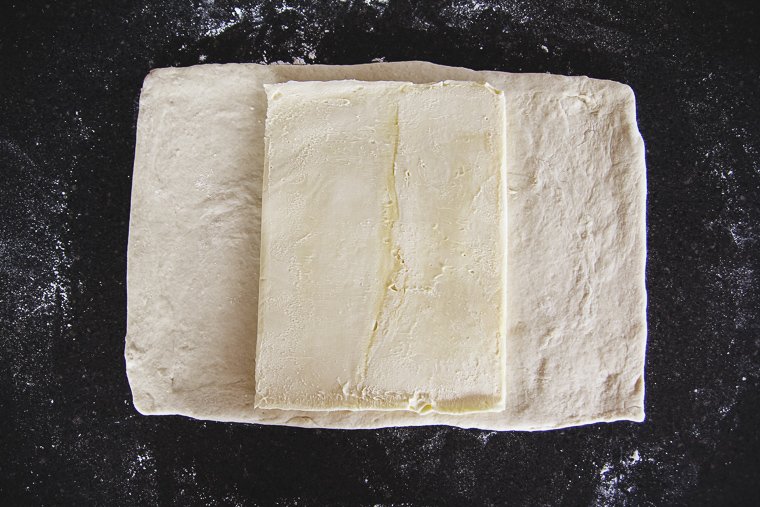
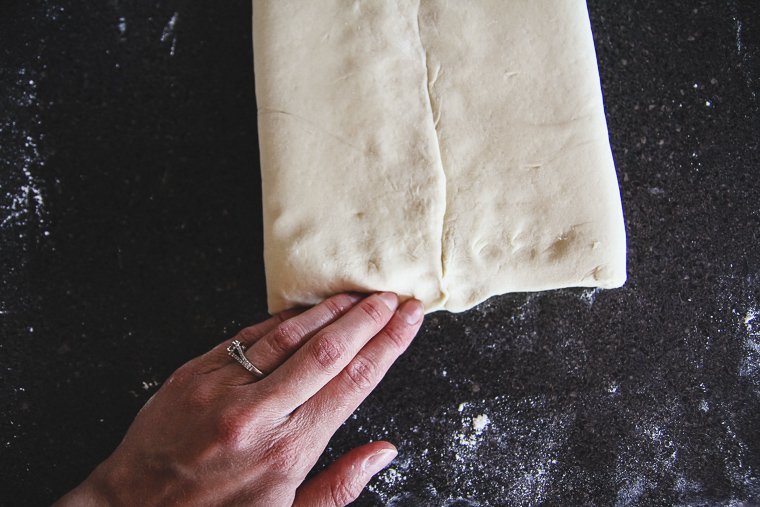
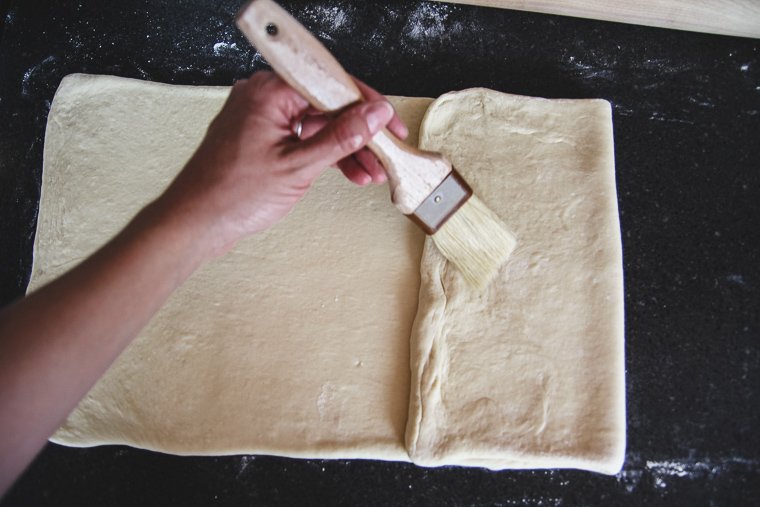
Fold the short ends of the rectangle over the butter until they meet in the middle.
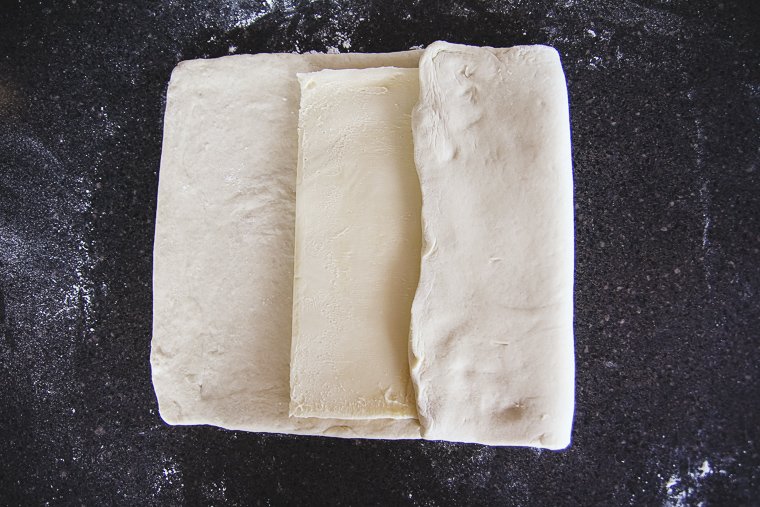
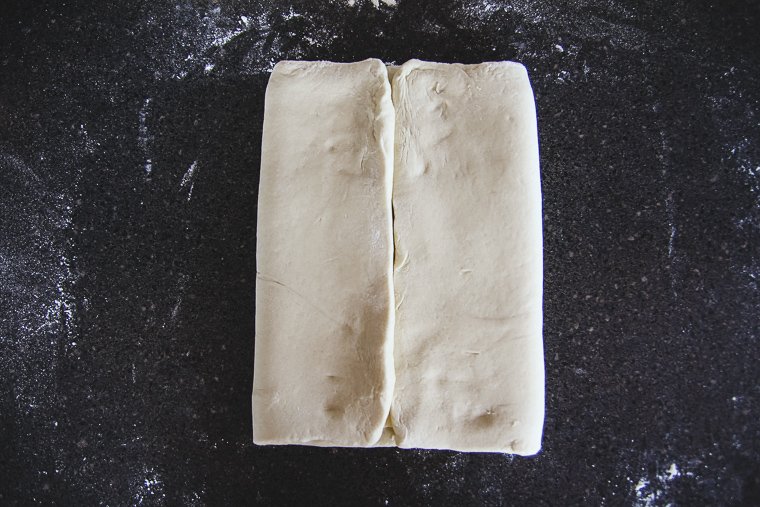
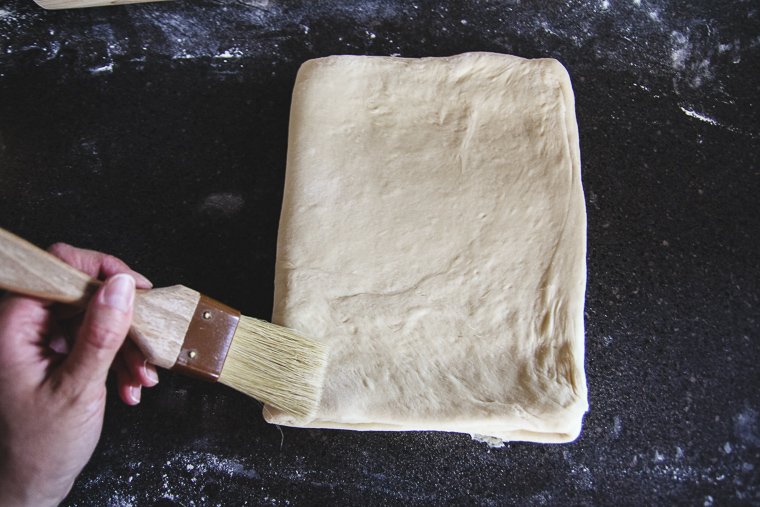
Use a pastry brush to brush away any loose flour. Pinch the center seam and the top and bottom edges closed so the butter is completely encased in dough.
Step 4 – First Lamination Fold (Book Fold)
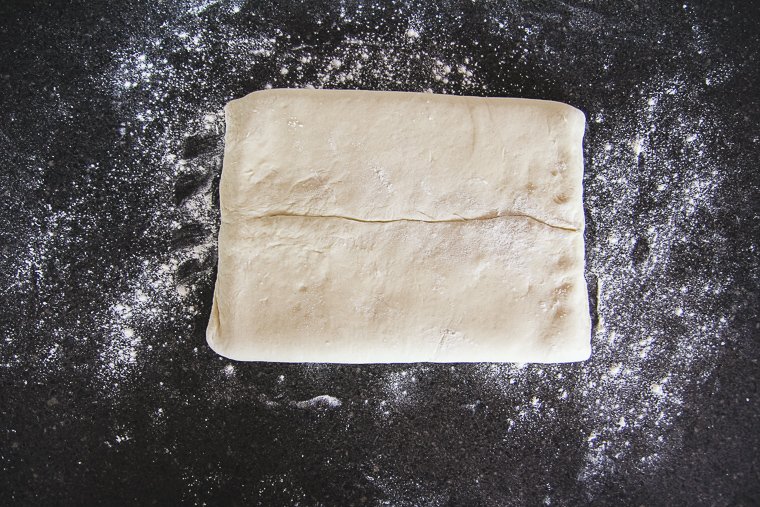
Now we’re going to do our first lamination fold. This is called a book fold. Turn your dough so the center seam is parallel to you.
Begin to lengthen the dough by gently pounding it with your rolling pin. Focus on keeping the corners and edges straight, and check often to make sure the dough isn’t sticking to your counter. Dust underneath with more flour when needed.
I always pound the dough to get most of the length. This keeps my rectangle more shapely and helps my dough to shrink back less.
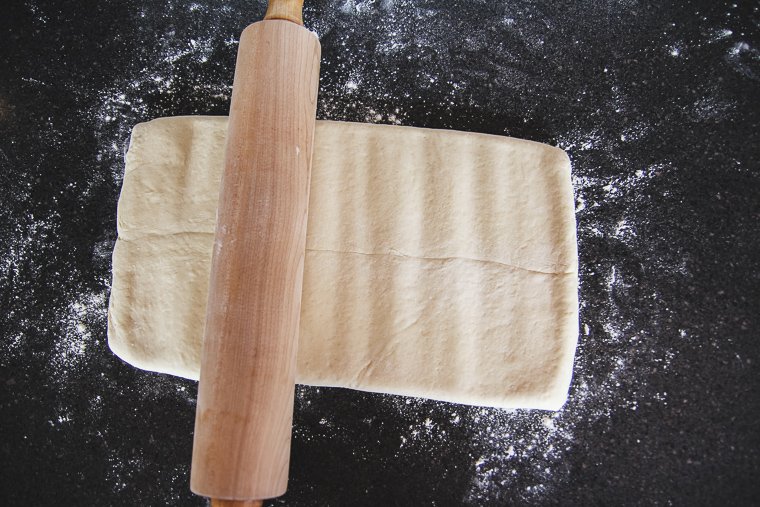
Now finish rolling the dough to a 24 x 10-inch rectangle. I work on the length first, and then finish the width.
Concentrate on rolling with a gentle outward “sweeping” motion instead of pressing hard downward into the dough.
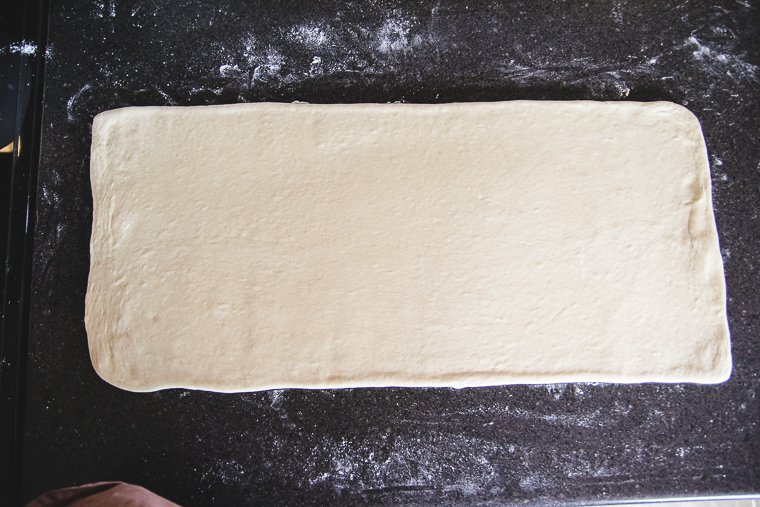
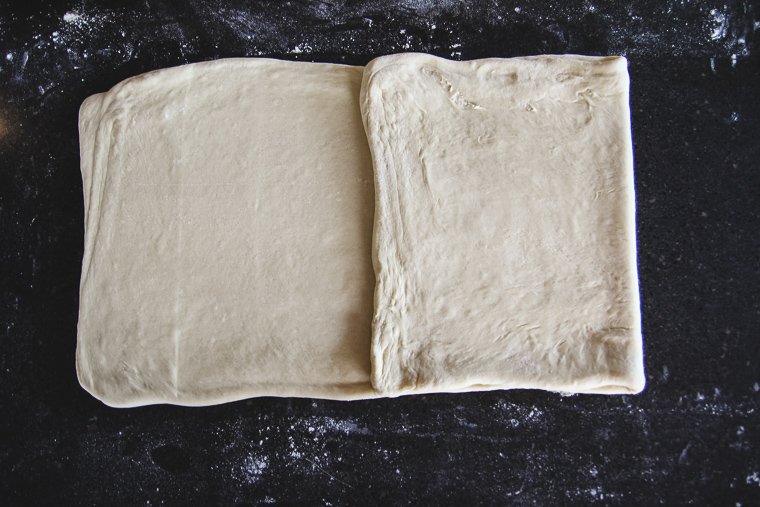
Continue to brush away loose flour as you go. Fold in both edges to meet in the middle.
(Update: I’ve found that it’s better to meet the edges of the book not in the middle for the most even layering. You will still close the book in half the same either way.)
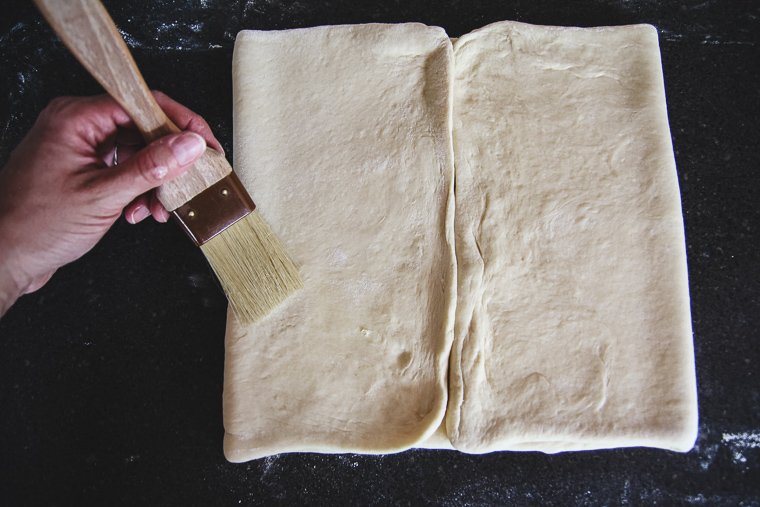
Then close your new folded ends together like you’re closing a book.

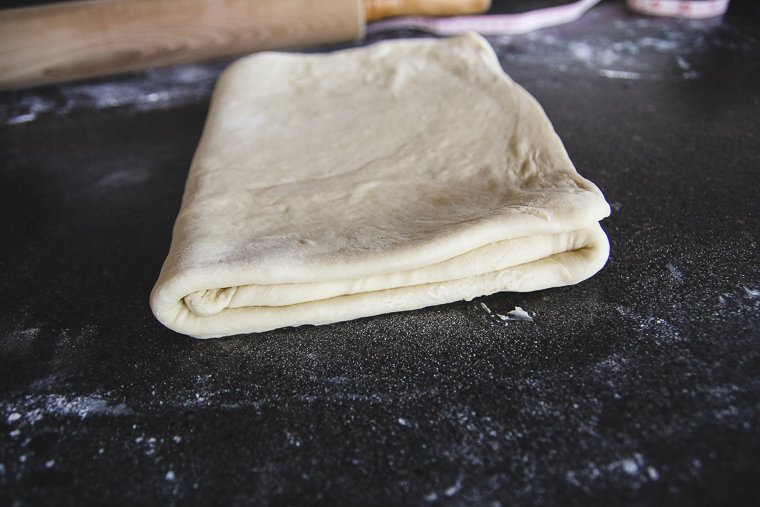
Here is a side view so you can see the layers:
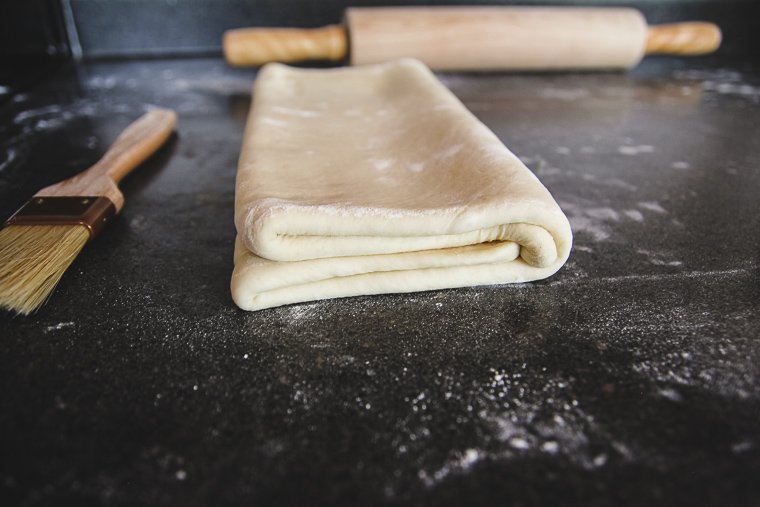
Wrap your book in plastic wrap and refrigerate for 15-20 minutes. This will keep the butter and dough from getting too warm and will allow the dough to relax for easier rolling during the final fold.
Step 5 – Second Lamination Fold (Tri-Fold or Letter Fold)
Place your book on your counter with the folded side facing you. Roll to a 24 x 10-inch rectangle again, pounding the dough first, then rolling gently outward.
Still focus on keeping the edges and corners straight, and watch that your dough isn’t sticking to your counter underneath.
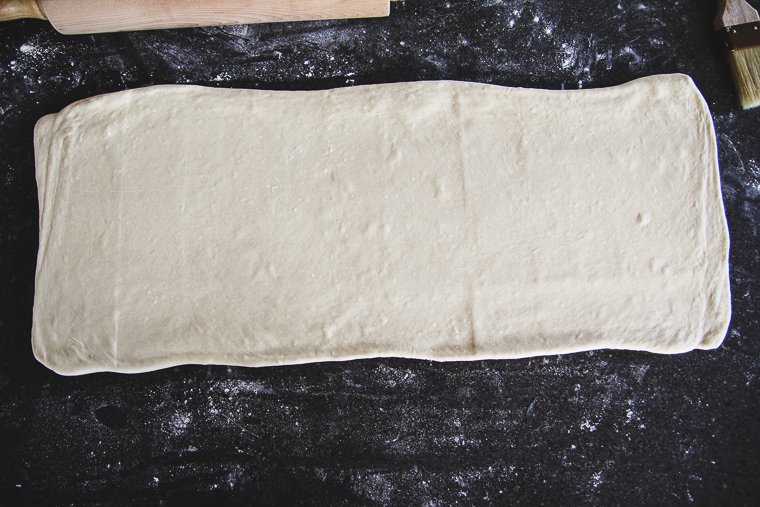
Now fold the dough in thirds as if you’re folding a letter, brushing away loose flour as you go.
Here is the side view after the letter fold:
Wrap your dough in plastic and chill again–this time for at least 1 hour.
Step 6 – Cutting and Shaping Sourdough Croissants
When you’re ready to shape your croissants, pull your dough out of the fridge and allow it to rest for 20 minutes to allow the butter to become pliable again.
Set your dough on your counter with the fold facing you. Roll to an 18 x 11.5-inch rectangle.
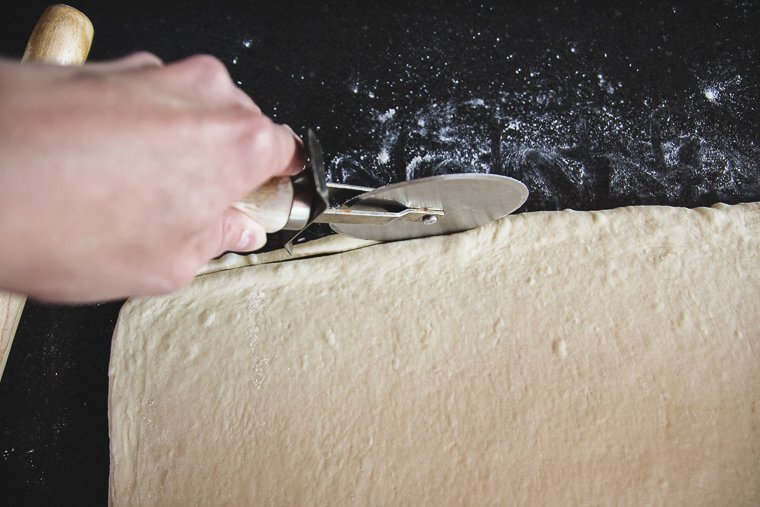
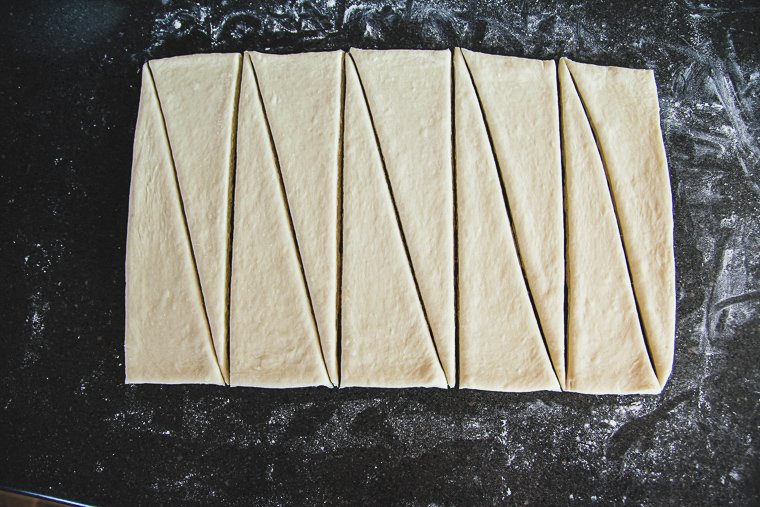
Use a pizza cutter to trim the edges of the rectangle. This will expose the layers so they rise properly during baking.
Now use your pizza cutter to cut the dough into 5 even rectangles (measure for accuracy). Cut each rectangle in half crosswise to create 10 triangles.
*These dimensions make 10 modest-size croissants. If you want 8 larger croissants, roll laminated dough to 17×14, trim, and cut into 4 rectangles before slicing into triangles. Arrange 4 croissants to each sheet pan, and lower the baking temperature to 375°F after the first 3 minutes of baking. Bake until golden brown.
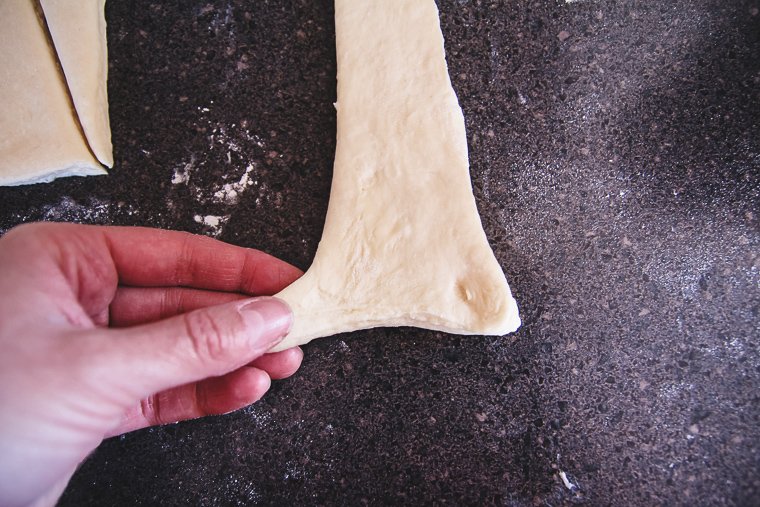
Starting with the fat side of your first triangle, gently stretch the corners to make them wider. It’s even easier if you use both hands at once. Careful not to tear the dough.
(Update: Instead of stretching the corners, I now cut a slit in the center of the base of the triangle. That allows the corners to splay outward as I begin to roll the croissant.)
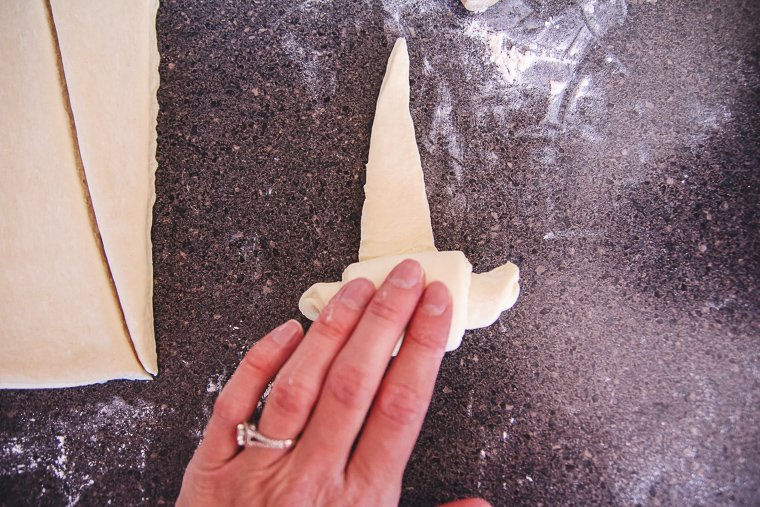
Then begin rolling the croissant from the bottom. There is no need to stretch the croissant as you roll, but you want to roll tight enough that there won’t be gaps in the pastry.
The end of the triangle should end up on the underneath side.
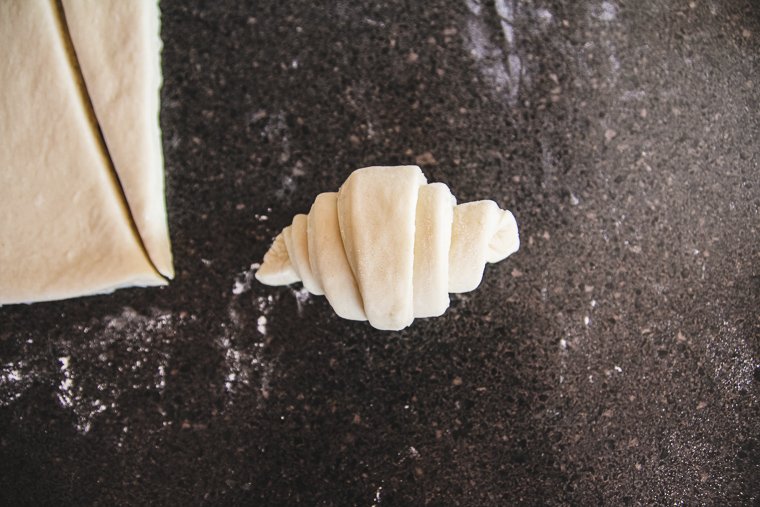
Press the end gently into the croissant to help it adhere to the bottom. Repeat to shape the remaining triangles.
Place your croissants on parchment-lined half sheet pans, five to a pan.
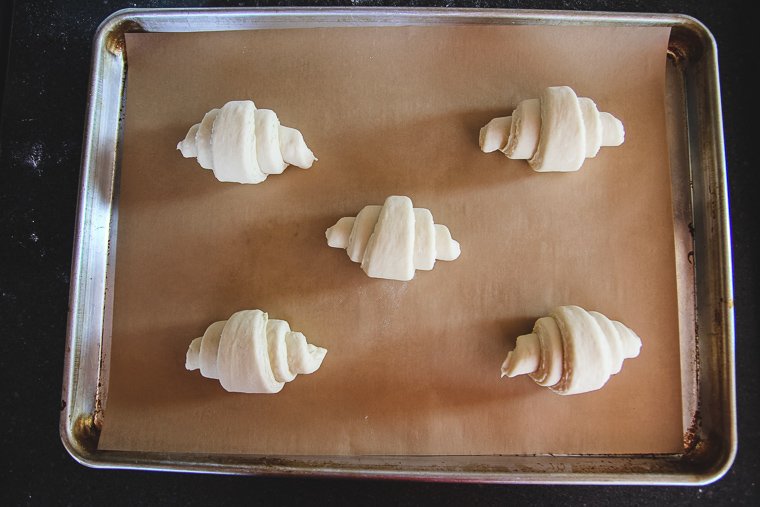
Step 7 – Proofing and Baking Sourdough Croissants
Cover your sourdough croissants with plastic wrap (not too tightly), and allow them to proof until they have doubled in size and wobble like jello when the pan is bumped (see “Tips” section for notes about proofing).
Proofing will likely take several hours. It is very essential that they proof long enough (at a temperature that is not too warm) so the butter doesn’t leak out of the layers during baking.
When they are almost done proofing, preheat your oven to 400°F and place a rack in the center of the oven.
Whisk together the egg and milk to make an egg wash. Brush the egg wash gently on each proofed croissant with a pasty brush, avoiding the layered edges.
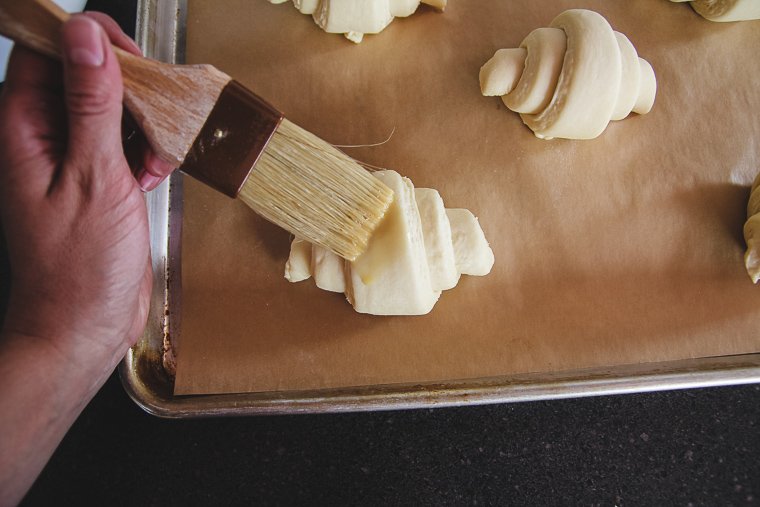
Bake one pan at a time for 15-20 minutes, or until the croissants are deeply golden. (Hold the second pan in the fridge if it’s done proofing, but you aren’t ready to bake yet. Egg wash and bake when the first pan is done.)
Place your finished pastries on a rack to cool completely before serving or storing.

How to Store Sourdough Croissants
The croissants will last for 2-3 days at room temperature in a sealed container.
I prefer to freeze any leftover sourdough croissants in a single layer in a zipper freezer bag for optimal freshness. To reheat, microwave the croissants briefly, or place them on a baking tray in a 475°F oven for 3-5 minutes, or until warm.
I hope you enjoy making these as much as I do!

Sourdough Croissants
These hand-rolled sourdough croissants require simple ingredients and only two lamination folds after locking in the butter block. No stand mixer required! They are akin to what you would find at a bakery but with all the benefits of sourdough with a long fermentation.
Ingredients
Sourdough Croissant Dough
- 115g active sourdough starter, 100% hydration
- 36g sugar
- 10g kosher salt
- 29g (2 tablespoons) unsalted butter, melted
- 240g whole milk, cold
- 423g unbleached all-purpose flour
Butter Block
- 227g (1 cup) 82% fat (European-style) unsalted butter, cold
- 8g (1 tablespoon) unbleached all-purpose flour
Egg Wash
- 1 egg
- 15g (1 tablespoon) whole milk
Instructions
Feed starter several hours before mixing dough and allow it to peak.
Sourdough Croissant Dough:
1. Day 1: Mix the dough ingredients until a shaggy dough forms. Remove dough to a clean countertop and knead for a few minutes until a smooth dough forms. Form dough into a ball.
2. Transfer dough to a large bowl and cover. Leave in a warm place (75°-78°F) to ferment for 4 hours, or until it has nearly doubled in size.
3. Cover and refrigerate dough overnight.
Butter Block:
1. Day 2: Place cold butter on a sheet of parchment paper and sprinkle with the flour. Fold the ends of the parchment loosely to cover the butter and begin pounding the butter with a rolling pin until it begins to flatten. (Update: I find it's easier to measure and fold the parchment before placing the butter inside.)
2. Use a measuring tape to form the parchment paper into a 6x8-inch rectangle pouch over the butter. Flip the pouch over to keep the edges closed. Then use a rolling pin and your fingers to evenly press the butter into the pouch to make a butter block. Chill if butter has begun to melt and looks greasy on the edges. If butter is still cold but very pliable when you bend the package, it is ready for the next step.
Lock in Butter Block:
1. Remove dough from fridge and turn it out onto a lightly floured surface. Use your hands to begin to shape the dough into a rectangle and pinch the corners to shape them. Roll the dough into a 13x9-inch rectangle.
2. Unwrap butter block and place in the center of your dough with a short side facing you.
3. Bring the ends of the dough over the butter so they meet in the middle of the butter block, encasing the butter. Press every seam to seal so the butter does not escape during rolling. Brush away any loose flour with a pastry brush.
First Lamination Fold (Book Fold):
1. Turn the dough so the center seam is parallel to you. Use your rolling pin to gently pound the dough to lengthen it. Then roll to a 24x10-inch rectangle. Try to keep the edges and corners straight, and dust underneath with more flour as needed to prevent sticking.
2. Fold the short ends of the rectangle inward to meet in the center (Update: meeting the edges together off-center is actually better). Then fold the new ends together like you're closing a book. Brush away any loose flour as you go.
3. Wrap book in plastic wrap and refrigerate for 20 minutes.
Second Lamination Fold (Tri-Fold or Letter Fold):
1. Place dough on your lightly floured surface again, this time with the fold facing you. Pound and roll to a 24x10-inch rectangle again.
2. Fold the short ends of the rectangle in thirds this time, as if you are folding a letter. Brush away loose flour as you go.
3. Wrap in plastic again, and chill for 1 hour.
Shaping and Baking Croissants:
1. Remove dough from fridge and allow it to rest for 20 minutes or until the butter is pliable again. With the folded side facing you, roll to a 18x11.5-inch rectangle. Use a pizza cutter to trim the edges.
2. Cut the rectangle into 5 equal rectangles, measuring for accuracy. Cut each rectangle in half on the diagonal to form 10 triangles.
3. Set a triangle in front of you with the bottom two corners facing you. Brush away loose flour. Gently stretch these corners wider with your fingers and then roll the croissant tight enough that there won't be gaps in the finished pastry. (Update: I now make a small cut in the center of the base of each triangle instead of stretching the edges, then roll.) Lightly press the tip of the triangle into the croissant to help it adhere to the underneath side. Repeat for remaining triangles.
4. Arrange the croissants on 2 parchment-lined half sheet pans, 5 to each pan. Cover with plastic wrap (not too tightly) and leave at room temperature to proof for several hours (do not exceed 75°F during proofing), or until croissants have doubled in size and wobble like marshmallows when you bump the pan. You should begin to see some separation in the layers when proofing is finished. Meanwhile, preheat your oven to 400°F.
5. Beat your egg and milk together to make an egg wash. Use a pastry brush to brush egg wash over each proofed croissant, avoiding the laminated edges.
6. Bake one pan at a time on the center rack for 15-20 minutes, or until deeply golden brown. (Hold second pan in the fridge until you're ready to egg wash and bake if done proofing.)
7. Place croissants on a cooling rack, and serve or store once they've cooled completely.
Notes
Recommended Products
As an Amazon Associate and member of other affiliate programs, I earn from qualifying purchases.


Nutrition Information:
Yield: 10 Serving Size: 1Amount Per Serving: Calories: 288Total Fat: 5gSaturated Fat: 2gTrans Fat: 0gUnsaturated Fat: 2gCholesterol: 29mgSodium: 436mgCarbohydrates: 52gFiber: 2gSugar: 6gProtein: 9g
*Nutrition information is not always accurate.
I’m so grateful for your comments, reviews, and questions! Your star ratings help others discover my recipes, and your feedback helps me make improvements. Thank you for your support!
Is there a way to make half the recipe so it results in 5 full sized croissants?
Hi Taylor, I would just make the full recipe and freeze the extra croissants. I think it would get a little tricky to cut the recipe in half.
So first time making these… how do I make them so that the butter doesn’t melt out of them when baking? My house smells like it’s on fire 🤣
They rose and baked beautifully but the butter issue was bad…
Hi Ashley, sorry you had trouble with leaking butter! That can happen because the croissants weren’t fully proofed (they need to be very jiggly like marshmallows) or you proofed at too warm a temperature causing the butter to start melting out of the layers before baking. I hope next time goes better!
I have made these multiple times now and LOVE this recipe. Waiting for them to proof the right amount is by far the hardest part. I would recommend if you’ve never done them before to bake on a RIMMED baking dish…. Definitely set my oven on fire the first time I made them haha. I also make them during the day and let them rise overnight, due to the fact that it is such a slow process. Then you also don’t have to stare at them impatiently 🙂 We also make a double or triple batch and then make some of them Boston Crème and oh my lawd they’re so good. Thank you so much for taking the time to post the pictures with it. That was a game changer.
I’m excited to try these tomorrow. Any tips for making mini croissants? What size to roll out/temp and time?
Thanks!
I just made these into mini croissants this morning! My friend showed me how. Rather than cutting them into 5 rectangles and then into triangles, cut them along every 2 inches, then do one long cut down the middle. You end up with about 20 two inch rectangles. Then you just roll them straight across. We added chocolate chips too! So we did about 3-4 chocolate chips, rolled it over, added a few more chocolate chips and then rolled them the rest of the way. Followed her instructions from there on with no issue. Everyone loves them!
I tried your recipe and my croissants turned out so perfect.. in the top but the bottoms got really burnt on one batch (my fault I put in for too long before I wanted the top to brown more) I added enough wash to the second batch and the bottom still got a bit too brown.. any tips or tricks? I know with sourdough loafs some people have things that help!
Hi Becca, thank you for trying the recipe! Hard to say without seeing your croissants. I would make sure you aren’t baking on a low rack in the oven. I wonder if you possibly had butter leaking, contributing to the over-browning on the bottom. Under-proofing the croissants would make them resistant to browning properly on the top, so that’s another thing you could consider.
Hi, my croissants have been sitting on the counter in my kitchen at about 72° and they have not doubled in size in four hours. Should I leave them or just put them in the fridge overnight?
Hi, I’ve tried your recipe a couple times now and I’m having trouble with the croissants turning out doughy in the centre. I thought they proofed long enough, they were puffy and wobbly, but after baking, it looked like they leaked quite a bit of butter and were doughy inside. The outside looked good. The final proof was 6 hours, could they need even proof? Thanks!
Hi Erika! Yes, it sounds like you need to proof even longer.
On Step 7 you say “Cover your sourdough croissants with plastic wrap (not too tightly), and allow them to proof”. What would you suggest here if we don’t want to use plastic wrap? I’m thinking a tea towel would be much too heavy preventing the rise. If I put them in a glass baking dish then invert a second one over the top so the 2 combined are deep enough to allow them to proof would that work? Trying to get away from any plastic touching food 🙂
Hi Sarah, I’ve been thinking about this lately too. I think an inverted pan should work! I’ve also seen sheet pan covers on Amazon.
Good morning. Thank you for making this recipe. I’m attempting this today (and tomorrow!)
I was wondering if I can freeze raw and if so at what stage please? I want to think before the last rise. They can then do that last rise when the croissant thaw out? But I’m doubting my limited knowledge.
Thank you in advance.
Hi Chris, I think you could freeze the croissants after shaping and then thaw and proof. I wouldn’t freeze longer than a week to be on the safe side. Let me know how it goes!
Awesome recipe, if it weren’t for the pictures I would’ve been lost haha. They came out so flaky and layers were great! Mine tasted a little too sour thought, and not sweet enough. Thoughts on how I could remedy that? Maybe my starter was too overdone?
Hi Lexi! It’s hard to say what happened as far as the sourness. If you kept the dough in the fridge for extra days or your starter was extra ripe or out of balance, the croissants would have turned out more sour. You could add a little more sugar to the recipe if you prefer them more sweet.
Hello 🙂 Can this recipe be used with fresh milled grain? Thanks!!
Hi Leanna, yes I have made them with freshly milled flour. You’ll want to choose a hard wheat for the best gluten development, and you’ll find the dough will need a little extra milk. 🙂
After the second lamination, can I chill the dough for more than 1 hour without it getting too cold? I am hoping to be able to leave it in the fridge for 3 hours.
Hi Ashley, yes you can! Just let the dough sit out a little while before you try to roll it out so the butter layers don’t “shatter” between the dough.
Hello!!!! Ohmyword – these are incredible 🙂
I have made them twice now and both have turned out amazingly!!!!
At what would I freeze them before cooking them?
Thanks for trying the recipe, Kendra! I would probably freeze the croissants after shaping for up to two weeks. Then just pull them out to thaw and proof.
These turned out amazing for my first try at croissants! Thank you so much for the detailed recipe! ☺️
Hi Leanna – my house is about 71 f,
I’m letting them proof on my counter overnight and not sure if I’m able to wake and bake (after I fold etc lol)! Or if I still need to place in fridge for some time before moving on to the next steps?
Thanks!
These turned out beautifully! I will say, the last proofing step took quite a while for me – after they were shaped and rolled they sat on the counter for about 6 hours until they were ready to bake – I had to be veryyyy patient until they double in size and had the ‘marshmellow’ consistency mentioned in the tips. The house was about 74 degrees. If I could, I would attach a photo!
Thank you for trying the recipe, Shannon!
Oh my god thank you for sharing this!!!!!
I have made these several times now and they have turned out great. My house has ranged from 67-71 degrees while they are proofing and it usually takes about 14-16 hours for them to proof. I make them in the evening and let them proof on the counter overnight then bake them the following morning.
Thank you for your helpful feedback, Brandi!
Hi – I made these and they were amazing! One question though – when I baked them, they were in a pool of butter which obviously melted out of the dough. I immediately moved to a cooling rack and there were no issues. I’m just wondering if this is normal or if I’ve done something wrong? Thanks and I will be making these again!
Hi Deanna, leaking butter is most commonly caused by under-proofing the croissants. If the butter started leaking during proofing, though, the room temperature/proofing spot was too warm. I hope the next time goes even better!
It’s not rising! After 4.5 hours at 74′ it’s still the same. What can I do???
I cannot seem to get this to go right for me! I do everything to a T, and once i get to the second proof nothing. I’ve kept my home at 77 F, tried in the oven, set by the window in the am,… they will not rise. I have tried this recipe twice and about to make a third attempt but with a different recipe. I don’t know where I’m going wrong.
Hi Bri, how long would you say you are waiting for them to rise?
Would a final proof in the fridge overnight work before baking?
Hi Anya! You can refrigerate the shaped croissants overnight and then proof the next day, but it’s such a slow-moving dough that they won’t actually proof in the cold.
Same here! The second rise they didn’t rise at all. So far it’s been over 3 hours…
Can I add chocolate chips and if so, at what stage?
Hi Rhonda! I haven’t tried adding chocolate chips, but you would probably want to add them during shaping.
Thank you for this post. First time making Croissants and love using my sourdough. I felt your instructions were very helpful, photos were great and your notes really helped. The proofing really did take a long time , so I appreciate your encouragement to hang in there. After living near France for 3 years I really miss my croissants and café in the morning. I’ve always thought they were be so hard to make. Thanks!
Amy, thank you for trying my recipe and for taking the time to leave such a nice comment! I’m so glad the instructions were easy for you to follow. 🙂
First time making croissants and this recipe is perfect!! Mine turned out so good and so delicious!! I can’t wait to make them again.
I love to hear that! Thank you for letting me know, Leanna!
I started to learn how to bake different pastry using sourdough starter. I look a different recipe. I found yours on how to make croissants and I’m in love on how easy was to follow the steps. I wish I could show you my end result.
Thank you
Thank you so much for letting me know, Aleida! I love to hear that the croissants turned out well for you.
Can I freeze once the croissants are shaped?
Hi Trudy, it might work, but I haven’t tried that yet.
Hi, how long is “a few hours” for the second proof? They have been sitting for about 3 hours at 72-75 degrees and barely have risen. I will say though, the first rise barely even got poofy after 5 hours. my starter was very active though and had pretty much doubled when I used it
Hi Ashlyn! The proof can take quite a while. The timing for the first rise also depends a lot on your dough temperature after mixing, and if your starter was all the way at its peak. If you give the croissants the time they need to get wobbly, though, they will turn out much more open in the center. I’d love to hear how things went.
My croissants turned out doughy. I thought they had proofed long enough (about 8 hours) but all of the centers were doughy. I was afraid to bake longer because the bottoms were already very dark after 17-19 minutes. Do you think they were still under proofed?
Hey! Can’t wait to try, what are your thoughts on freezing after shaping? Thank you!
Hi Victoria! I haven’t tried that yet. Did you end up freezing some before proofing?
Can you use homemade raw butter for these?
Yes you can, Ashley! Unsalted butter works the best for laminating pastry.
Hi! I made these today and I just have to say thank you! Croissants have been something I’ve had such a hard time with and these were perfect! I literally did a happy dance! Thank you for a fantastic recipe!
I’m so glad you had a fun time making the croissants, Ruby! 🙂
Hi! Wondering what difference would need to be made if I was looking to fill these? Like make a ham and cheese breakfast croissant with them?
Hi Ellen, though you could probably just roll in ham and cheese in while shaping, I would worry about the long proof time. I would personally just cut the finished croissants open, layer on some ham and cheese, then stick under the broiler briefly to melt the cheese. 🙂
I followed the recipe to a T and unfortunately they did not turn out. They looked beautiful as I put them in the oven but when they came out they were burnt on the bottom and raw on the inside. Not sure what went wrong, but pretty disappointing for how much time went into them.
I’m sorry, that’s such a bummer! It sounds like your oven may run hot!
hey! what properties of whole milk are necessary for this recipe? I’m dairy free and thinking of using oat milk. thank you!
Hi Maleeka! The milk adds softness to the dough. I think you should be fine substituting with oat milk, but let me know how it goes!
I’ve used homemade almond milk (almonds and water) 3 times now and they have turned out wonderful each time!
Easy recipe with great results!! Thank you!!!
Thank you for trying the recipe, Chad!
How would you go about adding chocolate in them?
Hi Leanna! Hope you are doing well. After the initial 4 hours of dough warm ferment time, should the dough look doubled in size? What should I be looking for once it has been 4 hours? Thanks so much for the recipe! Looking forward to getting to do the rest!
Hi Carly! The dough will increase in size a little, but it won’t double. As long as it’s been in a warm place (75°-78°), it should be ready for the fridge! Have fun. 🙂
Can I use 2% milk…?…. It’s what I have and my starter is at peak? Thanks
Hi Marianne, 2% should work just fine!
How long can you leave the finished croissants at room temperature or do you have to freeze them right away?
Also how would you store them on the counter?
Hi Donna! You wouldn’t have to freeze them right away–that’s just what we always do with the leftovers. I would guess they would stay fresh for 2 or 3 days in an airtight container at room temperature. Make sure they cool completely before you store them.
Hi, I was wondering if it would be ok to use pastry flour instead of all purpose flour for this recipe?
Hi Fernando, I haven’t tested with pastry flour, so I’m not sure how the switch would affect the recipe. 🙂
I have the same question. I would like to try with at least half freshly mailed pastry wheat
Hi Ann! I did make these once with 100% soft white wheat, and they needed more gluten strength. They just tore during proofing. Next time I’ll be trying hard white.
I made this recipe and it turned out amazing!!!
Thank you!
I’m so glad to hear that, Claudia! Thanks for leaving a comment. 🙂
If I would want to bake these first thing in the morning, how would i go about that – having done all the leg work (folding and proofing) the day before?
Would it be possible to refrigerate them after shaping in order to bake them in the morning? If so, would you recommend letting them proof first? And would I have to bring them to room temp before baking? Looking forward to trying this recipe this weekend!!!
Hi Jill! Yes, I think that would work. I wouldn’t do the extra day in the fridge after laminating in that case or they would get too sour. I would try proofing first and then refrigerate them covered well with plastic wrap. You could bake them from cold the next morning as long as they have proofed sufficiently by then. 🙂
Just finished trying your
recipe of Sourdough Croissants. Very
successful and fun. Thank you!
I’m so glad you enjoyed making the croissants, Jeremy!
Why are we needing to let the dough do a 12hr cold proof?
The cold ferment allows the dough enough time to develop properly. 🙂