
This post may contain affiliate links. See my full disclosure. As an Amazon Associate, I earn from qualifying purchases.
I’ll show you how easy it is to make your own sourdough starter from scratch with just flour and water! Before you know it, you’ll have an active, bubbly starter to use in recipes.
More Sourdough Guides for Beginners:
- How to Feed and Maintain a Sourdough Starter (Easy Refrigerator Method)
- Sourdough Baking Terms for Beginners
- Essential Sourdough Bread Making Tools
What is a sourdough starter?
A sourdough (or wild yeast) starter, is a fermented culture of living yeasts and bacteria that is used to leaven bread naturally. Essentially, the flour is fermented.
A portion of the mother starter is always reserved when baking to be refreshed (fed) with new flour and water and used again and again.
Sourdough starter becomes an integral part of the kitchen that can be used to bake artisan bread, bagels, english muffins, and even pizza crust!
It can be even be shared and passed down to others.
For a sourdough starter tutorial specifically for whole wheat (or freshly-milled) flour, visit this post.
You don’t need any packaged yeast to make a homemade starter. In fact, starters were used to bake bread long before commercial yeast came into the picture.
You can get some established starter from a friend to be able to bake bread right away. You can also purchase fresh sourdough starter here.
But to make one yourself, you really just need a little patience, flour, and water.
I started mine several ago now, and I’m so excited to show you how simple the process can be!
Two Sourdough Starter Myths Debunked
There are some common misconceptions floating around about sourdough starter.
“You can only make one type of bread with a sourdough starter.”
In reality, you can use starter in place of yeast to make any type of bread with any kind of flour.
Many of these breads will not taste sour if baked properly, but they will have a depth of flavor and added health benefits that cannot be achieved with commercial yeast and quick rise times.
“Sourdough baking is too much work.”
People often have in their heads that sourdough baking is time-consuming and complicated. That couldn’t be further from the truth.
The starter is not difficult to care for once you get into a routine, and sourdough baking can be as simple as you want it to be.
You might be interested in baking bread daily, but more than likely, you’ll use your starter casually, and it will be more than happy to wait in the fridge for you until you are ready to bake again.
Though sourdough doughs require longer ferment times (much of which is hands-off), the process is very similar to baking with yeast. It just takes a little more planning ahead.
You will get into your own groove as time goes on.
Why this sourdough starter recipe?
After a quick poke around the web, you’ll notice there are many different ways to start a sourdough starter.
Though every sourdough baker has their own spin on the process, the principles are very much the same.
This recipe is easy and affordable to start and maintain.
The starter will work wonderfully for the majority of sourdough recipes you’ll come across, or you can change the flour type or consistency of the starter later on, if you so desire.
I keep the starter small in the creation stage to reduce the need for excess flour. You’ll be able to increase the amount of starter once you’re ready to use it for baking.
Don’t forget to read the FAQs section at the end of the post for even more information!
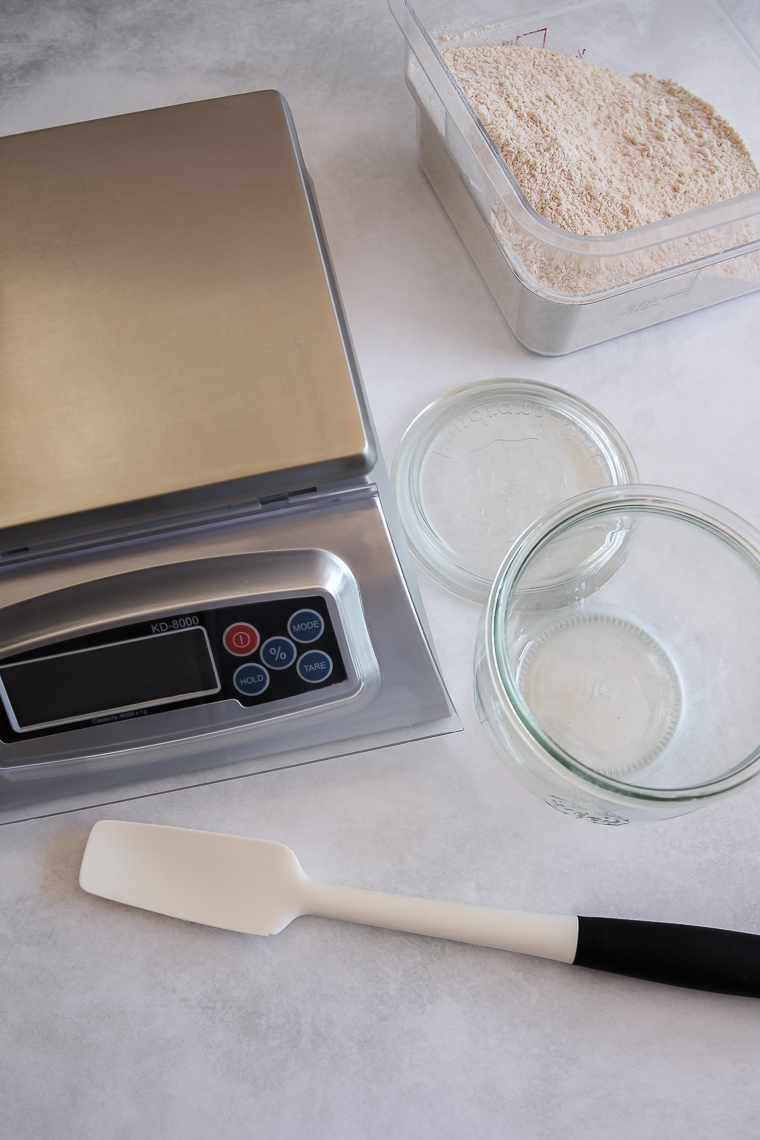
Recommended Sourdough Starter Supplies
You really only need a jar, a scale, and a stirring utensil to get started.
1. Lidded Jar
You can really use any lidded glass, stoneware, or plastic container with straight walls to store your starter–even a plastic food storage container.
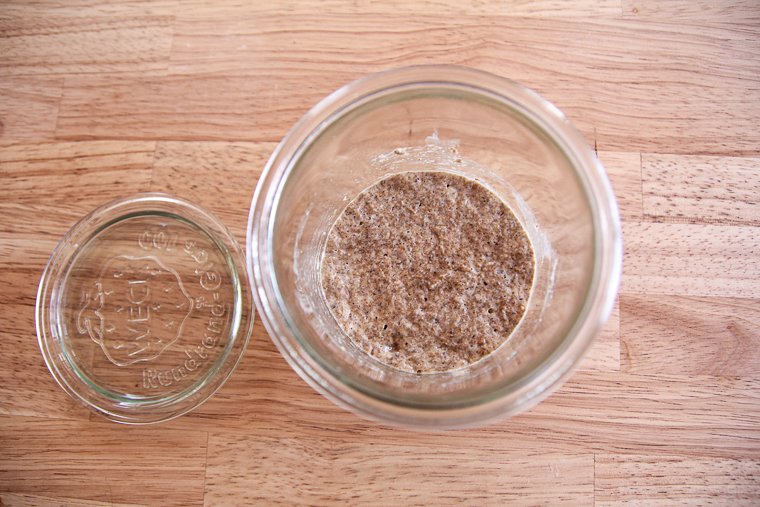
I love using Weck mold jars as containers for my sourdough starter. The jars look lovely and function well with a super wide mouth for easy filling and stirring.
The rubber gaskets can be left off after a feeding to allow the starter to breath while still keeping it covered with the glass lid.
The 1/2 liter size is perfect for making the starter and storing small amounts of starter in the fridge. The 3/4 liter size is perfect for feeding a larger amount of starter. It’s nice to have two of each so you can switch to a clean jar seamlessly. I also love the tulip-shaped jars.
Your sourdough starter container needs to be big enough that your starter has room to triple in size after a feeding without overflowing. It should also have a large enough opening to add flour and water, take out starter, and be cleaned easily.
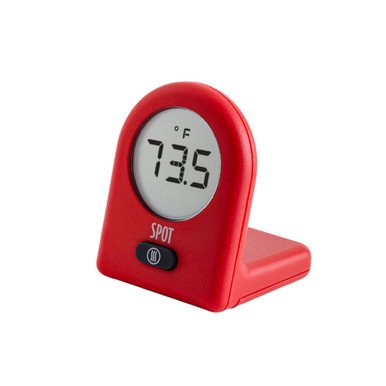
2. Digital Kitchen Scale
You’ll notice that the flour and water is listed in gram weights for this recipe. Most bread recipes are by weight instead of volume since every person measures flour so differently.
Weighing keeps the consistency of the starter precise and will teach you to become comfortable with a scale for your future sourdough baking projects.
This digital kitchen scale is the one I always recommend.
Though there are cheaper options out there, this one doesn’t clear itself out mid-weigh like my old scale used to. I can even walk away to grab something and the reading will be there when I come back. It’s so precise that I can weigh in something light (like salt) into a sizable bowl of dough.
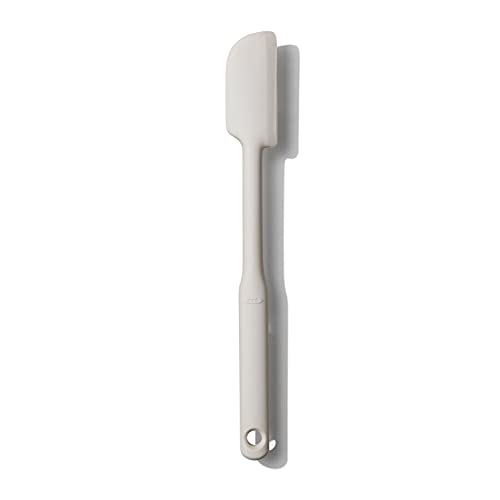
3. Silicon Jar Spatula
My favorite utensil for stirring a starter is a sturdy silicon jar spatula.
A spatula like this makes it quick to incorporate flour on the edges of the jar and rinses off easily later. You won’t risk breaking your jar with a metal spoon. Use what you have on hand, though!
Ingredients to Make a Sourdough Starter From Scratch
- Unbleached flour
Unbleached all-purpose flour is going to be the least expensive choice for creating and maintaining a starter. It makes for a versatile starter since you can use it for both white bread recipes and recipes with wholegrain. You can use unbleached bread flour as well.
- Whole wheat or rye flour
This recipe calls for a small amount of whole wheat or rye flour on day 1 to kickstart fermentation. You can buy a small bag of either of these flours. Choose one you will enjoy using up in a recipe later.
- Unchlorinated water
It’s possible that chlorinated tap water could be harmful to the yeasts and bacteria you’re trying to cultivate in your starter.
Some people don’t seem to have an issue with tap water, but it’s not a bad idea to use filtered water. Well water or spring water would work just fine.
Tips for Making a Sourdough Starter from Scratch
- There is no need to sanitize your jar and stirring utensil. Just make sure any soap or detergent residue is completely washed away.
- The speed of initial fermentation (and later the mature starter ripening/rising after a feed) is directly related to temperature. 75°F (23°C) is an ideal room temperature. You’ll notice I call for lukewarm water to keep the starter warmer. If you’re making a starter during a chilly time of year, the process can easily take longer than 7-10 days. Give a new starter as much time as it needs to mature before you use it in recipes. If you feel like your starter has stalled, visit the FAQs section below for troubleshooting.
- A starter should always be fed at least its own weight in fresh flour. Discarding during the creation stage is necessary to avoid making a huge starter and wasting flour. You can “build up” a starter later. Do not bake with the discard until the starter is established (after 7-10 days). Harmful bacteria may be present before the PH is balanced.
How to Make a Sourdough Starter (Step-by-Step Instructions)
We will begin by stirring a small portion of wholegrain flour and water together. The first couple days we only stir the starter once a day while we wait for signs of fermentation.
On the morning we finally see bubbling and rising (usually day 3), we will discard a portion of the new starter and feed the remaining starter with fresh all-purpose flour and water. We will continue this feeding cycle once daily until the starter is mature and strong enough to leaven bread.
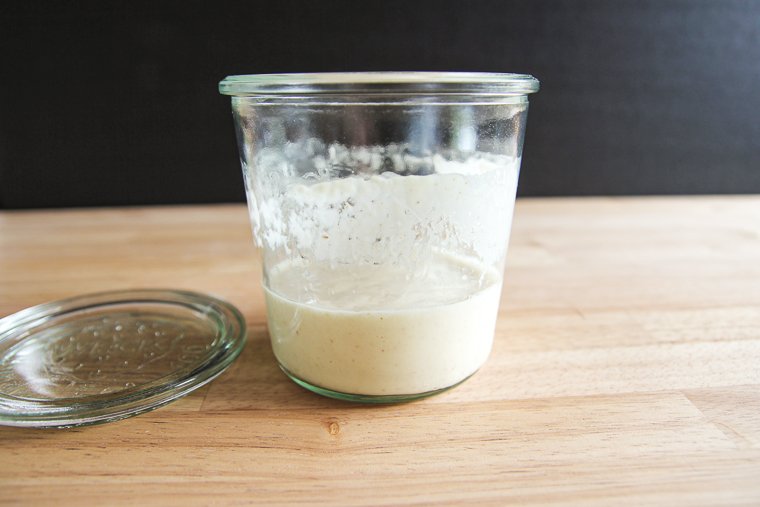
Morning of Day 1 – Initial Mixing
On the first morning, start with a clean jar.
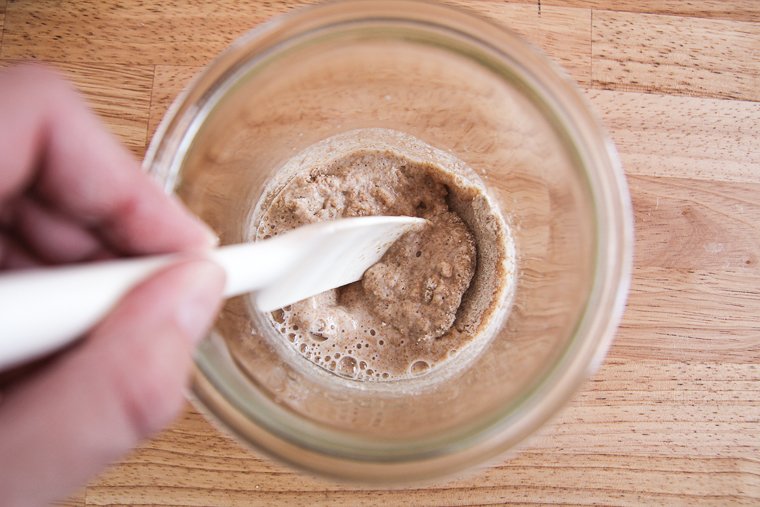
Turn on your kitchen scale, place the jar on the scale, and press “tare” to clear the scale to zero. Weigh out 50 grams of whole wheat (or rye) flour and 50 grams of lukewarm water. Stir until combined.
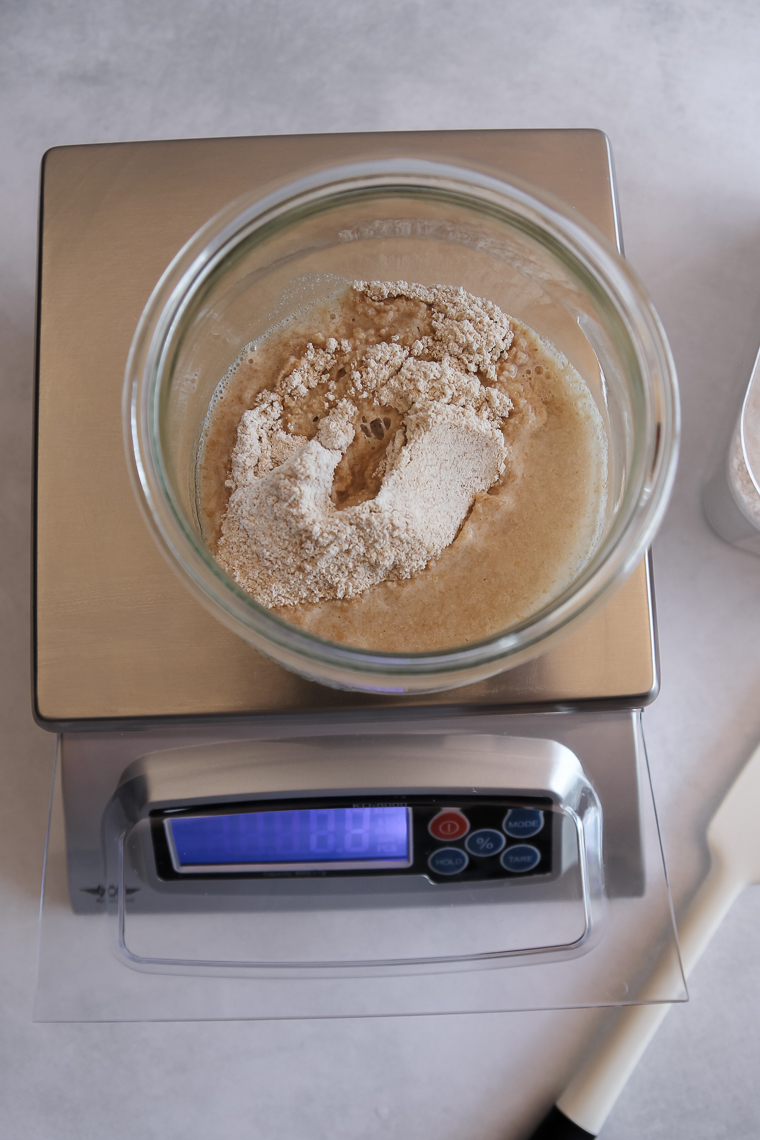
I like to mix my starter with a slender silicon spatula to reach the bottom easily and keep the edges of the jar cleaner.
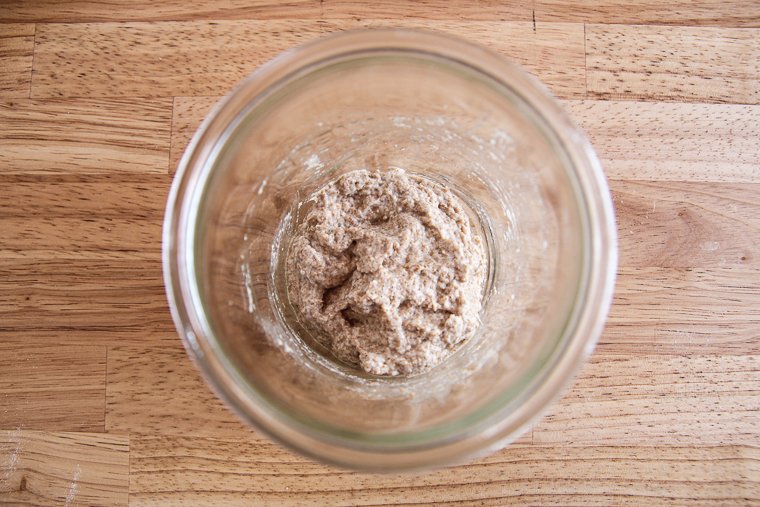
Cover the baby starter with a loose lid and let it sit in a warm area (75°F is ideal) until the next morning.
Morning of Day 2 (No Signs of Fermentation Yet) – Stir Only
The next morning, you probably won’t see much action yet. Some water separation on top of the starter is normal.
If you do see substantial bubbling and rising, move on to day 3 instructions. Otherwise, simply stir the starter, cover, and leave it until the next morning.
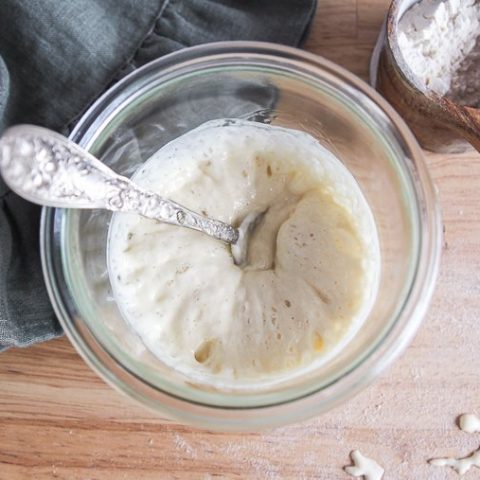
Morning of Day 3 (Showing First Signs of Fermentation) – First Feeding
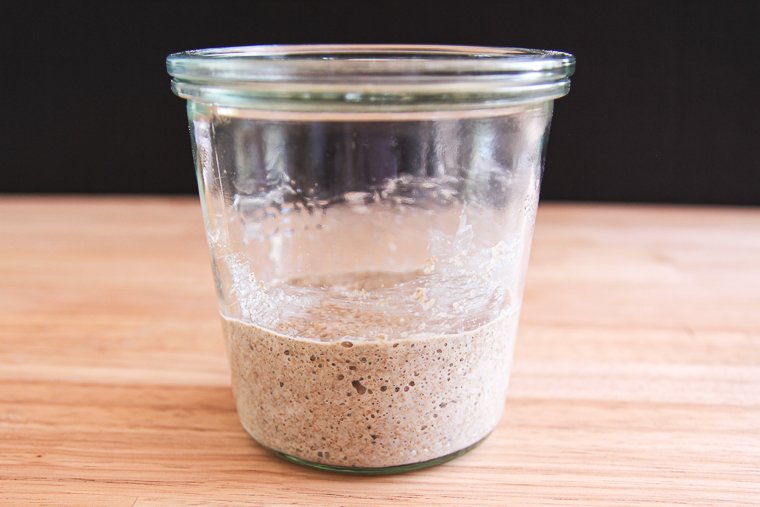
Still no bubbling and rising by day 3? Repeat day 2 instructions. More likely, though, you’ll see substantial bubbling and it’s time for the first feeding.
A starter will commonly bubble and rise dramatically between days 2 and 3, but this is no indication that it is ready for baking. You probably won’t notice any sour smell at this point.
Weigh 50 grams of starter into a clean jar and throw away or compost (discard) the extra 50g starter. Don’t ever put discard down the sink drain.
To the 50 grams of remaining starter, add 50 grams of all-purpose flour this time and 50 grams of lukewarm water. Stir until everything is combined. Cover and set in a warm place until the next morning.
Note: Feeding with equal weights flour and water creates a “100% hydration starter.” This hydration is commonly called for in many sourdough recipes.
Mornings of Days 4-7 (Or Additional Days Until Maturity) – Discard and Feed Once Daily
Days 4-6 are typically sleepy days for a new starter, but don’t let this concern you.
Your sourdough starter may smell off-putting like gym socks, vomit, or vinegar. It won’t smell like delicious sourdough bread until it reaches the proper balance of yeasts and bacteria. This is normal!
Each of these mornings, discard 100g of starter, leaving 50g in a clean jar. Then feed with 50g all-purpose flour and 50g lukewarm water. Stir and cover.
If your house is particularly chilly (below 70°F (21°C) or so), you should wait to discard and feed until you actually see bubbling.

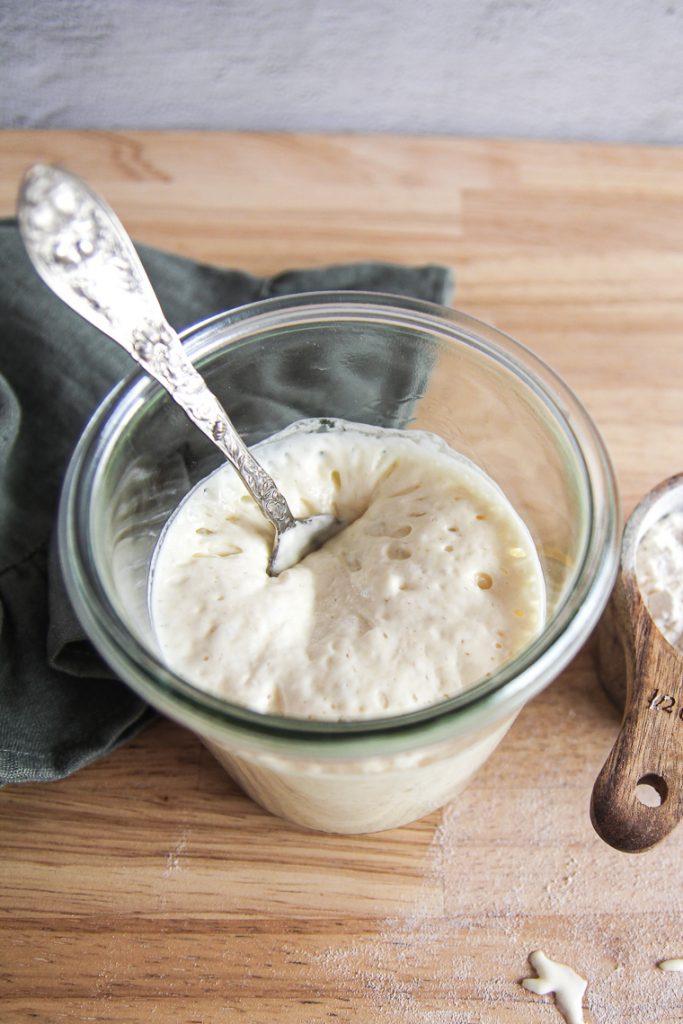
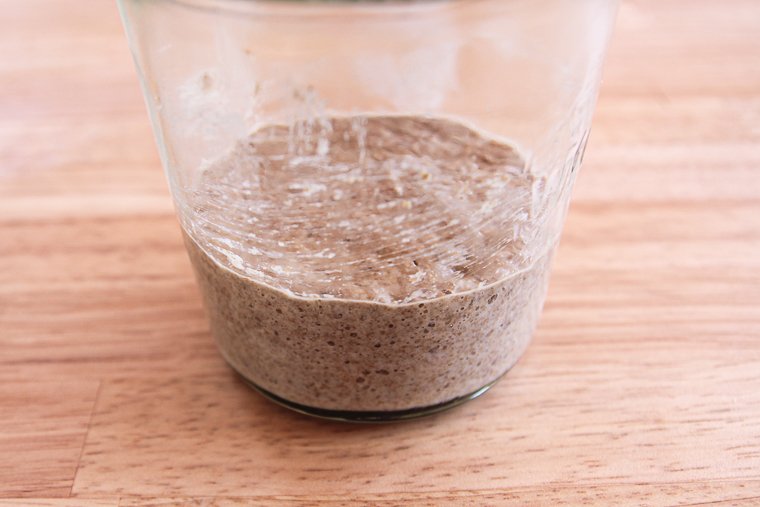
On day 6 or so, you may begin to see slide marks on the jar. These marks aren’t residue from stirring. They indicate that your starter rose well and then fell back down.
You should not do any extra daily feedings during the creation stage. It’s not a problem if your starter is rising and falling early or water is separating to the top of the starter.
Regardless of how your starter is bubbling and rising on the previous days, continue the feeding schedule for at least the first 7 mornings. After that time, you may determine whether your starter is ready for baking or needs more time to mature first.
When can I use my sourdough starter for baking?
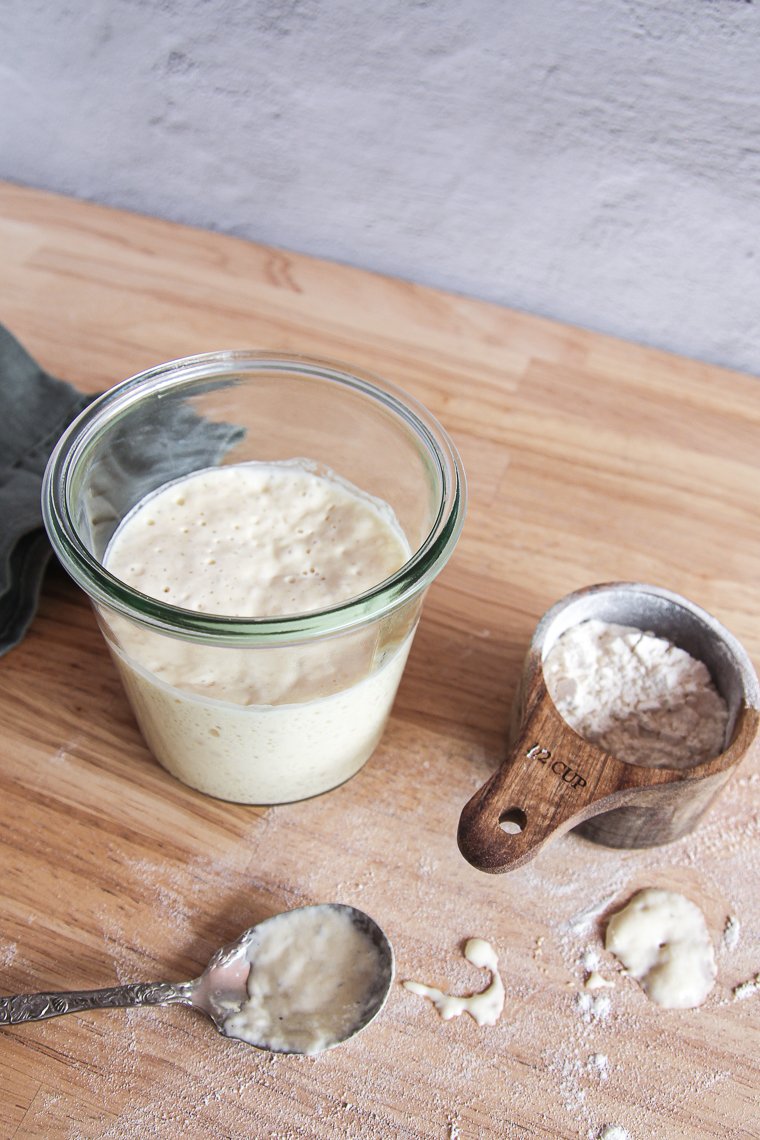
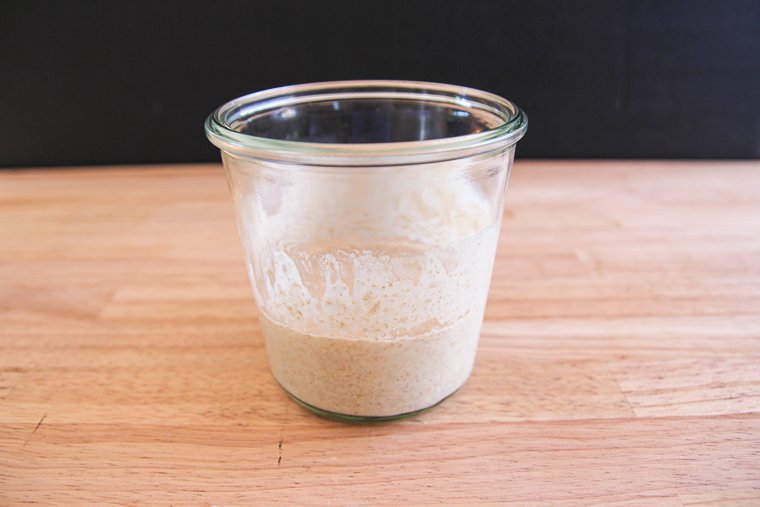
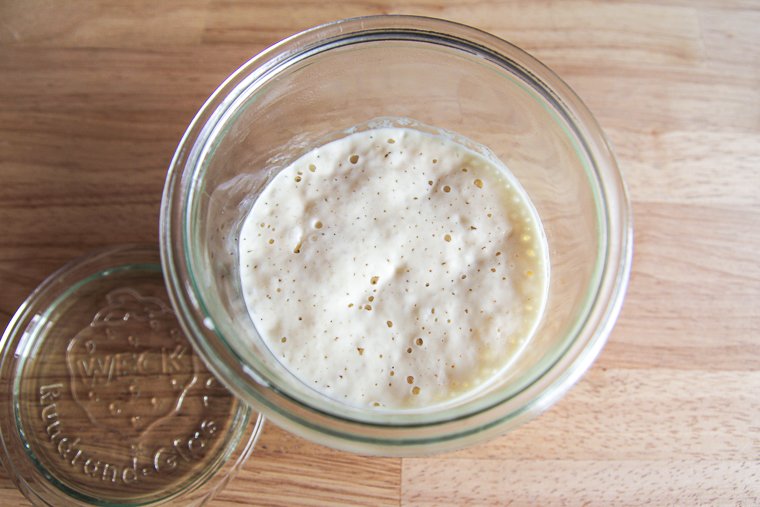
As day 7 progresses, your starter may behave like a mature starter after its refreshment:
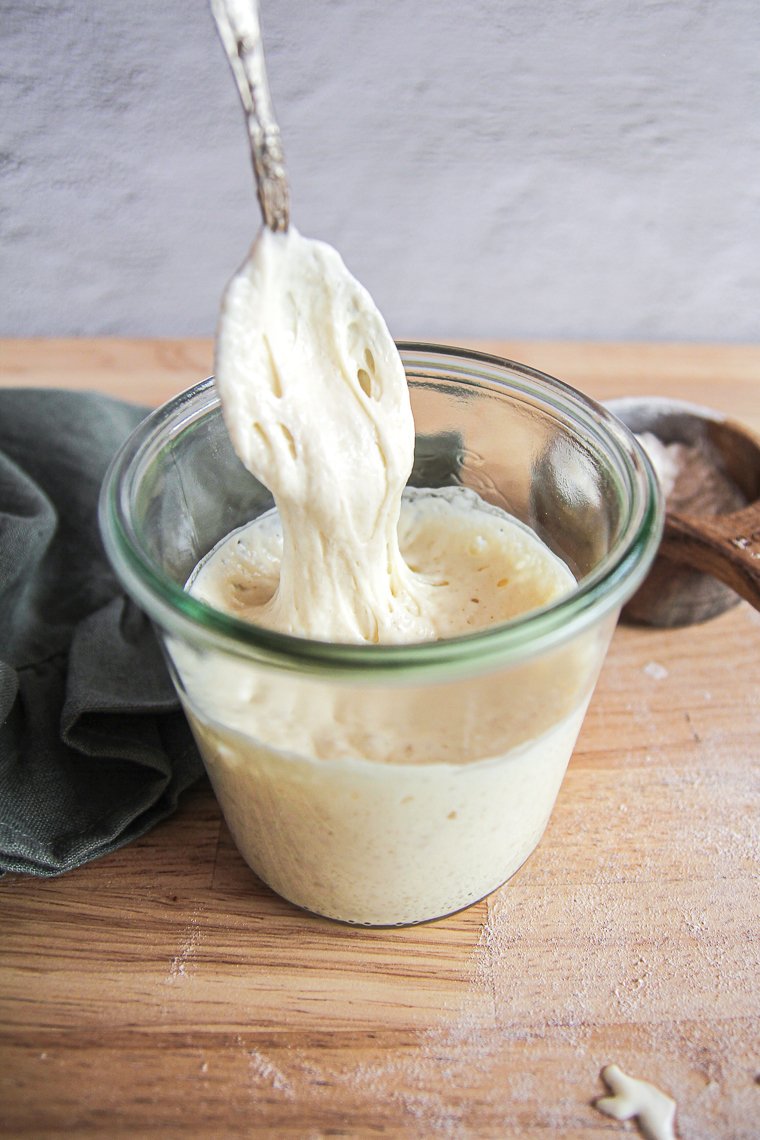
- It nearly triples in size within a few hours (which is a typical rise for an all-purpose flour starter at this hydration). It has many small bubbles throughout and on the surface and has an almost “fluffy” texture.
- It has a pleasant, sweet, yeasty aroma with a hint of sourness at its peak (not an unpleasant smell).
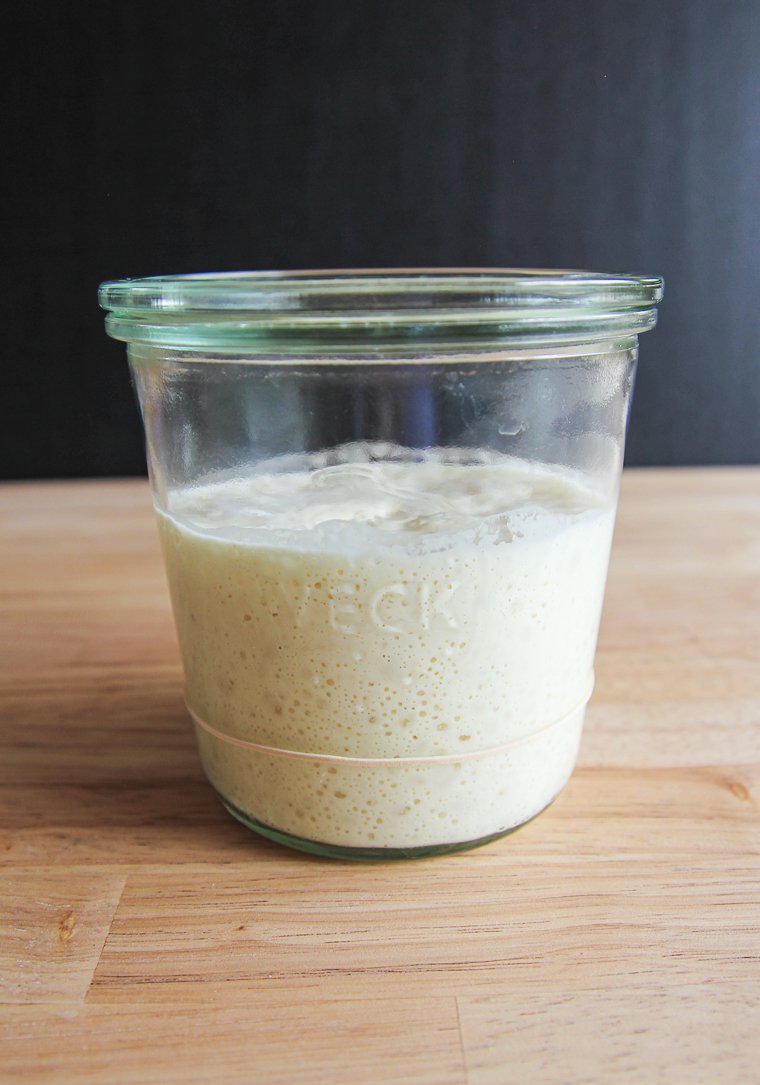
You can place a rubber band on the jar at the level of your starter or mark it with a dry erase marker right after you refresh it so you can clearly see how much it rises within a few hours.
(At this point, there’s no need to switch to a clean jar every time you feed–only if it gets gunky.)
If your starter is showing these healthy signs after its feeding on day 7, you may transition to a regular maintenance schedule (including refrigeration) and use it to bake bread! Woo hoo!
It’s not uncommon for a starter to take an extra week or two to become strong. Don’t be shy about continuing the morning feeding schedule if you have any doubts that your starter is ready.
Your starter will become even more reliable, vibrant and flavorful over the next several months.
See the sourdough starter FAQs below the printable recipe card, and if you still have any questions or problems, I’d love to help if you leave a comment here or send me an email through the contact page.
Next, visit my post How to Feed and Maintain a Sourdough Starter so you know how to use and care for your new starter!
I’m so grateful for your comments, reviews, and questions! Your star ratings help others discover my recipes, and your feedback helps me make improvements. Thank you for your support!
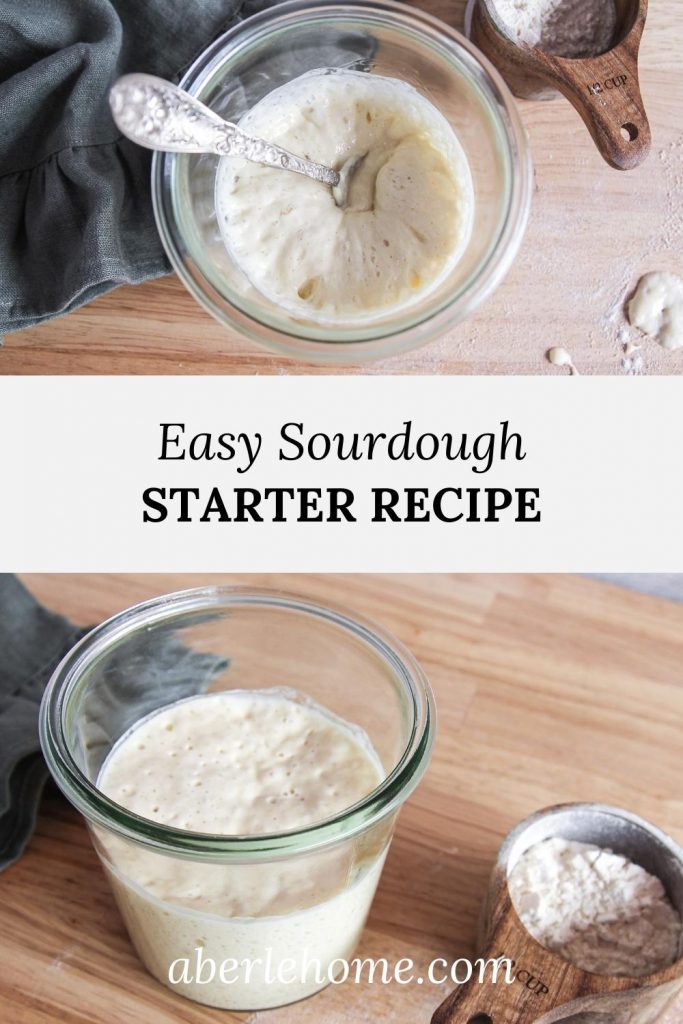
Easy Sourdough Starter from Scratch
I'll show you how easy it is to make your own sourdough starter from scratch with just flour and water! Before you know it, you'll have an active, bubbly starter to use in recipes.
Ingredients
- 50g whole wheat or whole rye flour
- Unbleached all-purpose flour
- Lukewarm water (unchlorinated is recommended)
Instructions
Morning of day 1 (initial mixing): Set a clean jar (1/2 liter or larger) on a kitchen scale and press "tare" to clear the scale to zero. Weigh in 50 grams whole wheat (or rye) flour and 50 grams of lukewarm water. Stir to combine. Cover with a loose lid and set in a warm place (75°F/23°C is ideal) until the next morning.
Morning of day 2 (no signs of fermentation yet): If bubbling and rising, move on to day 3 instructions. Otherwise, stir the starter only, cover, and set in a warm place until the next morning. (Some water separation is normal.)
Morning of day 3 (showing first signs of fermentation): If starter still hasn't bubbled and risen, repeat day 2 instructions. If bubbly, perform the first feeding. (A dramatic rise is common on day 3, but doesn't indicate maturity at this point.) Discard 50g of starter into the trash or compost (leaving 50g in a clean jar). Add 50g all-purpose flour this time and 50g lukewarm. Stir well, cover, and place in a warm spot until the next morning.
Mornings of Days 4-7 (plus additional days, as necessary): Continue with a once daily feeding each of these days. If your kitchen is particularly chilly, below 70°F (21°C), wait to discard and feed until you actually see bubbling. Discard 100g starter (leaving 50g in a clean jar), then feed with 50g all-purpose flour and 50g lukewarm water. Stir well, cover, and leave it in a warm place until the next day. (Some days of little activity and foul smells like stinky cheese, gym socks, or vomit are normal while the starter develops.) Do not feed more than once a day even if starter begins to rise and fall early.
Signs that your starter is ready for baking: When your starter is at least 7 days old, consistently triples in size with many small air bubbles throughout and on the surface a few hours after each feeding, looks "fluffy," and has a pleasant, yeasty, mildly sour smell after rising, you may now use it for baking, build it up with a larger ratio of flour and water if you need to, and transition to a normal maintenance schedule. If the starter is not showing these signs (which is not uncommon by day 7), continue the morning feeding schedule for as many days as necessary until starter is mature.
Use the starter for baking at its peak rise after a feeding (or refrigerate for another time, or discard and feed again). You'll know your starter is at its peak if the surface has flattened to the edges of the jar, it has bubbled throughout and all the way to the surface, and the smell has changed from raw flour to a bread-like smell.
Unless you'll be baking daily, store your starter in the refrigerator between bakes to reduce unnecessary feedings. Feed it at least once weekly. If you'll be maintaining it at room temperature, it will require peak-to-peak feedings. For more information, see my blog post How to Feed and Maintain a Sourdough Starter.
Notes
Discard: Since a starter must be fed at least its weight in fresh flour, it's necessary to throw away a portion of the starter before each feeding during the creation stage. Otherwise you'll be wasting flour and creating a huge amount of starter! Sourdough starter discard should be used for baking only after the starter reaches maturity (which usually takes 7-10 days). Before that point, the PH of the starter is not balanced and harmful bacteria may be present. Never put discard starter down the sink drain.
Did I kill my starter? Don't use hot water in the starter or heat the starter above 140°F (60°C) or you will kill the yeasts and bacteria you're trying to cultivate. Throw out the starter if any fuzzy black mold or colorful mold is present, but don't confuse oxidation, gray/brown alcohol (hooch) on the surface, or flakes of bran from the whole wheat or rye flour as mold. If starter stalls after day 7 when it was previously rising and bubbling, insure you're not feeding the starter too early each time before it actually rises and bubbles. Early feedings will quickly weaken the starter. In contrast, if the starter seems to have stalled, yet slide marks are always present on the jar, you starter is rising and falling before you realize it and is hungry. In this case, see my post How to Feed and Maintain a Starter for more information.
Recommended Products
As an Amazon Associate and member of other affiliate programs, I earn from qualifying purchases.


Nutrition Information:
Yield: 1 Serving Size: 1Amount Per Serving: Calories: 975Total Fat: 4gSaturated Fat: 1gTrans Fat: 0gUnsaturated Fat: 2gCholesterol: 0mgSodium: 15mgCarbohydrates: 206gFiber: 22gSugar: 2gProtein: 32g
*Nutrition information is not always accurate.
Sourdough Starter FAQs
1. Why do I have to discard half the starter each feeding?
If you don’t discard the excess starter, you’ll face two problems. Firstly, you’ll end up with way too much starter as you add more flour and water each day.
And secondly, there will be too high a ratio of starter to fresh flour and water, starving the starter between feedings.
Once your starter is established, you can use the excess in recipes specifically formulated for discard. (Or simply use up the extra to bake any recipe.)
Until your starter is active, there’s really not much you can do with the excess except toss it, add it to your compost pile, or feed it to your backyard chickens. Thankfully, the amount is small with this recipe.
2. Can I make more starters with the discard?
Later when your starter is established, you can separate off a portion of your starter to gift to someone else anytime you want!
You will even be able to take a portion of your starter and convert it to a wholegrain (or part wholegrain) starter if you want two different starters to use in your kitchen.
In the meantime, it wouldn’t be practical to feed separate jars of baby starter to try to get them all going at the same time. Just focus on cultivating one starter and go from there.
3. Why is there brown liquid floating on my starter?
Brown or gray liquid is called “hooch” and is a byproduct of fermentation. It’s a sign that a mature starter is ready to be refreshed, so you may notice it when your starter is hungry for a feeding.
Simply stir the liquid back into the starter and continue discarding and refreshing as normal.
If there is a dramatic layer of hooch on a neglected starter, pour the hooch off before feeding.
4. Why is my sourdough starter separating?
Water can separate to the top of an immature starter, and this is nothing to be concerned about.
If an established starter is hungry for a feeding (or has been neglected for a while) gray/brown alcohol (hooch) can form in the starter and the starter can separate into layers.
Simply stir the starter back together before discarding the extra and refreshing it with flour and water (or pour off a large amount of hooch first.)
5. What is the best flour for sourdough starter?
Unbleached all-purpose flour is practical for a starter because the starter can be used for both white bread recipes or for breads with whole grains. It is inexpensive to purchase.
Organic flour and bread flour are fine to use as well, but definitely avoid bleached flour.
Starters do really well on wholegrain (wholemeal) flours also, and many bakers choose to use a particular ratio of white and wholegrain flour (rye is common) to control certain characteristics of their starters.
I have a post specifically for 100% whole wheat (or freshly milled flour) starter here.
Wholegrain flours will make a more vigorous, slightly more sour starter.
These flours don’t have as strong of a gluten structure, so a starter like this probably won’t rise and bubble quite as much in the jar, but that is not a problem in this case.
It’s fine to mix or change flours in a sourdough starter anytime, though a starter might take a few feedings to completely adjust to changes.
6. Why is my sourdough starter not bubbling or rising?
It may not be bubbling or rising for a few reasons. It could be that your starter needs more time to develop before it will consistently rise and bubble in the jar.
If kept around 75°F, your starter could be ready to use for baking in as little as one week. You may find that you need to continue the feeding schedule for another full week or longer before it’s ready.
Another possibility if your starter is older than a week: your starter may be bubbling and rising in the jar after feedings, but is deflating and needing a feeding much earlier than you realize.
In this case, the bubbles will have popped, but you’ll notice streaks higher on the jar where your starter was previously sitting. It could very well be ready to bake with at this point, it’s just telling you it’s ready to be stored in the fridge or fed more frequently.
If your starter was previously rising well, but seems to have stalled out after the first week, you might be feeding it too soon each time, weakening the starter.
Start ignoring the clock and wait to refresh it until it has peaked in the jar or becomes nice and bubbly throughout… even if that takes a couple of days. Continue this way until it becomes strong again.
7. Why does my starter smell bad?
An unpleasant sour smell (like gym socks or acetone) can be present when a starter is not mature, or if the starter has been neglected for a while.
A bad smell doesn’t usually indicate that a starter has gone bad. Regular feedings will balance the acid levels in the starter to resolve this.
8. How long does sourdough starter last?
If you continue to care for your starter with regular feedings, it can last indefinitely!
9. How do I know if I’ve killed my starter?
It’s very unlikely that you’ve killed your starter and more likely that it just needs continued consistent feedings, a warm environment, and more time to mature.
Gray or brown liquid on the starter is a normal occurrence called “hooch” and can be poured off before the starter is refreshed.
Sometimes a neglected starter can develop off-white textured kahm yeast on the surface. Kahm yeast isn’t harmful, so it can be scraped off before the starter is refreshed.
If you were to ever see fuzzy black or colorful mold in your starter, that would be a reason to throw the starter out and start over (this is uncommon, though).
Pouring hot water in your starter or accidentally heating your jar of starter to 140°F would certainly kill the yeasts and bacteria you’re trying to cultivate.
What can I use in place of the all purpose flour as I’ve just started milling my own flour and do not have any commercial flour in my home. I have a decent variety of wheat berries but not sure which one I should use. Will be using rye for the first step.
Hi Linda! A hard wheat would work just fine!