This post may contain affiliate links. See my full disclosure. As an Amazon Associate, I earn from qualifying purchases.
Sourdough pizza crust is simple to make for two 12-inch pizzas with perfectly chewy, airy, and crisp crusts. Proof and shape your pizza dough balls directly on sheets of parchment paper for easy transferring of the dough onto a hot baking stone in the oven.

One of my favorite things to make with my starter is sourdough pizza dough! Good homemade pizza is a must for us living up in the mountains where restaurants are few and far between.
This recipe is flexible. You can bake the pizzas the same day you start the crust, or refrigerate the dough until the second or third day.
The texture of the crust rivals restaurant personal pizza, with the occasional giant crispy air pocket.
This pizza dough recipe is heavily influenced by Maurizio Leo’s sourdough pizza dough and his method for baking pizza in a home oven.
I quite enjoy his recipe just as it is, but after making it many times, I’ve made my own tweaks and simplified the method.
The recipe calls for a very small amount of diastatic malt powder. This is to help the crust develop and brown properly. You can leave it out if you don’t have any on hand.

With this method, there’s no mess on a rolling pin, my oven, or even on my pizza stone. The dishes afterward are very minimal–a win-win!
You can customize each sourdough pizza with whatever sauce and toppings your heart desires.
Just keep in mind that freshly sliced, torn, or shredded mozzarella will melt much better than pre-shredded cheese.
Here is my 100% whole wheat sourdough pizza crust recipe.
After you’re done here, you may enjoy making my Soft Sourdough Breadsticks or Sourdough Soft Pretzels.
Sourdough Pizza Crust Baking Schedule
*The strength of your starter, the temperature in your home, and other factors will affect how long each step in the recipe will take.
Approximate timing:
- Mix and rest: 20 minutes
- Bulk fermentation: 2.5 hours
- Retard in refrigerator (optional): 24+ hours
- Pre-shape and proof: 3 hours 15 minutes
- Shape, top, and bake: 35 minutes
I usually start my dough in the late morning. This gives me time to feed my starter when I wake up in the morning so it can peak before I mix my dough. Then I’ll often proof and bake the same day that I start my crust to have pizza for dinner.
For the times that I choose to refrigerate the dough overnight, I’ll pull it out to proof the next day around 2:30pm to have pizza in time for dinner.
The extra time in the fridge only increases the flavor and development of the dough.
The timing is flexible, though, since you can leave the dough in the refrigerator longer than a day.
You could start the dough in the afternoon or evening on day one, if that works better for your schedule, then leave it in the fridge for pizza anytime on day two or three.
Tips for Making Sourdough Pizza Crust
- The key to the crust’s texture is all in the fermenting/proofing. Over-proofing your dough will prevent your crust from rising well in the oven. Under-proofing will result in a denser, crunchier crust.
- If you don’t own a pizza peel (I don’t), a large wooden cutting board or an inverted half sheet pan will work to transfer your pizza to the oven.
- Make sure to preheat your stone or steel along with your oven to prevent damage. Allow it to stay inside the oven as the oven cools down afterward as well.
- I actually prefer all-purpose flour for this recipe instead of a higher protein bread flour. The crust takes on the right balance between chewiness and airiness.
Equipment Needed
- Digital kitchen scale
- Medium-sized bowl (a bowl with a lid is helpful)
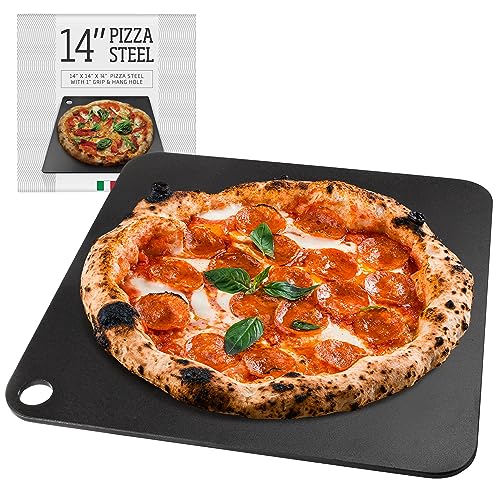
- Pizza stone or baking steel
- Parchment paper
- Plastic wrap
- Pizza peel (or a wooden cutting board or inverted half sheet pan to transfer pizzas to oven)
- Cooling rack
How to Make Sourdough Pizza Crust – Step-by-Step
Step 1 – Make Sourdough Pizza Crust Dough and Bulk Ferment
You’ll want to start by scaling your ripe sourdough starter, water, kosher salt, and diastatic malt (if using). Stir them together.
Then add your flour and stir until a shaggy dough forms.
At this point I use my hand to knead the dough in the bowl for a couple of minutes until it comes together. The dough should still be fairly sticky.
Place a lid (or tea towel) on the bowl and allow the dough to rest for 15 minutes.
Then it’s time to bulk ferment for the next 2.5 hours, or so. I like to set my dough in my turned-off oven with the light on to keep it closer to 75°-80°F.
You’ll want to perform 3 sets of stretch-and-folds every 30 minutes to develop strength in the dough. Stretch around the bowl a couple of times for the first set, and then once around the bowl for the remaining sets.
You can refer to my video below to see how to stretch-and-fold dough:
Then allow the dough to rest for the remainder of bulk fermentation (another 1.5 hours). Your dough should increase in size by about 1/3 its volume.
Step 2 – Form Into Balls and Proof
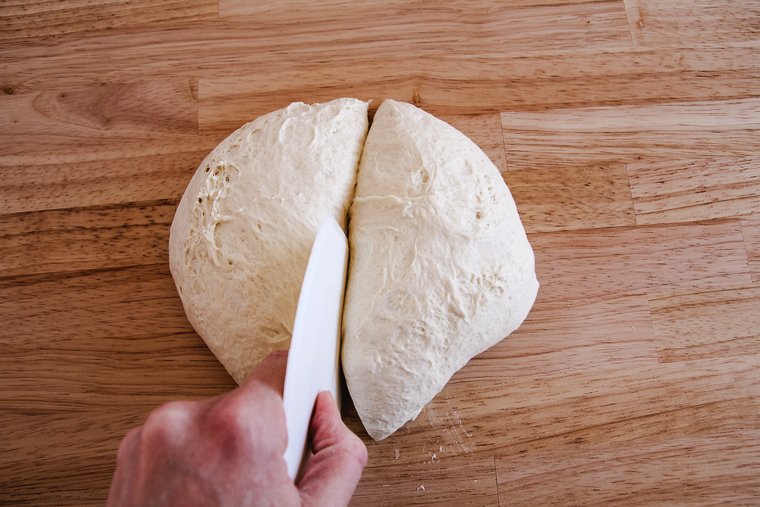
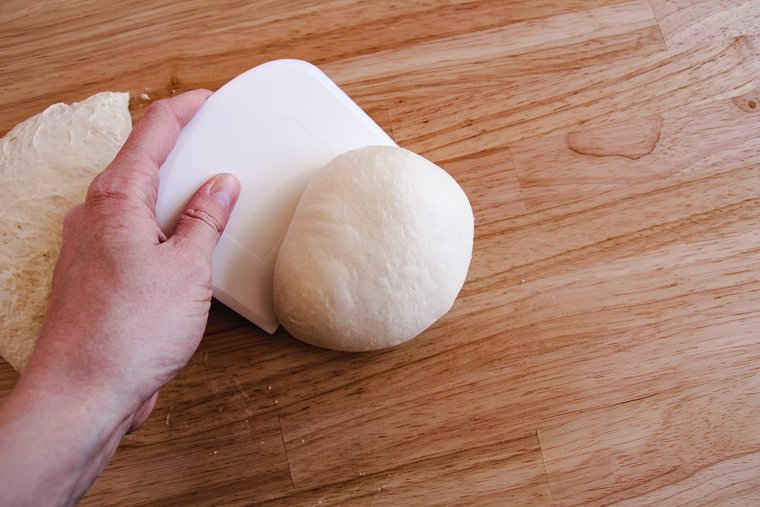
Turn out your dough onto your countertop and divide it in half with a dough scraper. You shouldn’t need to dust with any additional flour at this point.
Use your scraper to push your first piece of dough against the counter to form it into a tight ball. Try not to degas the dough in the process.
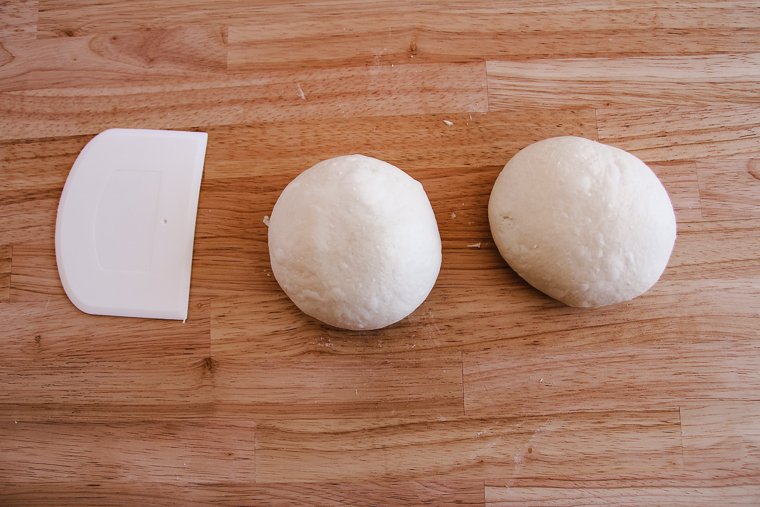
Repeat to form the second piece of dough into a ball. Coat each ball with a thin layer of olive oil. I usually drizzle oil in the same bowl the dough was fermenting in and scoot my dough balls through it.
If you want to refrigerate the dough for another day, place the oiled dough balls in an airtight food storage container. (Just remove your dough from the refrigerator for the next step about 3.5 hours before mealtime.)
See freezing instructions at the bottom of the post.
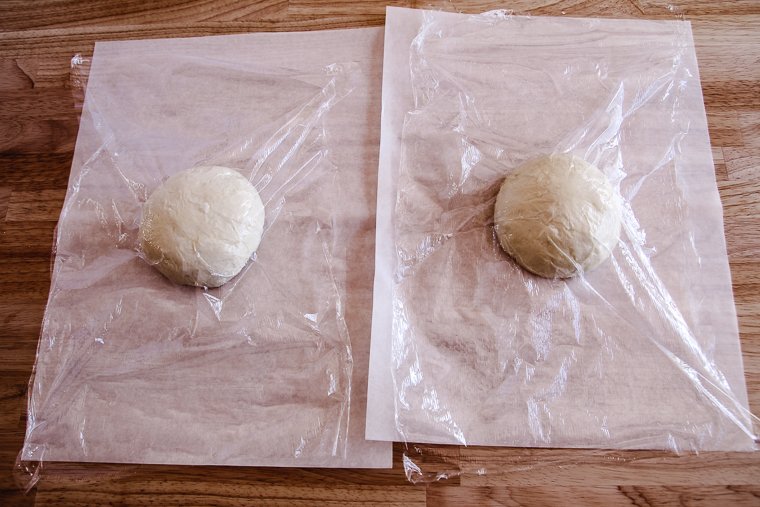
Once you’re ready to proof, place the oiled dough balls in the center of sheets of parchment paper. Cover them with plastic wrap to keep them from drying out and set them in a warm place (75°-80°F).
(Again, you can put them on baking sheets in a turned-off oven with the light on for extra warmth, if you need.)
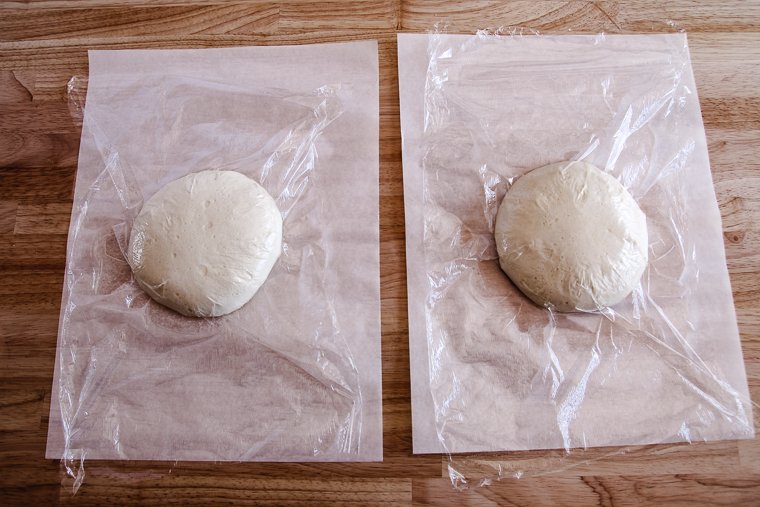
Allow them to proof for about 3 hours or until they look puffy and expand out sideways like the picture below.
If you poke the dough with a finger, it shouldn’t feel “tight” anymore. Your finger should leave an indent that springs back slowly when proofing is done.
Set a rack in the top third of your oven, and place a stone/steel on the rack. Then preheat your oven to 525°F (550°F is even better, if your oven has the option).
Note: To avoid damaging your pizza stone (or steel), make sure you put it in your cold oven and allow it to preheat with your oven.
The stone/steel insures your crust becomes crispy on the bottom. It will transfer heat to your pizza quickly, giving the crust good rise.
While the oven is heating up, you can begin assembling your pizzas.
Step 3 – Shape Sourdough Pizza Crust
To shape your first pizza, dampen (or lightly flour) your fingers to prevent the dough from sticking to you.
Begin pressing out the dough ball with both hands in a circular shape. Go from the center outwards, stopping before you flatten the outer crust.
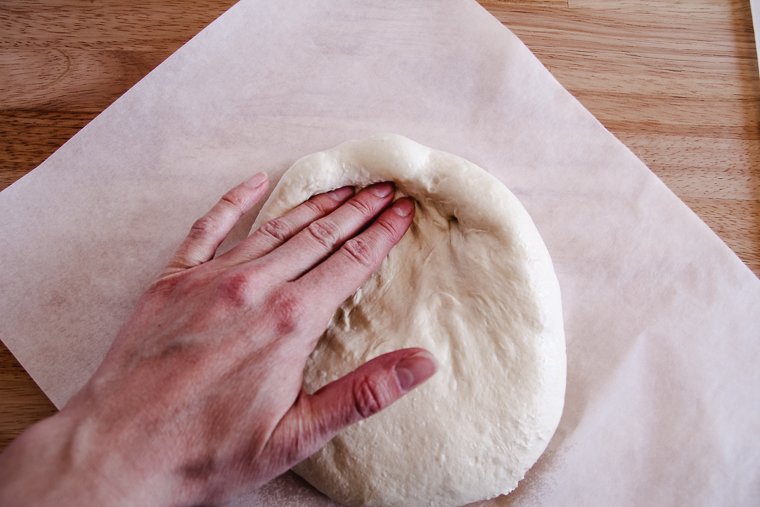
You don’t want to deflate the outer crust or pop any air bubbles that come to the surface. Work on pressing the middle of the crust out evenly until your pizza is about 12 inches in diameter.
This method is very beginner friendly. You don’t have to lift the dough from the parchment to shape it or worry about tearing holes in it.
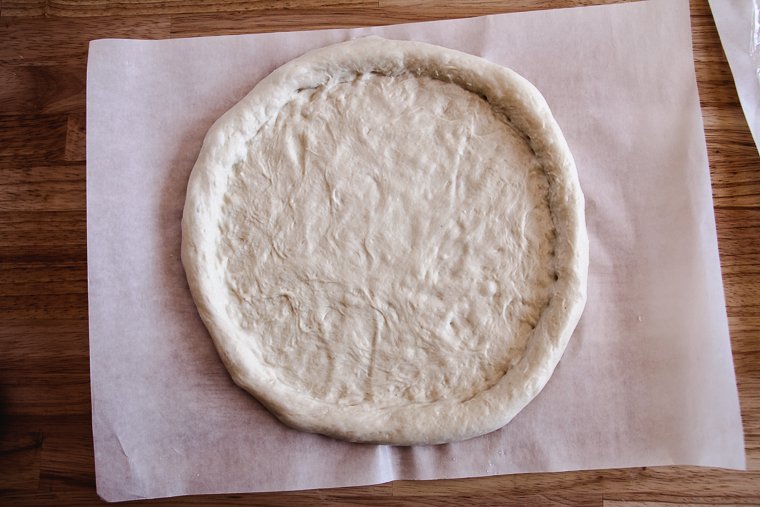
The crust will expand considerably during baking.
(Update 11/19/23: I now prefer to leave the outer crust a bit thinner and the bottom crust slightly thicker. I leave some air intact in the bottom crust by not pressing down so harshly. You can shape according to your own preferences.)
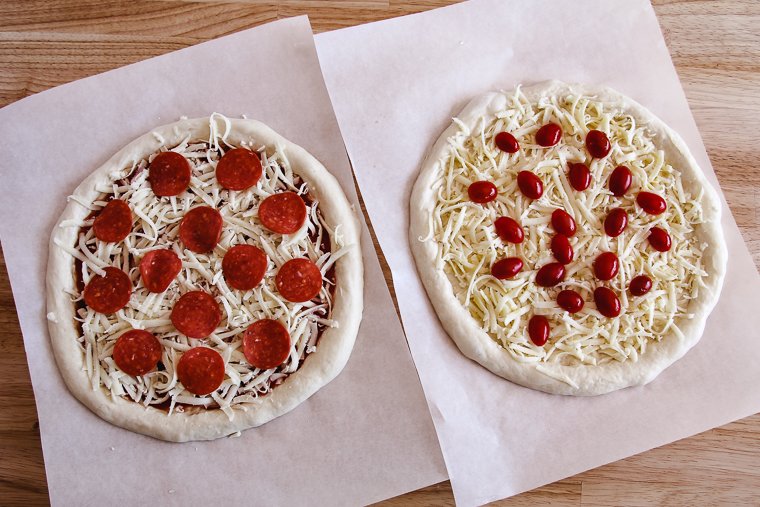
Step 4 – Top Sourdough Pizzas
Add any sauce and toppings you wish, though avoid over-topping to help the pizzas bake evenly.
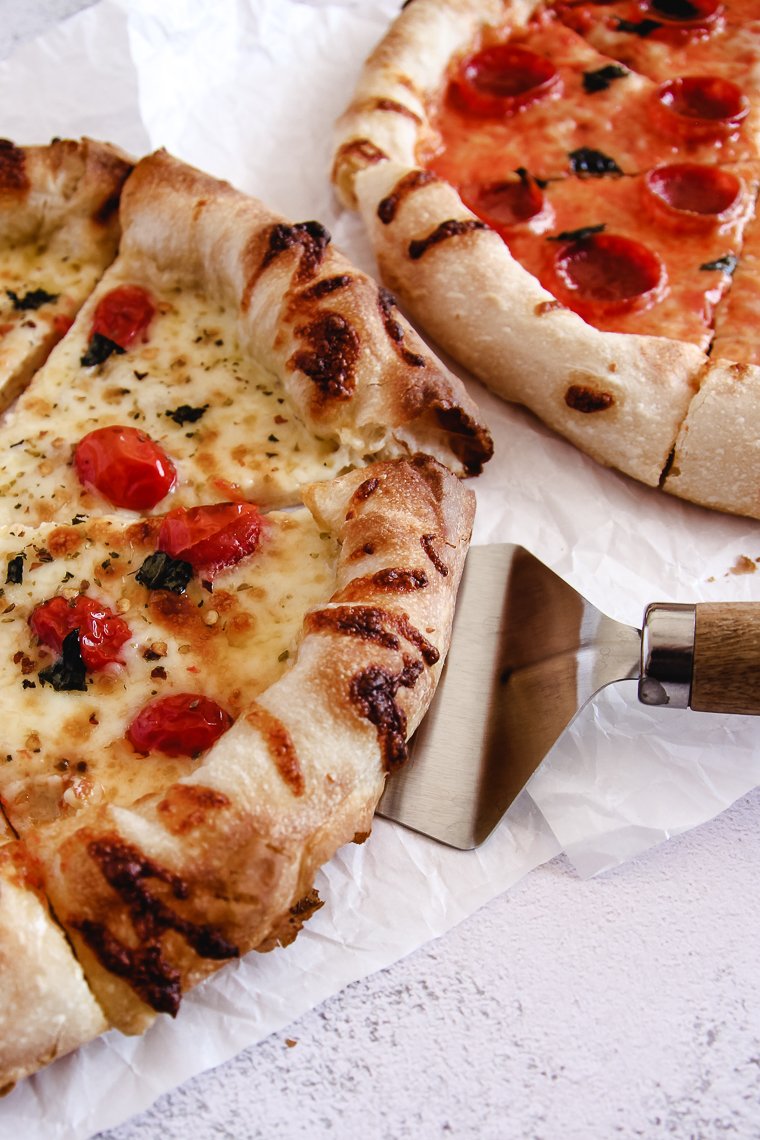
Sometimes we do pepperoni, Italian sausage with green chilis, or supreme-style pizzas with sauce.
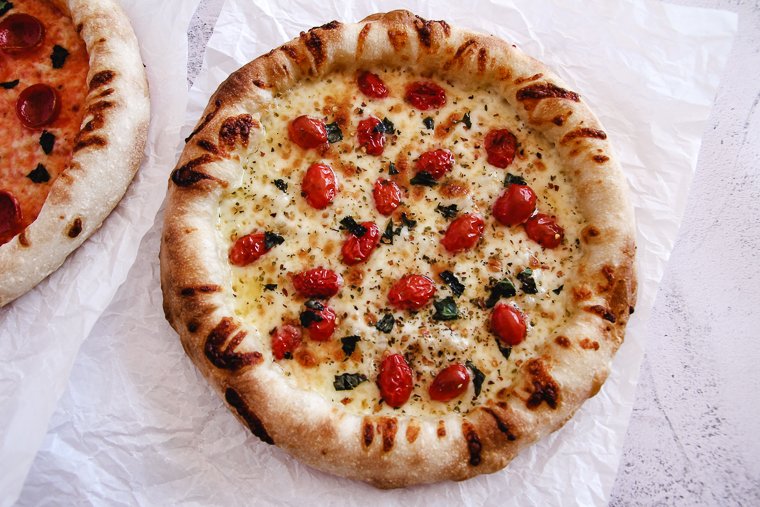
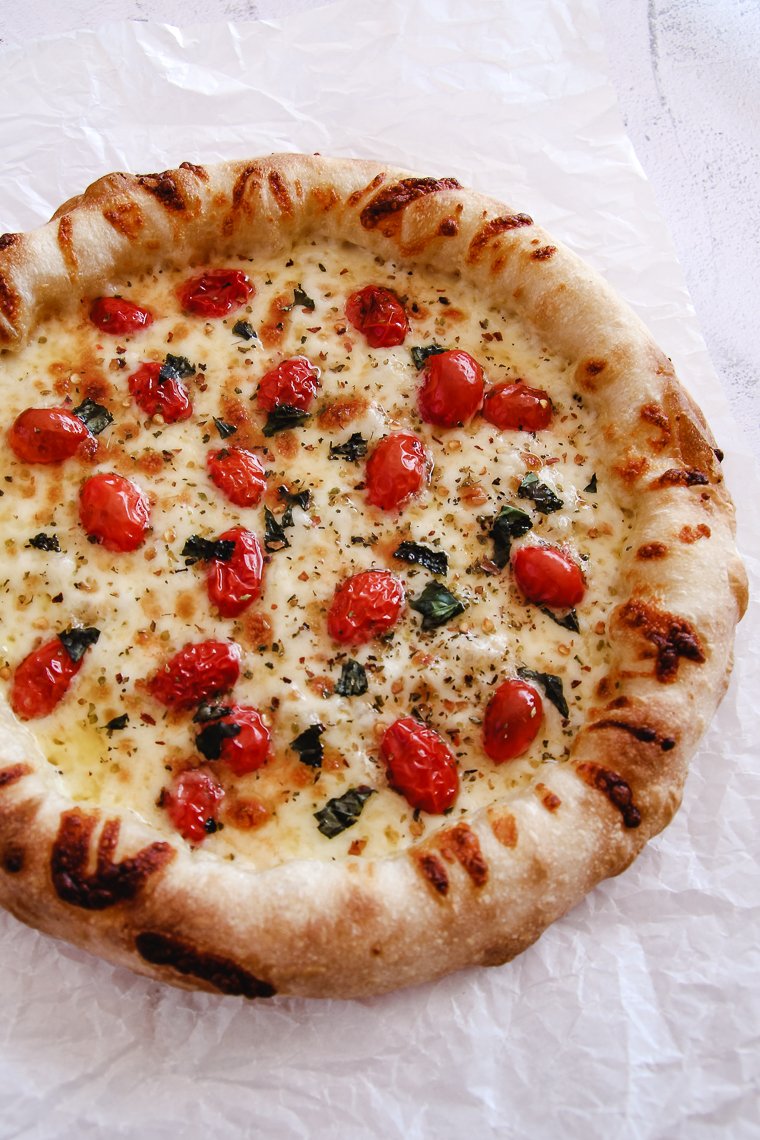
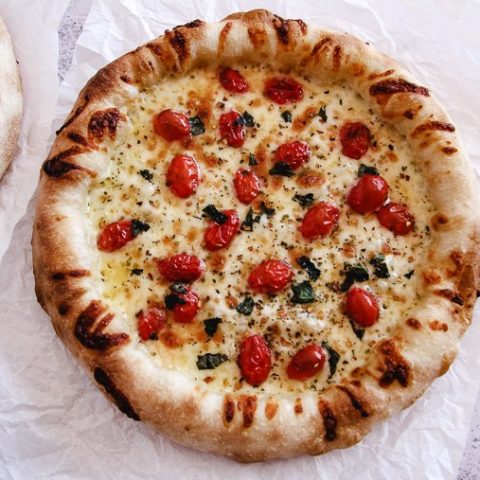
Other times, we stick to slices of mozzarella topped with sliced Campari tomatoes or halved cherry tomatoes and a drizzle of olive oil. Then we add fresh basil and oregano and chili flakes after baking.
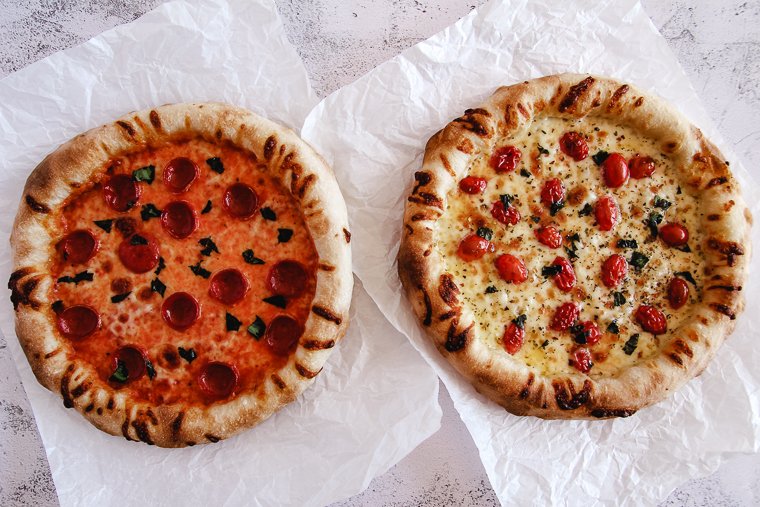
Step 5 – Bake Sourdough Pizzas
When your oven is ready, slide your pizza with its parchment onto your pizza peel.
Open your oven and quickly scoot your pizza right onto your hot stone or steel. Close the oven door and bake for 10-12 minutes (6 minutes at 550°F). You’ll know the pizza is done when the crust is nice and brown.
Note: Your parchment paper will be very dark by the time your pizza is baked. Don’t worry. It will not light on fire or release chemicals even when you’re baking higher than the recommended temperature on the package, according to my research and experience.
You can take your crusts even darker than mine if you like them crunchier.
Once you remove your first pizza from the oven, reset your oven temperature and allow it to come back to temperature before you put your second pizza in. This will allow your second pizza to bake up just as well as the first!
Allow your pizzas to cool on a wire rack for about 5 minutes. Then slice and enjoy while they are still warm.
How to Freeze Sourdough Pizza Dough
The good new is, this pizza dough freezes beautifully! I usually make a quadruple batch of dough at one time and form it into 6 larger dough balls for 3 meals for our family.
After you shape your dough into balls and oil them, simply wrap them in plastic wrap and place them in a zipper freezer bag to freeze for up to 3 weeks.
To thaw, transfer them to the refrigerator the night before. The next day, you can proceed to bake pizzas as normal!
I’m so grateful for your comments, reviews, and questions! Your star ratings help others discover my recipes, and your feedback helps me make improvements. Thank you for your support!
Sourdough Pizza Crust
This sourdough pizza crust recipe is simple to make (and can even be made a day or two ahead) for two 12-inch pizzas with perfectly chewy, airy, and crisp crusts. Proof and shape your pizza dough balls directly onto sheets of parchment paper for easy transferring of the dough onto a hot baking stone in the oven.
Ingredients
- 48g ripe sourdough starter (100% hydration)
- 215g water, room temperature
- 7g kosher salt
- 3g diastatic malt powder (optional)
- 330g unbleached all-purpose flour
- Olive oil to prevent sticking
- Pizza toppings of choice
Instructions
Feed starter several hours before mixing dough and allow it to peak.
- Mix: Mix starter, water, salt, and diastatic malt in a medium-size bowl. Add flour and stir until a shaggy dough forms. Knead in the bowl with your hand for a couple of minutes until the dough just begins to smooth out. Cover and allow to rest for 15 minutes.
- Bulk ferment (75-80°F): Perform three sets of stretch-and-folds on the dough at 30-minute intervals, covering dough after folding. (Stretch twice around the bowl for the first set, and once around for the additional sets.) Allow dough to rest for an additional hour and a half (covered), or until dough has increased by about 1/3 its volume (about 2.5 hours total time for bulk fermentation).
- Form into rounds and proof: Remove dough from bowl and divide in half (do not degas). Gently form each portion into a tight ball and coat in olive oil. (If baking another day, place oiled dough balls in an airtight food storage container and refrigerate. Pull out and proceed to next step about 3 hours before you intend to bake the pizzas.)
Place each ball smooth side up in the center of a sheet of parchment paper and cover loosely with a sheet of plastic wrap. Allow to proof in a warm place (75-80°F) for 3 hours, or until dough balls look puffy and have relaxed outwards. Dough should not feel "tight" if you press it with a finger. The indent from your finger should bounce back slowly. (If dough balls will finish proofing too early for mealtime, chill them until you're ready.)
When proofing is almost finished, place a baking stone or steel on a rack set in the top third of the oven. Then preheat oven to 525°F (or up to 550°F if your oven will allow). - Shape: Dampen or lightly flour your fingertips and begin to press out the first ball of dough on the parchment paper. Gently work from the center outward to extend the bottom crust with your fingers into a circular shape without deflating the outer crust or completely degassing the bottom crust. There is no need to lift the dough from the parchment paper. Continue until pizza is about 12 inches in diameter.
- Top: Top with sauce and toppings, but avoid over-topping. Slide the first pizza (still on its parchment paper) onto a pizza peel (a large wooden cutting board or inverted half sheet pan will work). Use the peel to transfer the pizza into the preheated oven on top of the stone or steel.
- Bake: Bake for 10-12 minutes (6 minutes at 550°F), or until the crust has browned to your liking. Transfer pizza to a wire rack and allow to cool for 5 minutes before slicing and serving.
- Reset oven temperature and allow oven come back up to temperature before baking the second pizza.
Notes
- To freeze dough: Wrap oiled dough balls in plastic wrap and place in a zipper freezer bag to freeze for up to 3 weeks. To thaw, transfer to refrigerator overnight.
- The key to the crust's perfect texture is in the fermenting/proofing. Over-proofing will prevent the crust from rising well in the oven. Under-proofing will result in a denser, crunchier crust.
- Freshly shredded, torn, or sliced mozzarella (or whatever cheese you are using) will melt better than pre-shredded cheese.
- Place your pizza stone or steel in your oven before you begin preheating, and likewise, allow it to stay in the oven afterward to cool along with the oven.
- Your parchment paper will get very dark, but don't let this concern you.
Recommended Products
As an Amazon Associate and member of other affiliate programs, I earn from qualifying purchases.


Nutrition Information:
Yield: 2 Serving Size: 1Amount Per Serving: Calories: 850Total Fat: 14gSaturated Fat: 4gTrans Fat: 0gUnsaturated Fat: 9gCholesterol: 9mgSodium: 1685mgCarbohydrates: 154gFiber: 7gSugar: 3gProtein: 25g
*Nutrition information is not always accurate.
What does (100% hydration) mean, next to the starter?
Hi Jess! That’s just normal starter fed with equal parts water and flour. 🙂
Have you tried freezing your sourdough pizza dough? At what point in the process would you recommend that happening?
Hi Elizabeth, I haven’t tried that yet, but it should work! I would freeze after shaping it into balls. I have read that pizza dough will lose some rise the longer it’s in the freezer, so I wouldn’t freeze it for more than a couple of weeks.
Hi, this will be my first time making pizza dough. Can you explain the reason we are waiting for day 2 or 3 before using the dough?
Hi Janet! You don’t have to wait 2 or 3 days. Lately we’ve been making pizza the same day as I make the dough, and it works great! I just form the dough balls directly after bulk fermentation and allow them to proof per the recipe. If they proof too fast, I lift them by the parchment to place them on a baking sheet so I can keep them in the refrigerator until dinner time.
This pizza is amazing!! I’ve made a regular pizza before, but this sourdough one is much better!
So glad you liked it!
Hi! I’m 13 years old. I make a lot of sourdough things, and I’m really interested in making this. But I was wondering what 100% hydration means for the sourdough starter?
Thank you!
Hi Miriam, 100% hydration means that the starter has been fed with equal weights of flour and water. This is how most people keep their starter anyway… about the consistency of a thick pancake batter. I hope that helps!
Thank you so much! Yes, that’s how I feed my starter, I just didn’t know that term 🙂
I’ll definitely be making this, thanks for sharing your recipe!
Looks delicious!! Thank you for sharing your recipe.
Thanks for your comment, Lisa!