This post may contain affiliate links. See my full disclosure. As an Amazon Associate, I earn from qualifying purchases.
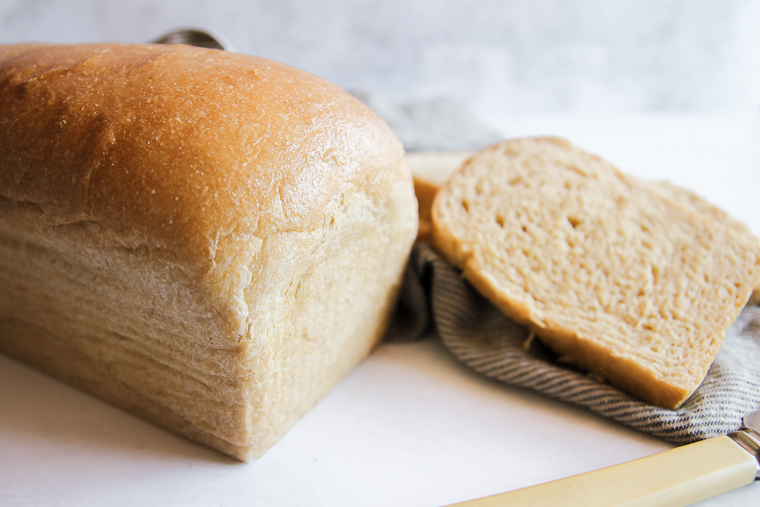
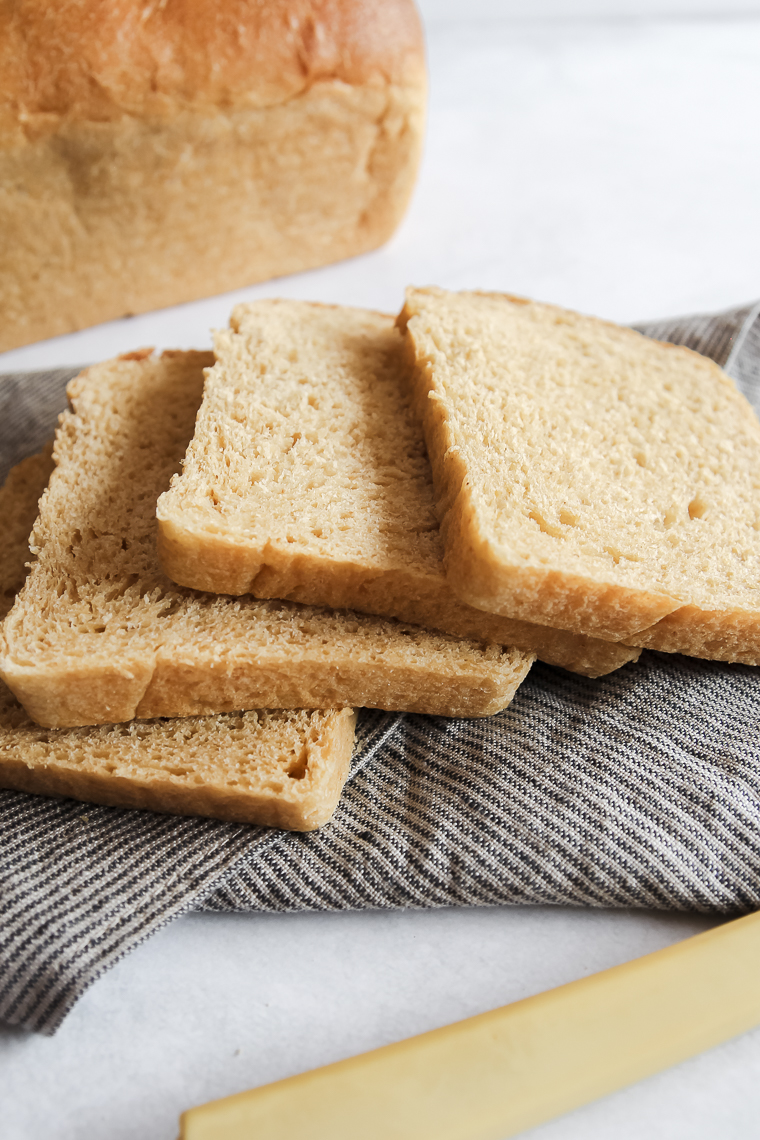
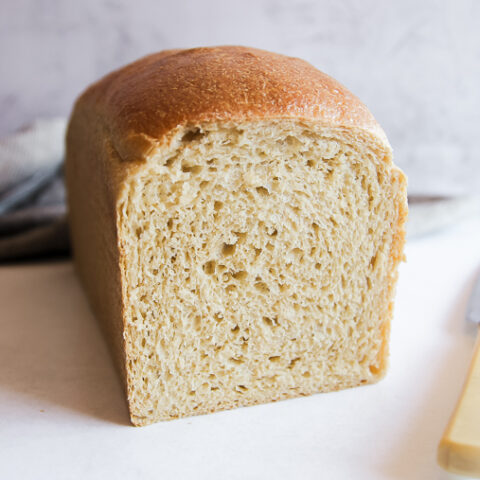
A soft and fluffy 100% whole wheat sourdough sandwich bread that can even be made with fresh milled flour! This recipe is listed in grams for consistency and is simple to knead in a mixer for a hands-off bulk fermentation.
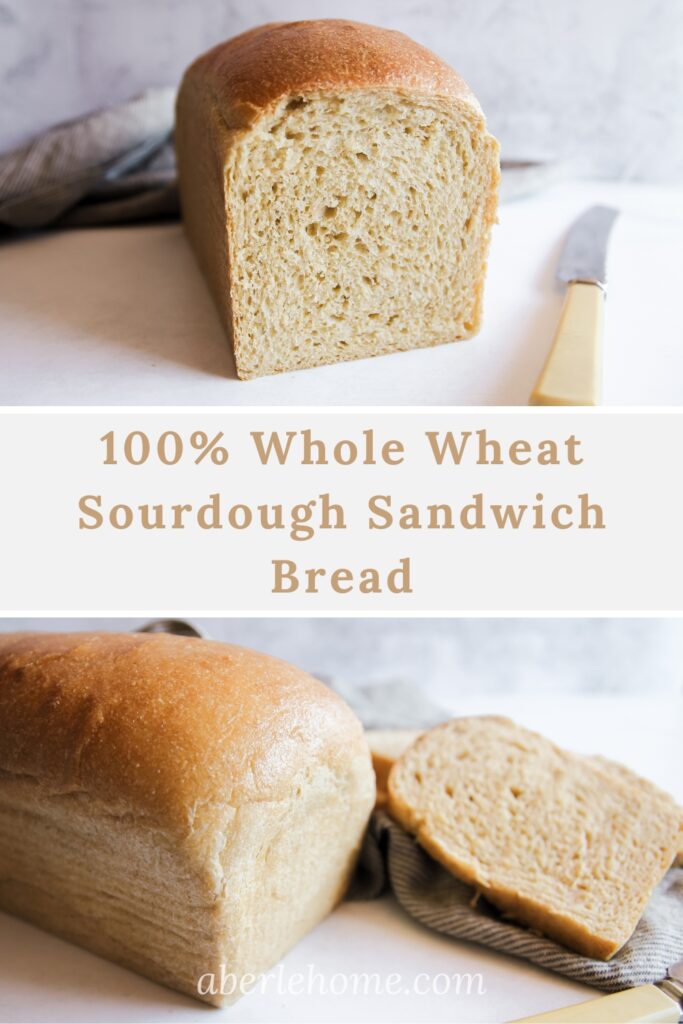
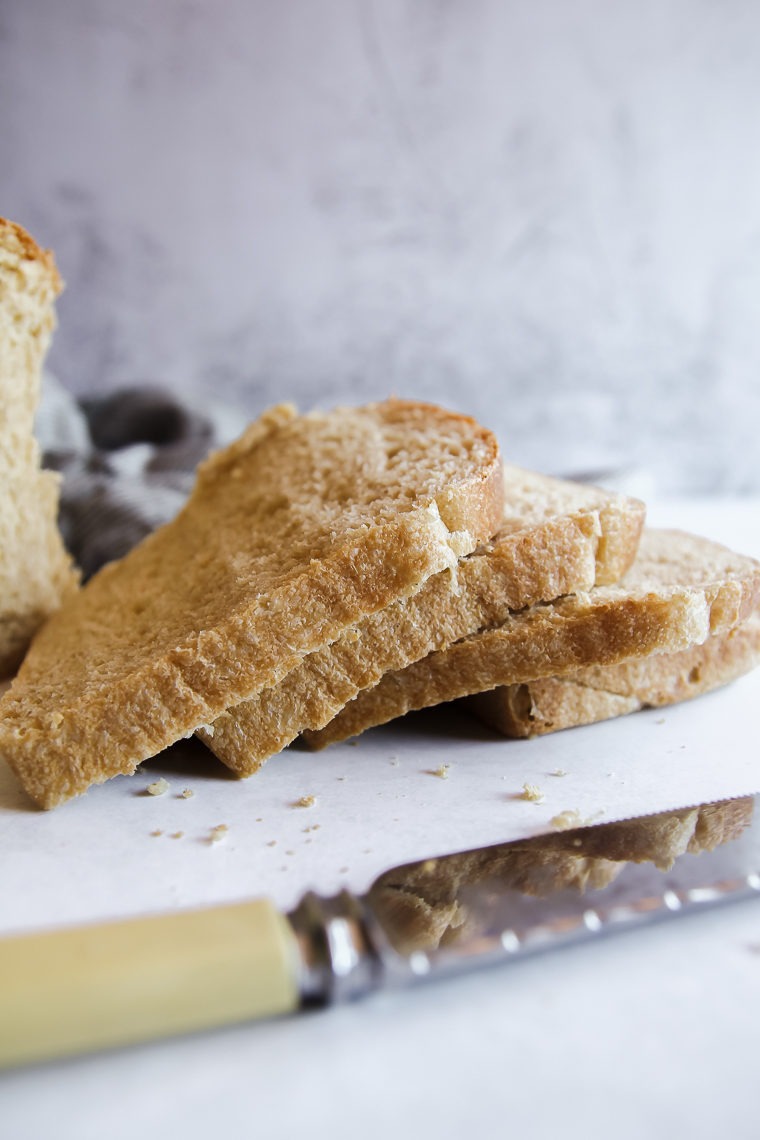
If you want bread full of naturally leavened wholegrain goodness that is soft enough for PB&Js or French toast, this bread is for you!
I’ve been playing around with this recipe a lot the past few months… trying to achieve a texture that is soft and sliceable, but not caky.
I wanted a kid and husband-approved substitution for store-bought sandwich bread that I could make myself with my freshly milled organic flour and simple ingredients.
And I wanted the bread to be straightforward and practical enough to make on a weekly basis.
I know I’m not the only one who wants to bake more wholegrain sourdough, so I’m excited for you to try the recipe and give me your feedback!
Reasons You’ll Love This Whole Wheat Sourdough Sandwich Bread Recipe
- It uses 100% whole wheat flour. Unsifted freshly milled hard red or hard white flour would work perfectly for the recipe.
- I’ve listed the ingredients in gram weights instead of cups for ease and consistency.
- The bread is naturally leavened with a sourdough starter instead of commercial yeast, but has a mild flavor and a 1-day baking schedule.
- Whole food ingredients (scalded flour, eggs, milk, honey, and butter) enrich the whole wheat sourdough sandwich bread for flavor and softness. No extra additives like vital wheat gluten or lecithin are needed.
- Kneading is done up front in a mixer, so you won’t have to perform any stretch-and-folds during bulk fermentation.
- The bread has a decent shelf life–up to 5 days at room temperature! The scalded flour in the formula (tangzhong) and the acidity from the sourdough starter are key to it staying soft and not molding as quickly as other homemade breads.
- The bread freezes well, so you can bake a large batch at once to save time. The recipe as written yields 2 loaves.
- You can substitute ingredients to make the bread your own.
If you enjoy baking wholegrain sourdough recipes, you’ll love to try my 100% wholegrain Maple Oat Sourdough Bread or my Whole Wheat Sourdough English Muffins.
Whole Wheat Flour Selection
There are a couple choices for you as far as flour goes. You can use standard “whole wheat” flour for a more robustly colored and wheaty-flavored bread.
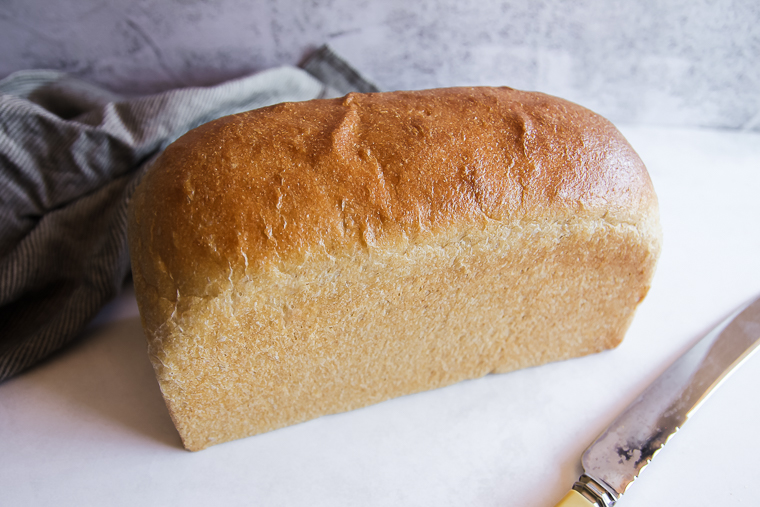
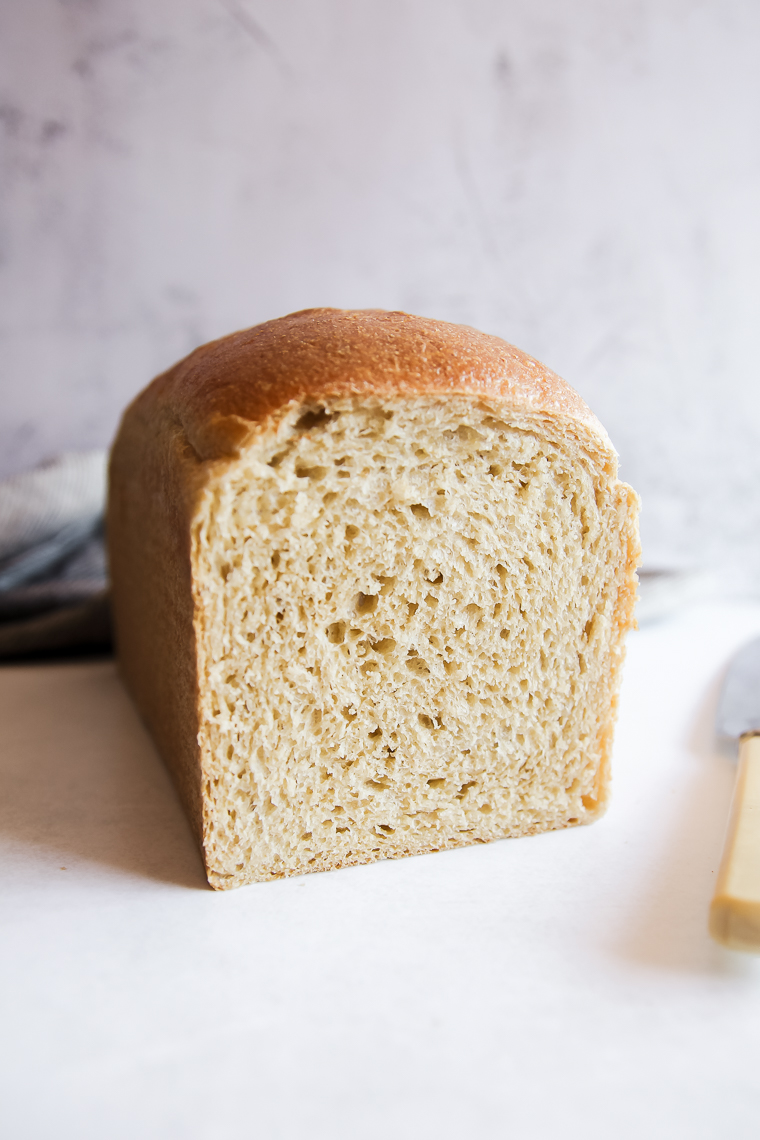
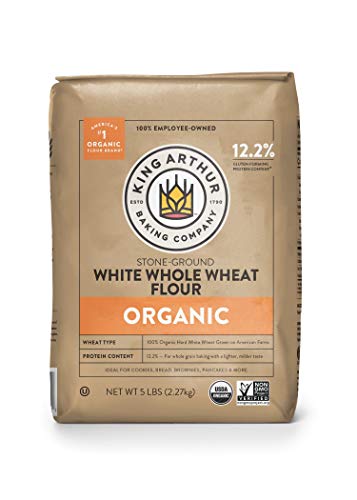
For a more mild flavor and color like the bread pictured in this post, choose a “white whole wheat” flour.
White whole wheat is just a different variety of wheat with a golden hue. It’s still a whole grain! I recommend you give it a try if your family likes to eat white bread (though this flour may not be available to you depending on where you live).
Avoid any soft wheat or whole wheat pastry wheat flours here–you’ll need strong gluten development for a good rise and fluffy texture.
For fresh milled whole wheat sourdough bread, choose either hard red wheat berries (spring or winter) or hard white wheat berries to grind.
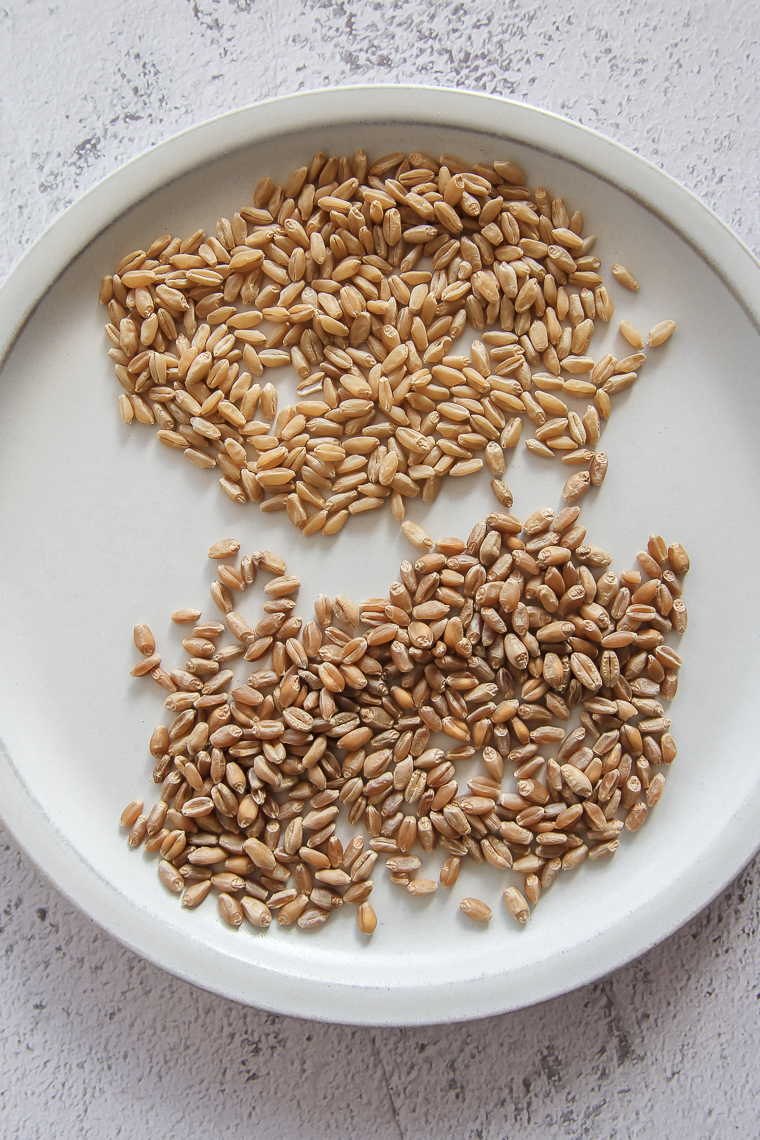
You can weigh wheat berries ahead of time to mill the exact amount of flour you need for the recipe. Make a little extra to dust your counter during shaping (600g should do the trick). Grind the wheat on the finest setting of your mill.
If you’re curious about the benefits of milling flour at home or how to get started, visit my blog post.
Starter Notes (How to Keep the Bread From Becoming Sour)
Ideally, use a whole wheat flour starter for true 100% whole wheat bread, if you have one. A white flour starter will work fine, though.
If you keep a white flour starter, you can easily prepare some starter for the recipe that you feed with whole wheat flour the night before. This way you can use a white starter and only introduce 10g of white flour into the recipe.
To make 220g prepared starter total for 2 loaves, mix:
- 20g starter
- 100g whole wheat flour
- 100g water
It should be risen and bubbly all the way through when it’s ripe and smell like yeast instead of raw flour. If it smells sour, it’s gone a little far.
The sourness of the bread will be related to your starter maintenance (assuming you don’t over-ferment the dough).
Make sure you’re in the habit of feeding your starter at its peak rise, and don’t wait any longer. This is especially true with a wholegrain starter.
Ingredient Substitutions
Though these substitutions may alter the texture and flavor of the bread a little, they are very doable! Feel free to make this sandwich bread your own.
Dairy-free option: Replace the milk with an alternate milk of choice (or water), and replace the butter with equal grams of a neutral oil like olive oil or avocado oil. Add the oil during the initial mixing before the 30-minute rest, then proceed as normal. (Kneading may take longer.)
Honey: Replace the honey with 60g granulated sugar or 45 grams real maple syrup, if desired. You can also reduce or omit sweeteners, in which case, increase the milk by 20g.
Whole wheat flour: If you want to squeeze in a little of a lower-gluten wheat like an ancient grain, keep that flour to 10% or less of the total flour weight.
Optional toppings: You can use wheat bran, cracked wheat, seeds, or rolled oats as loaf toppings, if you would like. Pat the tops of the shaped loaves with water. Sprinkle your counter or a sheet pan with the desired topping, then roll the tops of the loaves through the topping to adhere. Skip brushing the loaves with milk before baking.
Whole Wheat Sourdough Sandwich Bread Baking Schedule
*The temperature of your dough and kitchen will affect how long each step will take.
I bulk fermented and proofed around 78°F with a final dough temp of 78°F after kneading. If your dough/kitchen is cooler, expect the dough to rise slower.
Approximate timing:
- Prepare scald (tangzhong): 7 minutes
- Mix dough and rest: 40 minutes
- Add salt and butter and knead: 6-8 minutes
- Bulk fermentation: 3 hours
- Shape and proof: 2 hours, 35 minutes
- Brush with milk and bake: 35 minutes
*You could optionally refrigerate the dough after bulk fermentation if you need to shape, proof, and bake on day 2. For the most mild flavor and straightforward process, start dough in the morning and keep to a 1-day schedule.
Tips for Making Whole Wheat Sourdough Sandwich Bread
- Use a strong, active sourdough starter at its peak rise.
- Proper gluten development is the key to a light and fluffy loaf. You’ll notice I call for a 30-minute rest (“fermentolyse”) before the butter and salt are added to the dough. This rest is important to kickstart gluten development to avoid excessive kneading. It’s not uncommon that people knead whole wheat dough for 20-30 minutes to pass the “windowpane” test of gluten development, but with this technique, I knead only 6-8 minutes in my Bosch mixer. Since every flour and mixer are different, kneading could take longer for you. I’ll teach you which cues to look for.
- Signs of insufficient gluten development in the finished bread: A crumbly texture when sliced, a rough/craggy top crust, and loaves that won’t rise well and don’t have much oven-spring are all signs of insufficient gluten development.
- If your kitchen is chilly, you can set the dough in the microwave with the door ajar to keep the dough or proofing loaves warmer. 78°F is ideal here for bulk fermentation and proofing.
Recommended Equipment
- Mixer fitted with a dough hook (I love my Bosch Universal Plus for bread; KitchenAid motors can give out with larger batches of wholegrain dough.) You can get $20 off through my affiliate link.
- Digital kitchen scale (This one is my favorite scale because it’s so sensitive. I can even set my Bosch mixer bowl on top to weigh the ingredients.)
- 4-quart Cambro container and lid for bulk fermentation (or a large bowl)
- Bench scraper
- Flexible dough scraper
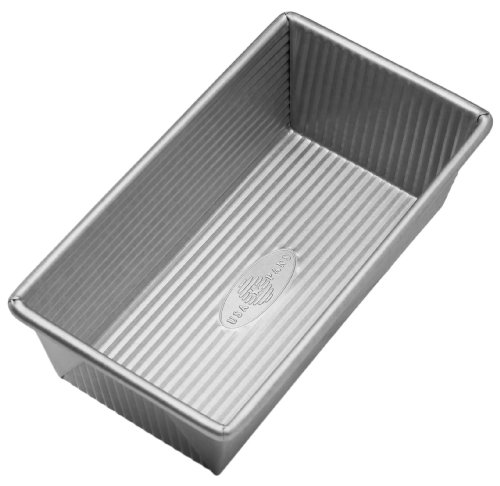
- USA small pullman pans (I don’t typically bake with the lids, but you could. Standard-size loaf pans also work wonderfully.)
- Instant-read thermometer to test dough temp and doneness (this one is my favorite for quality)
- Cooling rack
How to Make Whole Wheat Sourdough Sandwich Bread (Step-by-Step Instructions)
Step 1 – Prepare Scald (Tangzhong)
The scald sets this bread apart from a lot of other whole wheat sourdough sandwich breads out there.
It’s super simple. Add milk and flour to a small saucepan and whisk to combine. Then cook the mixture over medium heat, stirring constantly, until it thickens like thin mashed potatoes.
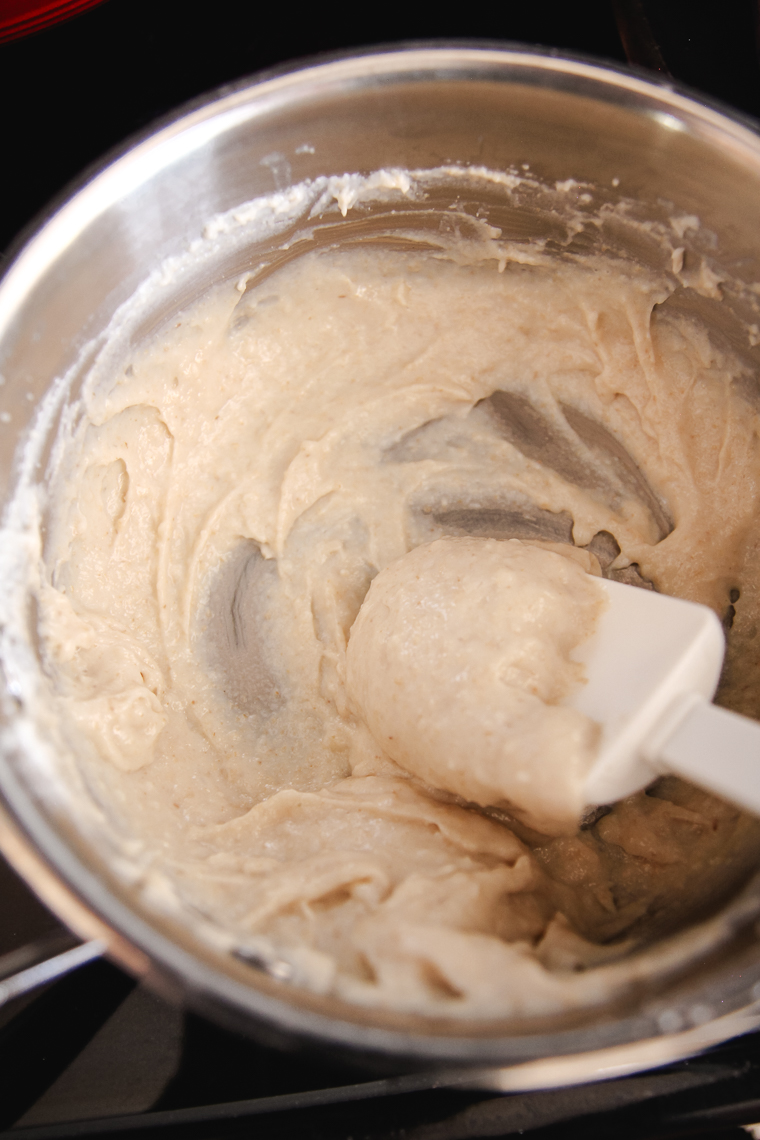
Set the mixture aside to cool while you weigh out your other ingredients.
Step 2 – Mix Whole Wheat Sourdough Sandwich Bread Dough
Into the bowl of a stand mixer fitted with a dough hook (I use my Bosch mixer with the dough hook and dough hook extender), add ripe starter, whole wheat flour, honey, milk, eggs, and the cooled scald/tangzhong mixture.
Mix for a minute or two until the ingredients are combined. The dough will be sticky and shaggy.
Cover the dough and let it rest in the mixer for 30 minutes.
After the rest, add in the butter cubes (trust me, they will mix in well even if they are cold) and salt.
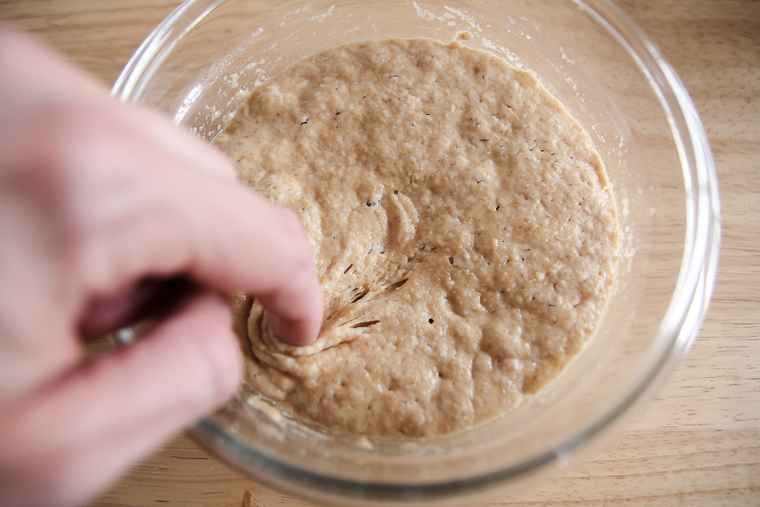
Knead the dough for 6-8 minutes on the lowest speed your mixer can handle without the motor lagging. Stop to scrape the sides down, if needed.
Then observe the dough after it rests for a minute. Dampen your fingers and see how far it will stretch. If the gluten structure is well developed, you’ll be able to stretch the dough dramatically into a thin “windowpane.”
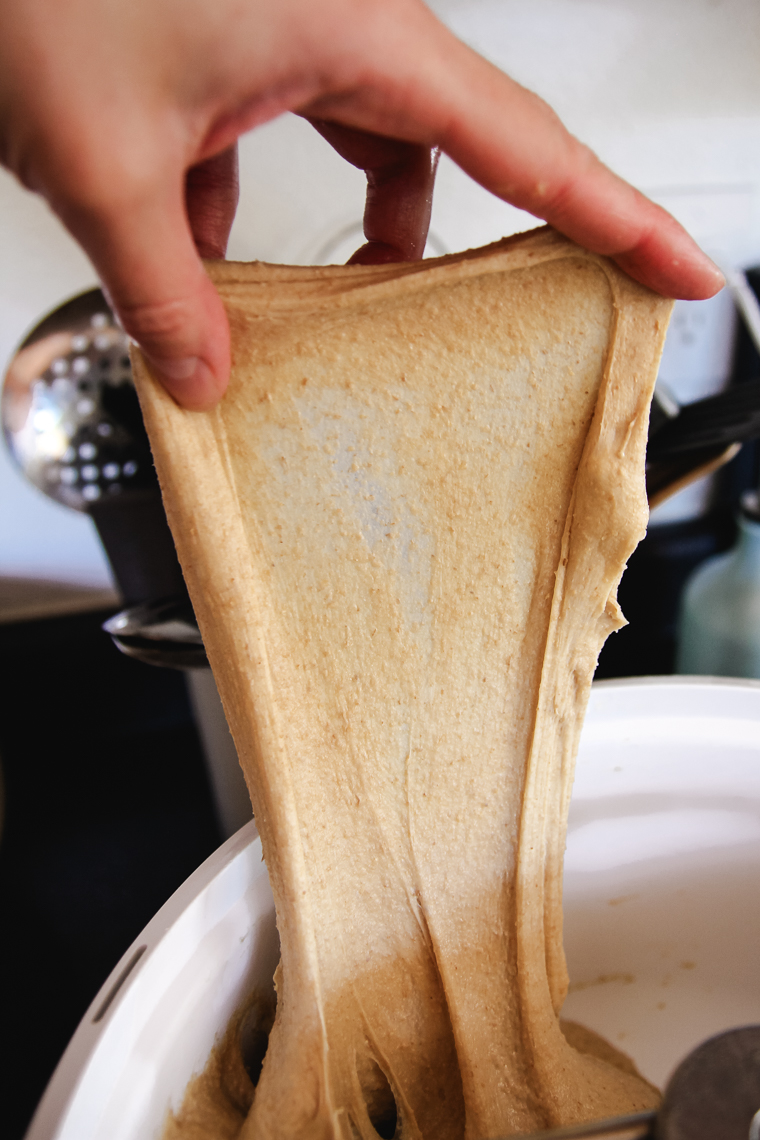
Equally important to passing the windowpane test: the dough should have a smooth, shiny, and “taut” appearance as it clings to the dough hook and pulls itself off the sides of the mixer.
If it doesn’t show these signs, continue to knead for a couple more minutes and check again.
At the same time, take care not to walk away and over-knead the dough. The gluten network will literally start to break apart if the dough is over-worked.
Step 3 – Bulk Fermentation
When your dough is done, dampen your hands to remove it from the mixer.
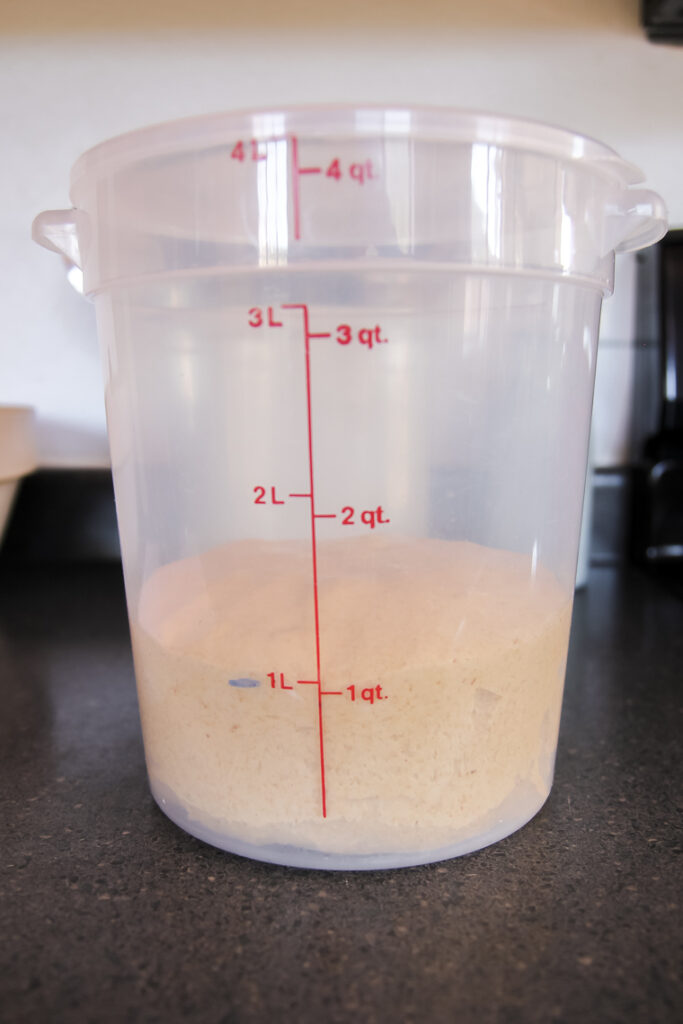
Form it into a ball and place it in a (preferably) straight-sided container for its first rise. Cover the dough to prevent it from forming a skin on the top.
I like to press the dough flat with my hand and mark the starting point on the container with a dry-erase marker (the 1L mark in this case).
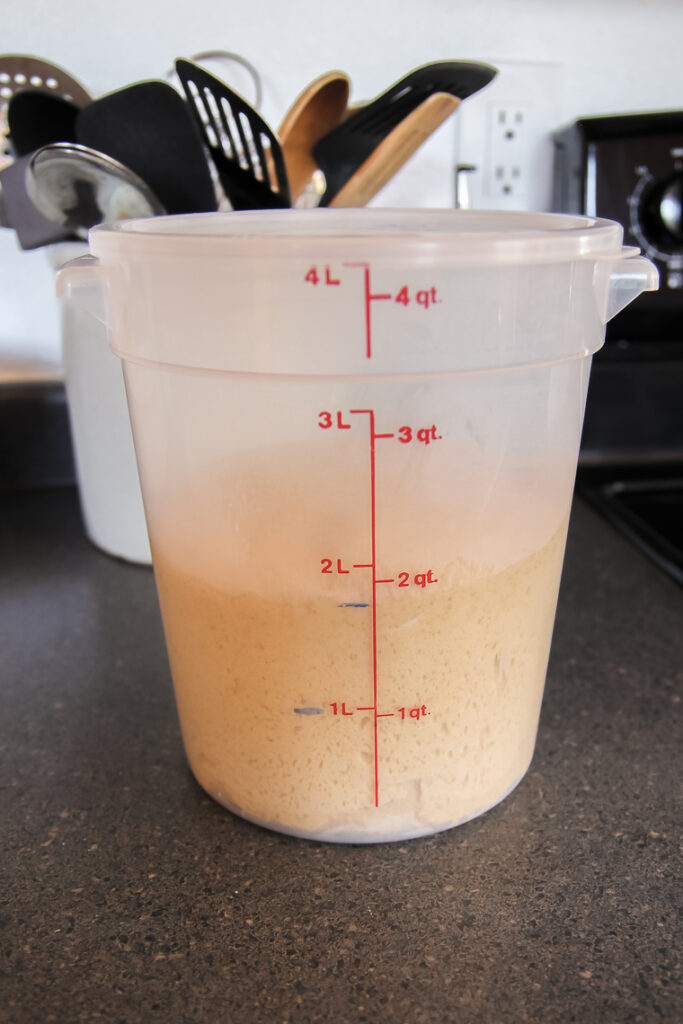
Set the dough in a warm place (I like the microwave with the door ajar for warmth from the light) until it has risen by 75% (not double) or to 1-3/4L on the container.
Step 4 – Grease Pans, Divide & Shape
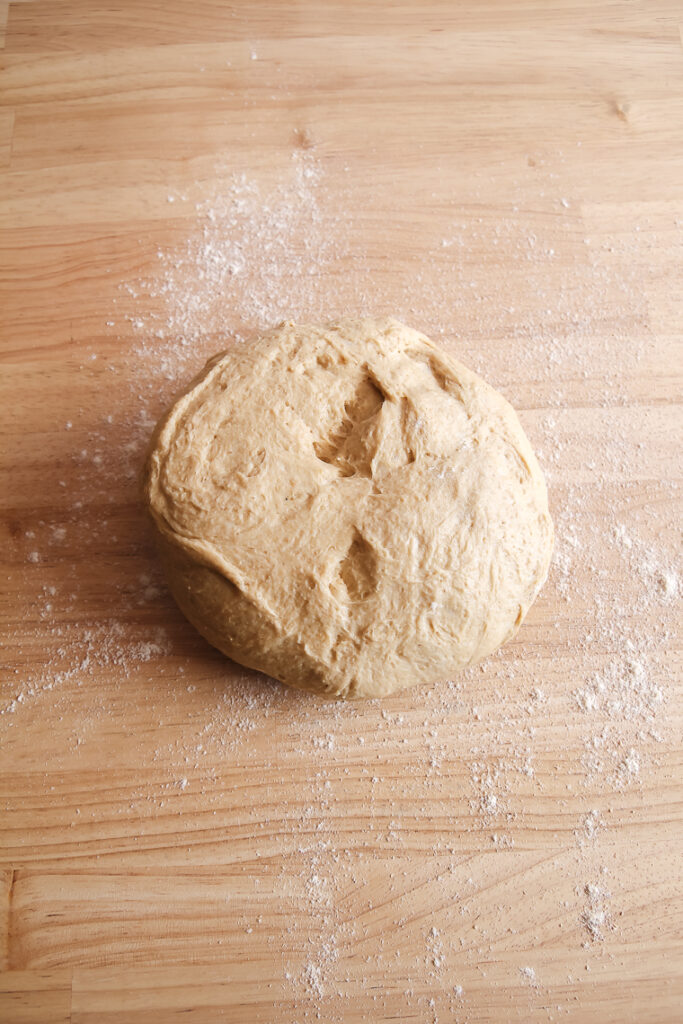
Grease the inside of your baking pans with softened butter (I apply it with a dry piece of paper towel) or oil. Turn out your dough onto a clean surface and divide into two equal pieces.
You can weigh the dough to make the two loaves exactly the same.
Lightly flour your counter and hands, and press out the first piece of dough into a round shape. Press all the air bubbles you can out of the dough (degas).

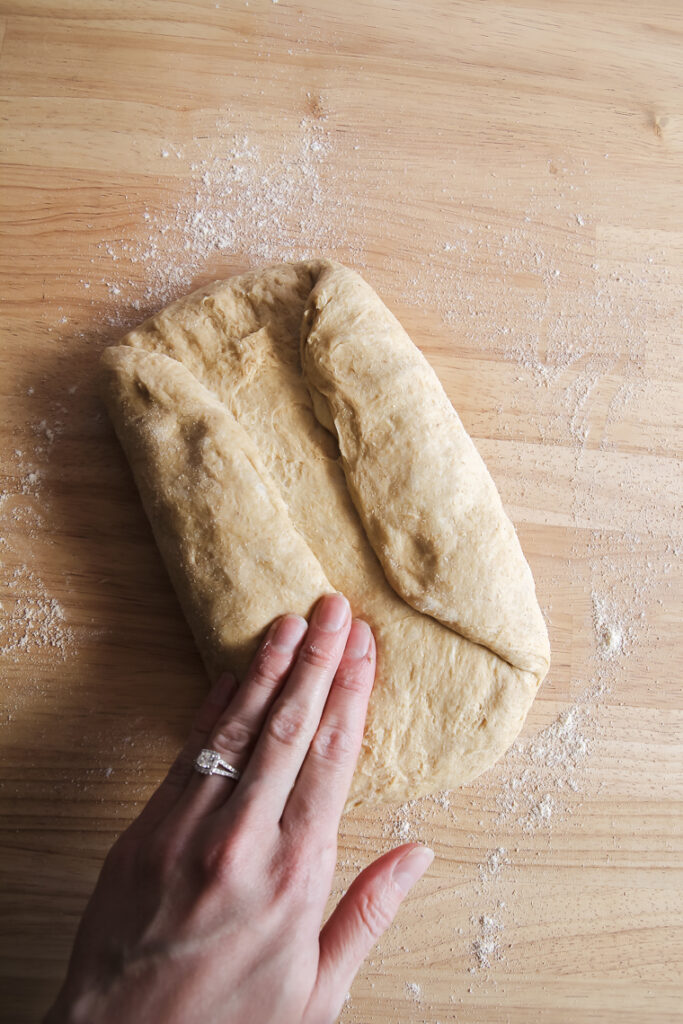
To shape, fold the two sides in towards the center.
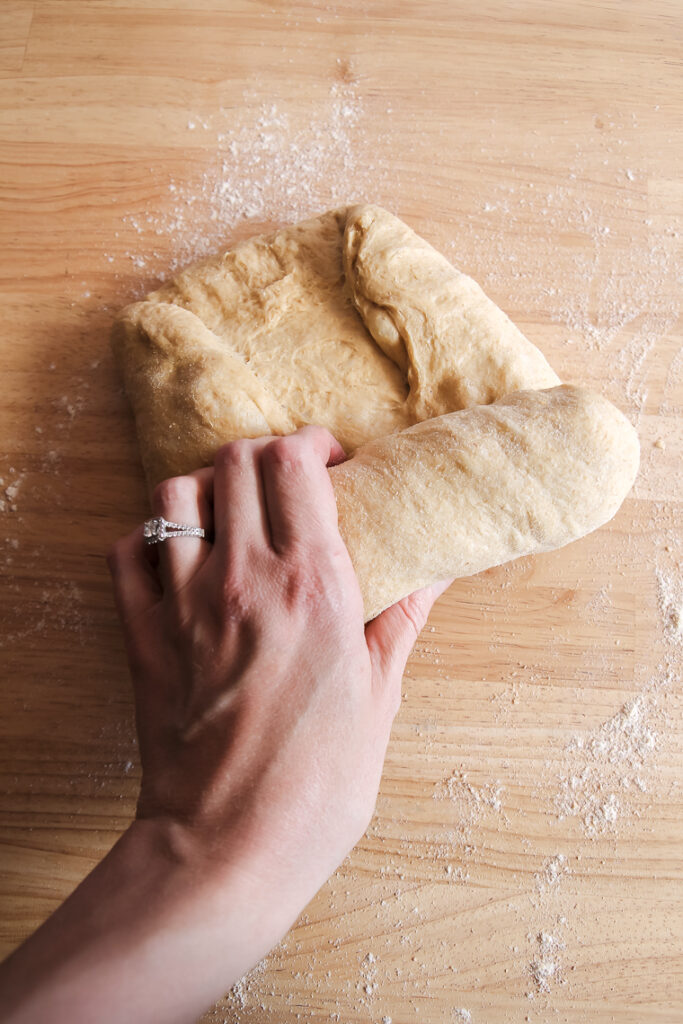
Then roll the loaf up from the bottom into a log, creating some tension as you go (but not so much that the dough tears).
Avoid adding excess flour while shaping.
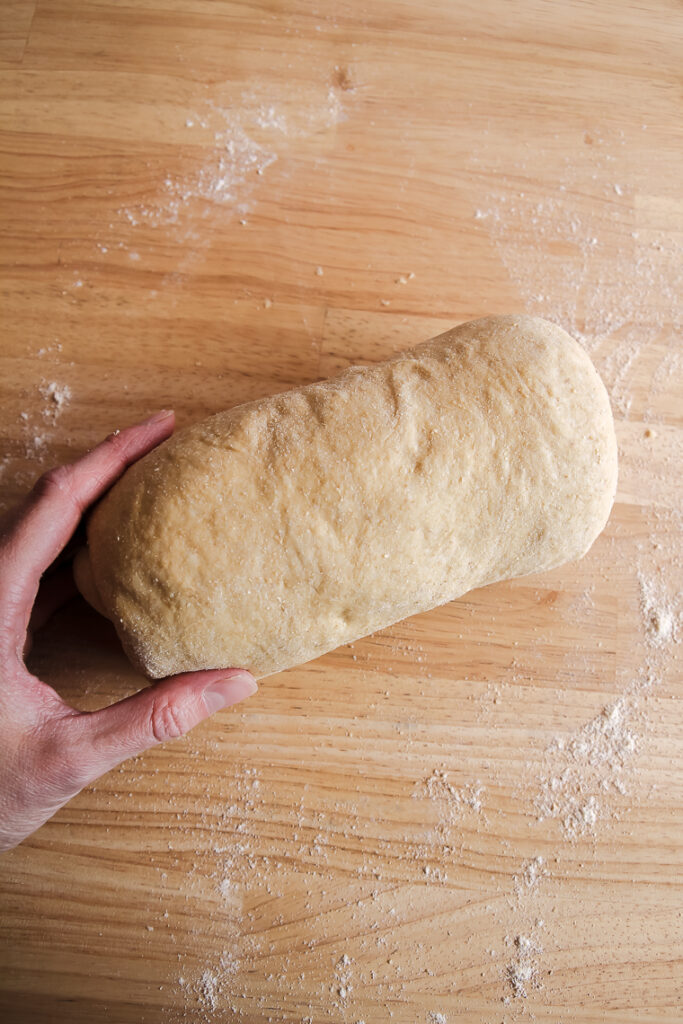
Place the loaf in the greased pan with the seam down (avoid pressing the loaf down into the pan). Then repeat to shape the second loaf in the same manner.
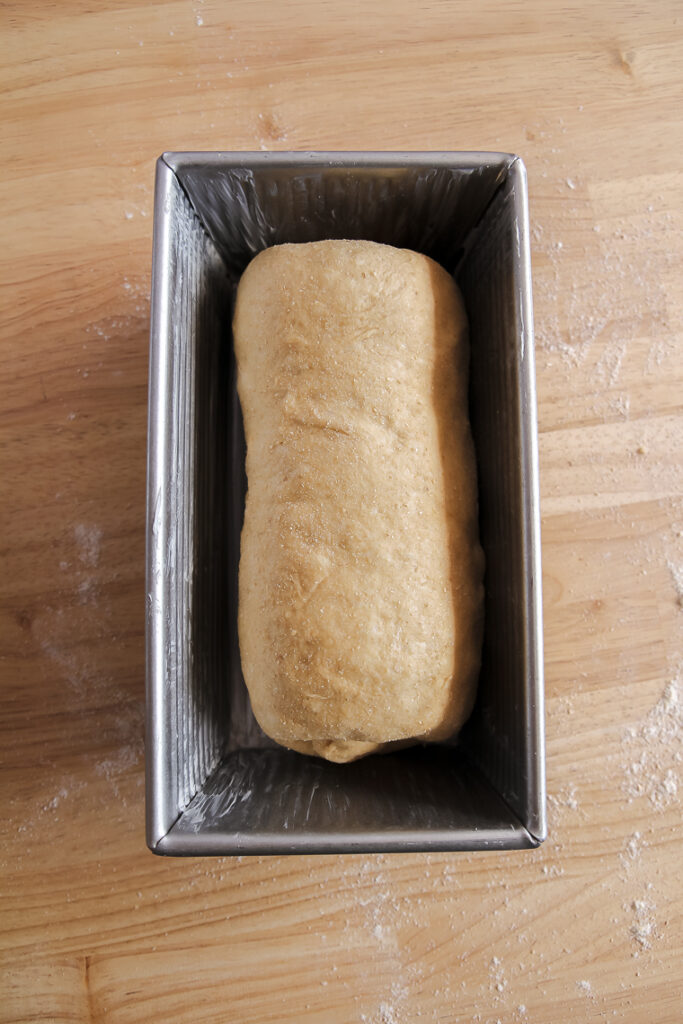
Step 5 – Proof
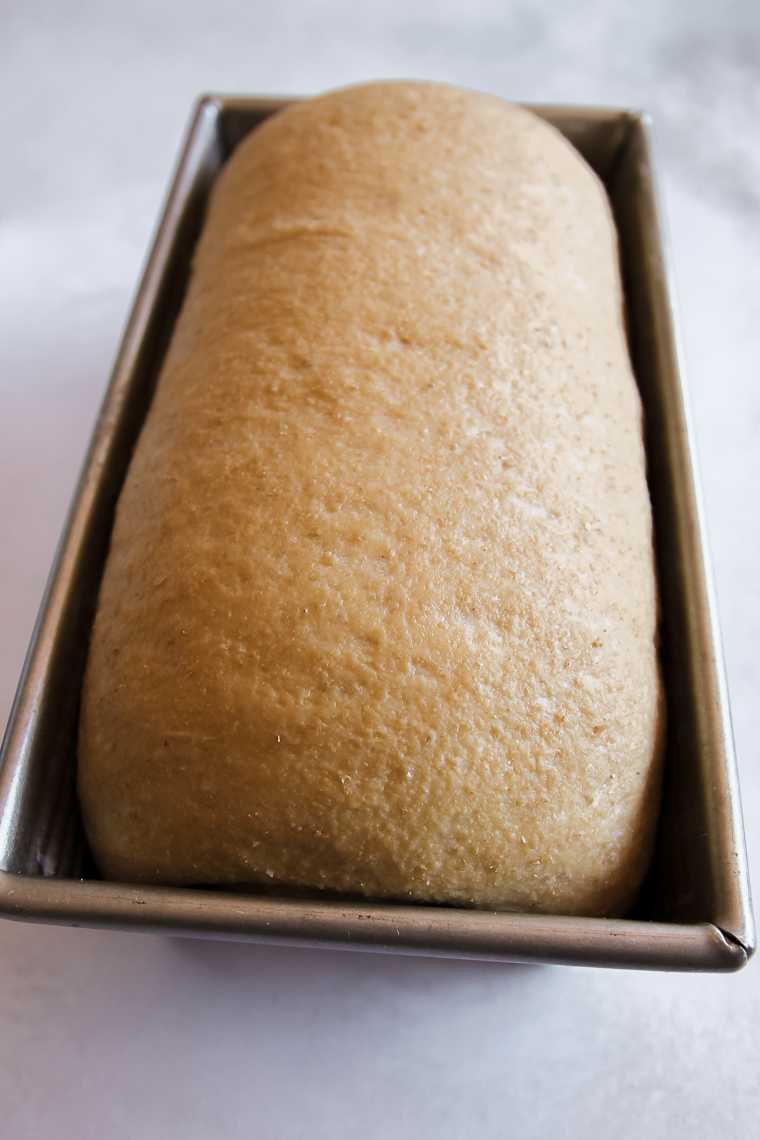
Cover the pans loosely with plastic wrap, and set them in a warm place to proof. If you’re using pullman pans, the dough should rise to about 3/4-inch below the top rims of the pans. Pictured here:
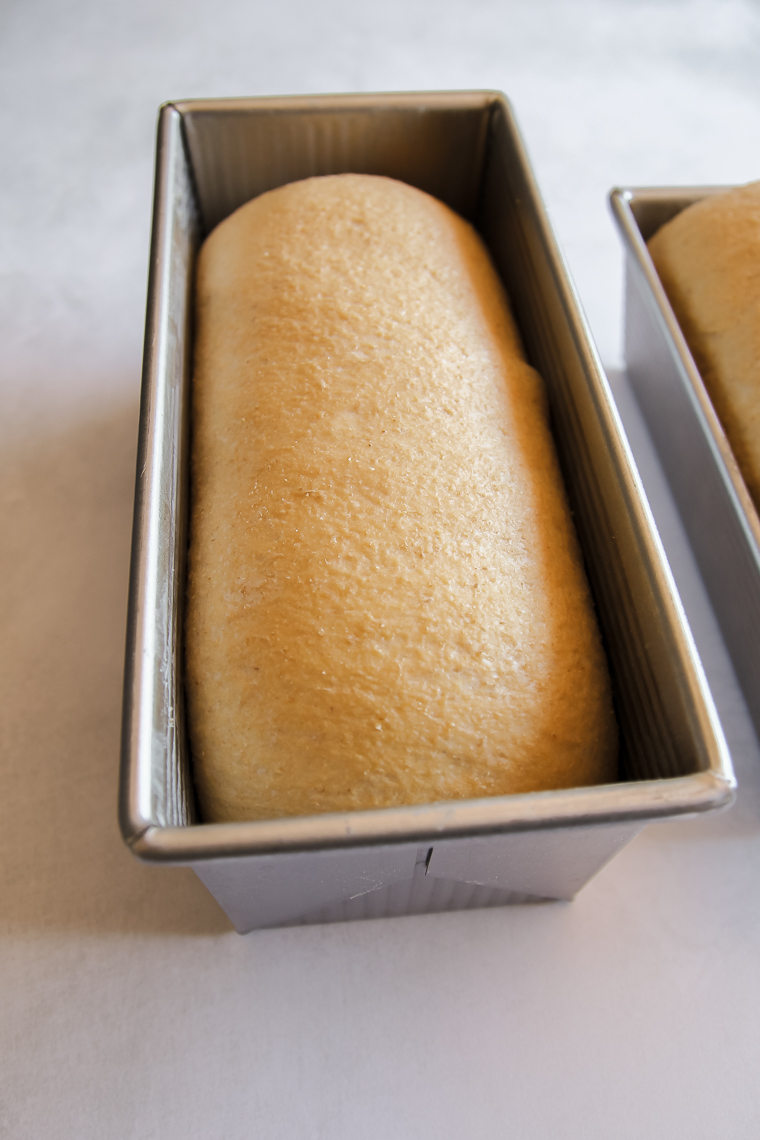
1-pound loaf pans, however, are a little smaller than pullman pans. If you’re using these pans, let the dough rise almost an inch above the rims of the pans before you bake the bread. Pictured here:
Don’t forget to preheat your oven to 350°F before the loaves are fully proofed.
Step 6 – Bake the Whole Wheat Sourdough Sandwich Bread
When the loaves are ready to go into the oven, remove the plastic, and gently brush the tops with milk using a pastry brush. The milk will make the loaves shiny and promote browning.
Finally, bake the loaves side-by-side on the center rack for 30-35 minutes or until the internal temperature registers 190°F on an instant-read thermometer.
Allow the loaves to cool in the pans for about 10 minutes, then you can turn out the loaves onto a cooling rack. Let the bread cool completely before you slice or store it.
How to Store Whole Wheat Sourdough Sandwich Bread
I don’t recommend you refrigerate bread. Instead, store it in an airtight container or bread bag at room temperature. I like these bread bags. They are nice and thick and can be reused.
For longer storage, freeze the cooled bread or slices, well wrapped, for up to 3 months. Leave at room temperature to thaw when you need it.
Leanna's 100% Whole Wheat Sourdough Sandwich Bread
A soft and fluffy 100% whole wheat sourdough sandwich bread that can even be made with freshly-milled flour! This recipe is listed in grams for consistency and is simple to knead in a mixer for a hands-off bulk fermentation.
Ingredients
Scald (Tangzhong):
- 30g whole wheat flour (see notes for flour options)
- 190g whole milk
Final Dough
- 220g ripe sourdough starter (100% hydration)
- 550g whole wheat flour (plus extra for dusting)
- 45g honey (or sub 60g granulated sugar)
- 250g whole milk (plus extra for brushing tops of loaves), lukewarm
- 2 large eggs (112g)
- All of cooled scald mixture from above
- 70g (5 tablespoons) salted butter, cold and cut into small cubes (plus extra for greasing pans)
- 14g kosher salt
Instructions
- Prepare scald (tangzhong): Add 30g whole wheat flour and 190g whole milk into a small saucepan. Whisk to combine. Set over medium heat and cook, stirring constantly to prevent burning on the bottom of pan, until mixture thickens to the consistency of thin mashed potatoes. Remove from heat and set aside to cool.
- Mix and rest: In the bowl of a stand mixer fitted with a dough hook add the ripe starter, 550g whole wheat flour, honey, 250g whole milk, eggs, and the cooled scald mixture. Mix on low speed until well combined. The dough will look sticky/shaggy. Cover and allow to rest for 30 minutes.
- Add butter, salt, and knead: After resting, add butter cubes and salt, then knead for about 6-8 minutes (on the lowest speed you can use without your mixer lagging), stopping to scrape the sides of the mixer bowl as necessary. Knead until the dough cleans itself off the mixer bowl to hold to the dough hook and looks taut, smooth and shiny. You should be able to stretch it dramatically into a very thin "windowpane" if you pull it with damp fingers after a minute of rest. If it's tearing when pulled and still rather sticky, continue kneading for a couple more minutes and check again.
- Bulk fermentation: When kneading is done, use damp hands to remove dough from mixer. Form into a ball, and place in a straight-sided container for bulk fermentation. Press the surface of the dough flat with a damp hand, cover, and mark the dough's starting point on the outside of the container with a dry-erase marker. Set in a warm spot until dough has risen by 75% (not doubled in size). (Bulk took me 3 hours with a final dough temp and ambient temp of 78°F (26°C).)
- Shape:Grease 2 small pullman pans or standard 1-pound loaf pans with softened butter or oil.Turn out dough onto a clean surface. Divide into two equal pieces (weigh for accuracy). On a lightly-floured surface with lightly floured hands, press the first piece of dough flat (degas) into the shape of a rough circle. To shape into a loaf, fold the two side edges slightly into the center, then roll the loaf into a log from the bottom, creating some tension as you go. Place the loaf seam-side-down in a greased pan (do not press loaf down). Repeat to shape the second piece of dough.
- Proof: Cover pans loosely with plastic wrap and set in a warm place to proof. Meanwhile, preheat oven to 350°F (176°C) with a rack set in the center. When fully proofed, the loaves should reach 3/4-inch below the rims of pullman pans or 1 inch above the rims of standard loaf pans. (Proofing took me 2 hours, 40 minutes at 78*F (26°C).)
- Bake: Without deflating the dough, brush the tops of the loaves with milk using a pastry brush. Bake loaves side-by-side on the center rack for 30-35 minutes until the internal temperature reaches 190°F (88°C). Leave bread in the pans to cool for 10 minutes, then turn loaves out onto a cooling rack to cool completely before slicing or storing.
Notes
Flour selection: Choose standard "whole wheat flour" for more "wheaty"-flavored and robustly-colored loaves. For a more mild flavor and color, choose a "white whole wheat flour" (used in bread pictured). If milling your own, mill either hard red wheat or hard white wheat berries on the finest setting. Weigh wheat prior to milling to make the exact amount of flour for the recipe. Mill 600g total for scald, final dough, and some extra for dusting the counter while shaping.
Starter notes: Use a whole wheat starter for true 100% whole wheat bread. A white starter will also work fine, or make some prepared starter the night before by mixing 20g starter with 100g whole wheat flour and 100g water. Allow to rise overnight and use in the morning once it's bubbly all the way through with a "yeasty" smell. This bread should come out with a mild flavor. If your bread is turning out too sour when you haven't over-fermented, you may have an issue with your starter maintenance.
Dairy-free option: You can replace the milk with an alternate milk or water, if you prefer. Replace the butter with equal grams neutral oil (like avocado or olive oil). Add oil with the other ingredients during the initial mixing. Kneading may take longer.
Optional loaf toppings: sprinkle the desired topping (rolled oats, seeds, wheat bran, or cracked wheat) in an even layer on the countertop. Pat the tops of the shaped loaves with water to dampen, then roll the tops through topping to adhere before placing bread in the pans. Skip brushing loaves with milk before baking.
Storage: Store bread in an airtight container or bread bag for up to 5 days. For longer storage, wrap loaf or slices well and freeze for up to 3 months. Leave at room temperature to thaw when needed.
Recommended Products
As an Amazon Associate and member of other affiliate programs, I earn from qualifying purchases.
-
 Heavy Duty Bread Bags with Ties
 -
Set of 2 Pastry Brushes
-
Cambro 4 qt Lid
-
Cambro 4 qt Container
-
OXO Good Grips Stainless Steel Scraper
-
Flexible Dough Scrapers
-
Hard White Wheat Berries
-
King Arthur, Organic White Whole Wheat Flour
-
USA Pan Bakeware Aluminized Steel Loaf Pan, 1 Pound
-
USA Pan Pullman Loaf Pan, 9 x 4 x 4, Aluminized Steel
-
Cooling Racks
-
Thermapen ONE Instant Read Thermometer
-
White Universal Plus Mixer (Use code ABERLEHOME for $20 off)
-
Bakers Math Kitchen Scale - KD8000


Nutrition Information:
Yield: 16 Serving Size: 1Amount Per Serving: Calories: 189Total Fat: 3gSaturated Fat: 1gTrans Fat: 0gUnsaturated Fat: 1gCholesterol: 28mgSodium: 367mgCarbohydrates: 35gFiber: 4gSugar: 4gProtein: 7g
*Nutrition information is not always accurate.
I’m so grateful for your comments, reviews, and questions! Your star ratings help others discover my recipes, and your feedback helps me make improvements. Thank you for your support!
I was almost ready to give up on sourdough with fresh milled flour because despite following many tried and true recipes from creators like grains in small places and just mill it my bread never turned out. This is the first recipe that produced a bread I am proud of. I love it so much and can’t wait to make this again for friends and family. Thank you so much!!!!!
That’s such a nice compliment! Thanks for trying the recipe, Jacob!
I’ve been making your bread for my grandchildren and they love it. I have a very important question that I would appreciate answered.
My grandson was just diagnosed with diabetes type one diabetes 🥺. We now have to count his carbohydrates very carefully.
The nutritional value at the end of your recipe says yield 16 servings, the carbohydrates are 35 g. per serving.
Am I assuming correctly that the 16 servings is for the TOTAL recipe? Or is it per loaf? I make TWO small loaves and each loaf gives me roughly 16 slices. In this case one serving is TWO slices!!!! Correct???
Thank you!
Anna Caldwell
[email protected]
Hi Anna, the nutrition info in the recipe card is calculated for 1/8 of a loaf as one serving (so yes, 16 servings is the entire recipe). I would doubt the card calculates precisely enough for someone managing diabetes, though. A source his doctor recommends would be best. So happy your grandchildren love the bread!
So excited to be trying this recipe for the first time! I’m assuming that I can do the second proof in the fridge if need be? Thank you for your detailed instructions!
Hi Alix, you can do that! Not sure if it would need to proof longer at room temperature afterward. The bread will turn out more sour as well.
I’ve been successfully making this recipe for some time. Yesterday’s batch disappointed. Slightly dense, lifting top crust, side split at top crust. Under proofed?
Hi Marcy, sounds like that may have been the case.
Hey I’m hoping to try this recipe tomorrow. And im wondering approximately how long does the first bulk ferment take?
I am having challenges in developing the gluten in the dough. I am using whole white white flour that I obtain from a independent farmer who uses organic practices. I halved the recipe and I use cream combined with water as I don’t have whole milk. Other than these changes, I followed your recipe. The dough would not come together in the mixer so I placed the dough on the counter, let it sit for a couple of minutes, and did several stretch-and-folds; placed it back in the mixer but it immediately fell apart. I placed it on the counter to do more stretch-and-folds, at which point I stopped. The dough failed the window pane test. Any ideas as to why this happened?
Hi Bridget, I’m sorry! I would suspect it’s the protein content of the flour you’re using (unless it has performed normally in other bread recipes). It might be lower in protein (make sure the flour isn’t labeled as a pastry flour or “soft” white wheat flour). Otherwise, over-mixing can cause dough to fall apart as well.
Hi Leanne
Thank you for the recipe. I tried it once and my husband and I really enjoyed it. It tasted great and stayed soft.
I had a problem the first time, and again right now, the dough is to wet. I added more flour last time, didn’t note how much, and I am adding extra this time, up to 2/3cup already and still sticky. Been needing for 20 min so far. Looks like I will have to add more flour. I am using Robinhood whole-wheat bread flour, I’m in Canada. What could be the problem?
Thank you for any help you can provide.
Take care,
Deanna
Hi Deanna! I’m sorry you were struggling with the dough being too sticky. It sounds like your flour isn’t absorbing liquid the way mine does… next time, you can try decreasing the milk instead of adding more flour.
Thank you, I’ll try that next time.
I’ll try that next time.
Silly Question…. If I triple this recipe to equate to 6 loaves, would I triple everything INCLUDING the Sour Dough Starter & Scalded milk/flour mixture.
I’ve read other recipes in the past that talks about only increasing the yeast to a certain point. Unsure if you have tried big batches of this recipe.
It looks amazing! I am so excited to try it. Seems like the best techniques I have seen out there, all put into 1 recipe.
Thank you for your time in putting this out there for us all.
Hi Jen! Yes, you would triple everything in the recipe including the starter and scald. I hope you enjoy the recipe!
I am so discouraged. I’ve been baking sourdough loaves for a few months now, and have yet to be successful, except for the one time I baked with white King Arthur all purpose flour instead of freshly ground grain. I’m buying heritage and ancient wheat berries and grinding them myself, and was excited to discover that you bake with home milled grains too.
I’ve tried this recipe twice now. First time, it bulk fermented fine but barely rose during proofing. The bread had good flavor but a very crumbly texture, like a dry quick bread. I attributed that to overmixing. After mixing 6 minutes with my Kitchenaid, it had pulled away from the bowl but tore instead of window pane, so I did another 2 minutes. Same result. After yet another 2 minutes, the texture had changed and it clung to the bowl and not the hook. It was very loose and sticky and terrible to work with forming a loaf.
Today I tried again. This time I mixed 6 minutes, then another 2. Window pane was weak (and my dough never looks “smooth, shiny and taunt”) but I didn’t want to risk destroying the gluten again, so I stopped at that point. Dough was much easier to work with but my loaf proofed poorly and looks nearly as bad as last time. Baked, the top is ever so slightly rounded (the first loaf was literally flat) but it’s rough and pocked, and the loaf is only 1.5 inches high. The texture is dense and a bit doughy, but not as fragile and crumbly as the last time.
What do you think I’m doing wrong? I have a good robust starter and followed your instructions carefully. The only unusual thing is that, because heritage berries are so expensive and hard to find, I’m blending Khorasan with soft white. I realize soft white isn’t recommend for bread because of its low gluten, but the ratio of SW to Khorasan I’m using yields a 15% protein flour, which is plenty high. I also wonder if my mill simply doesn’t grind finely enough. The flour is pretty silky, but still has some grit in it. Could that be the problem? I don’t want to give up, but I’m also growing weary of failure and eating flop bread.
Hi Christine! I’m sorry it’s taken me so long to reply to your comment. This particular recipe works with modern hard red or hard white wheat flour, because as you have found, soft wheats and ancients wheats just do not develop a stretchy gluten structure no matter how much kneading is done (even khorasan with its higher protein content). I hope you don’t give up! My advice would be to adjust your expectations for those special grains and search online for some recipes specifically developed for the grains you want to use. I’m sure you’ll get better results!
Hello! Thank you for sharing such a detailed recipe, I’m excited to use it. The nutrition info says “yield 8” so the info is essentially 1/4 of a loaf of bread, right? Since it’s two loaves? Thank you!
I just adjusted that to 16 servings… thank you for pointing out that mistake, Stephanie!
Hi, I’m going to try this recipe but was curious if I could use a mixture of hard red, einkorn, and rye and if you had a recommendation for the percentages of each! Thanks!
Hi Garris, if you want a very fluffy loaf, I would do a very small percentage of the rye and einkorn (like 10% of the total flour) since those grains don’t form gluten in the same way as hard red. You can do a greater percentage as long as you realize your bread will have a different texture and may not reach windowpane during mixing. Let me know if you try it!
The first time I made this, I did the following and it was perfect:
250g hard red
200g einkorn
100g rye
I’m making it again now with the following… we will see if it turns out because it was very sticky during shaping:
235g hard red
225g einkorn
100g rye
Trying this recipe today! I’m confused about your comment on feeding your starter at its peak rise. I have to feed it to GET it to peak rise so how do I feed it AT peak rise? I’m sure it’s something simple I’m missing but I just can’t wrap my brain around this.
Hi Carrie! That part was just talking about overall starter maintenance. Sometimes people struggle with overly-sour bread because they continually allow their starter to over-ripen (causing it to become acidic overtime) instead of using and re-feeding at its peak. I hope that makes more sense!
I didn’t read properly or something and only ended up making one loaf. Fingers crosses it still turns out okay. Do you have to divide this recipe? I have a 1.5qt glass loaf pan that I used to just make one. Should I split it every time in the future? I was getting slightly confused with the pan descriptions. But I am looking forward to seeing how this loaf turns out anyways!
Hi Ashley, a 1.5qt loaf pan is a standard size loaf pan. You will want to cut this recipe in half to bake only one loaf. 🙂
The milk for the dough should be scalded. From the web “Whey proteins in milk can interfere with the gluten formation in bread dough. Scalding the milk denatures these whey proteins, making it easier for the gluten to develop and create a strong, elastic dough.” I recall (50 years ago) my mother always scalding milk before adding it to bread dough. She wasn’t a sophisticated cook, but she could bake great bread.
Yet so many people are following this recipe with great success. Perhaps that’s because the ultra hybridized modern wheat most people bake with today is very different from heritage wheat. The new glutens are vastly different from what our ancestors ate before radical changes were introduced in the 60’s. Maybe the wheat your mother used (or HER mother who taught her) was heritage. I’m wondering if maybe heirloom gluten is more fragile and is damaged by unscalded milk, whereas modern gluten goes unscathed. This might explain why my 2 attempts at this recipe were failures, with very poorly developed gluten. I’m using heritage and ancient wheat berries.
The print version doesn’t specify “scalded” milk. It’s important to scald the milk. “Whey proteins in milk can interfere with the gluten formation in bread dough. Scalding the milk denatures these whey proteins, making it easier for the gluten to develop and create a strong, elastic dough.” From the web.
Can I use flax egg or chia egg instead of normal eggs?
I think either should work just fine, Sunita!
Hi Leanna
I have been making sourdough for a while. And not able to get the bread to rise I have red or white or fresh milled flour
I had to use gluten in my recipe and my bread still does not raise to its full extent You have any ideas to help me I would appreciate it many blessings Di.
Hi Di, if you’re sure your starter isn’t the issue and you’ve given the dough plenty of time to rise, it might be an issue with gluten development–especially if the loaves look like they are tearing on the top or deflating before they rise enough.
Make sure you’re milling a hard wheat even if you’re adding vital wheat gluten and knead as long as necessary until the dough is very smooth and stretchy. It’s also possible to over-work dough which can cause the gluten structure to break as well.
I was really interested in trying this recipe as I just got a mill, but the calories and carbs per slice was shocking! Any successful way to lessen?
Hi Lori, you’re right, this recipe has eggs, fat, milk, etc. I’ll be coming out soon with a loaf with less ingredients for those who would prefer. In the meantime, you can sub water for the milk and experiment with removing some of the enriching ingredients (like an egg or the honey) and adding more water as needed. The bread just won’t have the same texture, of course.
Thank you so much. I will let you know how my experimenting goes!
Oh my word, thank you, Leanna! I have never made bread, and just started experimenting with freshly-milled grains. I have never touched sourdough! It seemed like a gamble to hit all three milestones in one try – but I did, thanks to you! Your post was so detailed and easy to follow. I made it milk-free and I think I will reduce the liquids a wee bit next time. It was just much stickier throughout than yours appears in photos. But – but the final product looks and tastes PERFECT! Thanks for putting this out there for people like me!
Yay! I’m so happy to hear you had success on your first try, Louisa!
Hi there. This looks amazing. I really want to try it! My loaf pans are 9×5 tho. Do you have a recipe with measurement a for that? Thanks so much.
Hi Jodi, not exactly, but my pullman pans here are 9x4x4, if that helps you.
Hello. I don’t mill flour. Would I substitute with whole wheat or whole wheat bread flour?
Hi Debe, either whole wheat flour or whole wheat bread flour should work find, just don’t use whole wheat “pastry” flour.
I tried this recipe for the first time today and oh my goodness it is so good ! I got a grain mill for christmas and really wanted to make some good fresh milled bread that wasn’t using yeast. I had to knead for a bit longer and add some more flour which had made me so nervous because i really didn’t want a dense or crumbly loaf but they came out so perfect and delicious ! Super excited to make some more of these fresh milled flour recipes and continue making this bread here forward 🙂
Taelyr, I’m so glad the bread turned out well for you! Thank you so much for trying the recipe and leaving a comment!
Hi, I’ve made this twice because the flavor was so good I was willing to try again. This second time I reduced the milk by 30g. But it still came out so delicate that it cannot hold a slice so it just ends up crumbling into crumbs which stinks! Any idea how to make it hold it’s shape when sliced?
Hi Rachel, usually if the bread is crumbly, it means the gluten isn’t being developed all the way (needs more kneading). If you need more help, feel free to fill out the contact form to email me!
Thank you! That worked great! I mixed it for longer (maybe 11m) with the butter and salt and did a stretch and fold when starting the bulk ferment and it sliced without crumbling. Thank you!
Don’t skip the windowpane test. It’s very important to determine the gluten strength/structure.
I do not have a mixer with bread hook or any other mechanical equipment to mix. How do I mix this by hand please?
Hi Tom! You could do sets of stretch-and-folds after initially mixing the dough until enough strength is developed. I would do slap-and-folds up front too.
Hi there. I’m wondering the science behind “tangzhong”. I’ve never heard that term anywhere else. What’s the purpose of this step and what would happen if I omitted?
Hi Anne, it’s a Japanese term, but it’s also known as a scald. When a portion of the flour is cooked ahead of time, it gelatinizes and works as a natural dough enhancer. It softens the bread and extends its shelf life. I wouldn’t skip it if you try this recipe, since the dough won’t be able to absorb as much liquid without it. 🙂
Hi Leanna,
I’ve made this recipe now a handful of times and it’s wonderful. However, I am having a few things that aren’t working like you described. One, I will knead my dough for 20 minutes or more and still not achieve as good a windowpane as shown above AND I can not get my dough to completely clean off the sides like yours seems to. I wouldn’t mind these differences except I wonder if they play a part in my final dough. I seem to have cracks in the crust at the end Everytime and although that doesn’t effect flavour, it’s just not quite as pretty. Any suggestions?
Hi Maggie! It sounds like your flour may not be able to handle as much hydration as mine can. The cracking is usually due to the gluten not being developed enough (your dough is so sticky that your mixer can’t “grab” it properly). Are you using freshly milled? Next time decrease the milk by 20-30 grams and see if that fixes the problem. You can always drizzle in a little more milk after you begin kneading if you feel like you held back too much liquid.
Hi Leanna,
I like to use the 1.25 lb. loaf pans. I was going to increase the ingredients by 25% to fit my pan. My question to you is should I stay with 2 eggs or increase to 3 eggs?
Thank You
Hi Kim! If you want to be precise, just weigh fork-beaten eggs to get the right amount and save the extra for another use. Let me know how it goes!
Would you increase the Tangzhong by 25%? Thank you!
I love this recipe, but I have larger pans.
Hi Barb! You could definitely increase every ingredient by 25% to fill your larger pans.
Thank you!
Hi Kim,
Did you increase this recipe? I have the same size loaf pans. I wanted to see if the loaves came out and what your measurements totaled. Thank you!
Are you able to refrigerate or freeze the dough for later use?
Hi Nicole, I’m not sure about freezing the dough, but you can definitely refrigerate it after bulk fermentation before you shape it. The longer you leave it in the fridge, the more sour flavor it will take on.
Can you bulk ferment in the fridge overnight?
Hi Emily! Yes you can. I would refrigerate after bulk, and then shape the next day. Proofing will take longer if the dough is cold. 🙂
This looks amazing! In the steo by step instructions, I didn’t see when to add the salt. Before or after the 30 minute rest?
Hi Havah! The salt goes in with the butter after the 30-minute rest.
I prefer a strong sourdough flavor in my bread. Can I let this proof longer? If so, for how long and at what stage. I like to let my bread proof for at least 18 hours to have the sourdough do its work.
Hi Crystal! If you bulk ferment or proof much longer, you risk the gluten structure breaking down and negatively affecting the rise/texture of the final loaf. You could try placing the dough in the fridge overnight after bulk, and then shape and proof the next day to extend the process a little. I’ve found the bread turns out more sour if I use my starter a little past its peak.
Are your loaf pans 1lb loafs? I have a 1lb & a 1.25 lb. Will be making this tomorrow! Thank you!
Hi Barb, the instructions are for a 1lb pan. If you use your bigger pan, it just won’t need to rise as high during proofing. I’d love to hear how your bread turns out. 🙂
My bread came out perfect! It is delicious! This will be my go to sandwich bread! Next I am going to try your rolls with the Yundane method. Thank you so much!
I’m so glad to hear that, Barb! Thank you for trying the recipe!
I’m confused about the tangzhong. How much flour and milk do you use?
Hi Teresa, it’s 30g whole wheat flour and 190g whole milk for the tangzhong. There’s a printable recipe card at the bottom of the post with the exact amounts. 🙂
This is the most delicious whole wheat sourdough sandwich bread I have ever made and ever tasted! I even had the ferment over night in the fridge due to time and it still turned out great. Thanks so much for the fantastic recipe!
I love to hear this! Thank you for trying the recipe, April. 🙂
I had fantastic results with this! Soft, tender texture that my husband loves but the goodness of sourdough and whole wheat that I love! Thank you!!
I’m so happy to hear you both enjoyed the bread, Lori!
What a beautiful and very clear way you’ve presented this recipe! I will activate my starter tonight and make this recipe tomorrow with freshly milled flour and report the results! If your review section permits, I will include photos of my bread. Thank you for the opportunity to comment and ask questions! I value your recipe and responses!
Comments/Question
1. I would love to see your photos of this recipe made with freshly milled flour in future posts. It is clear to me you made it with the White Whole Wheat Flour, but it is always helpful to see bread made with freshly milled flour.
2. I would love to include seeds, partially ground, that give a noticeable texture to my sourdough bread. If you could give the weight percentage for seeds, etc. to incorporate into the recipe, I would be able to make sourdough sandwich bread exactly as we enjoy it most!
3. I love it that this recipe bakes at 350 degrees. Several other sourdough sandwich bread recipes on the web that I have made bake at a higher temp and longer bake time and the bread ends up with a much darker thicker crust that we like.
4. Why are eggs included in the recipe? Is it necessary to include the eggs?
Hi Evelyn, thank you for your comment! The bread in the photos was indeed made with freshly milled hard white wheat and a starter with freshly milled hard white as well. All of the recipes in my “home milled flour” category were made with flour that I ground in my Mockmill. 🙂 If you want to add seeds, you could probably add them the way you usually do for the same size loaf. Eggs are added to get the texture you see here, but you can leave them out if you need to. You would just have to add more milk or water to the dough to compensate for the loss of liquid. You won’t be able to upload photos to the comments section, but you can email me at leanna(at)aberlehome(dot)com
Love this recipe. I used an egg substitute, and it worked fine.
Hi! I just made the loaves on this sourdough fresh milled flour recipe. I’m excited to taste but I’m so sad my loaves split on the sides during baking. I followed the recipe instructions on folding exactly. I really hope I can figure out why bread is always splitting.
Hi Julie! Splitting can be caused by under-proofing, or more commonly with freshly milled flour, from not kneading long enough. Hopefully the splitting wasn’t too dramatic and the bread still tasted delicious! Thanks for trying the recipe.
Hi Evelyn. The eggs, sweetener and milk make it a ‘pain de mie”, a French term for a sandwich bread with a soft crumb and thin crust. Many years ago it was also called ‘enriched bread’ as it boosted up the nutrients in the bread. This is the best sourdough pain de mie I’ve made so far.