This post may contain affiliate links. See my full disclosure. As an Amazon Associate, I earn from qualifying purchases.
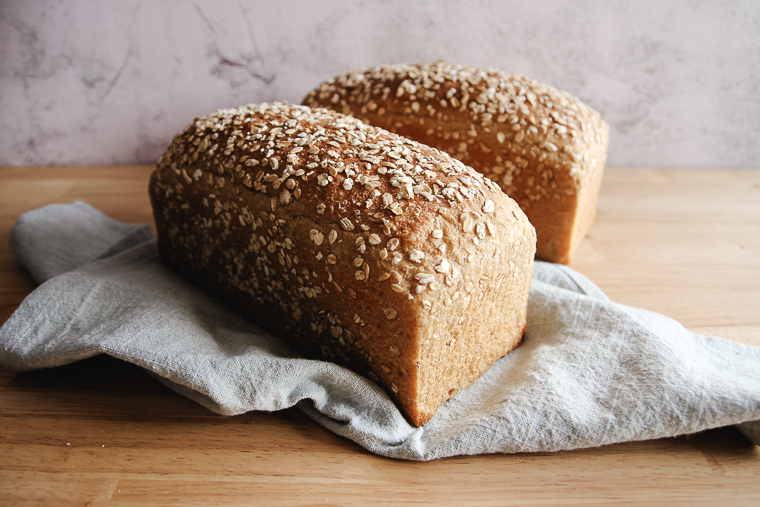
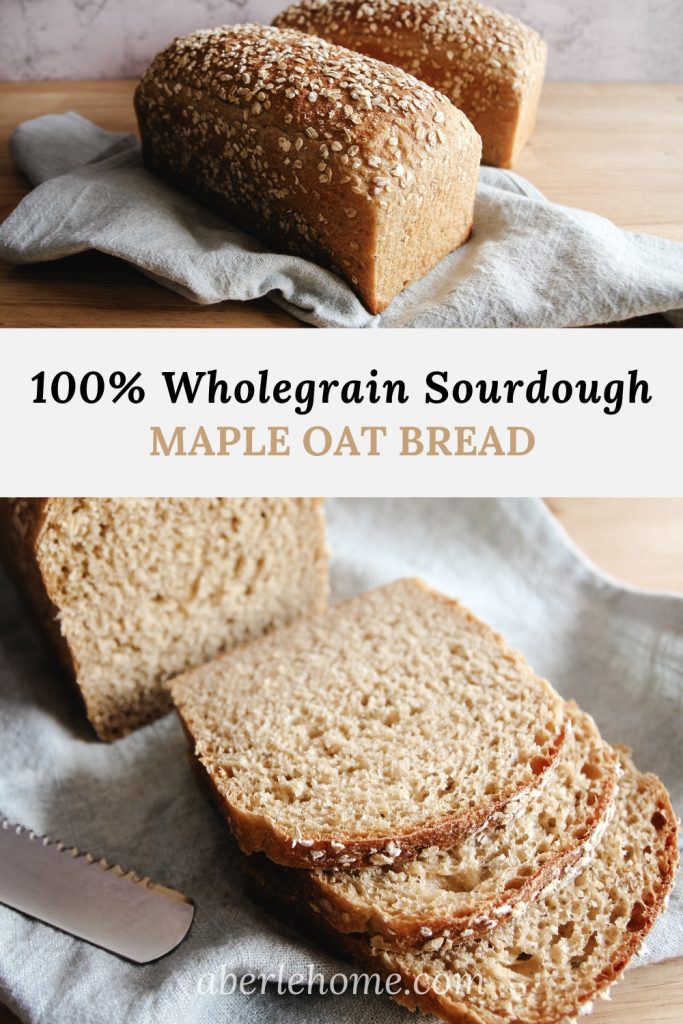
Wholegrain maple oat sourdough bread is softened with an easy oatmeal porridge. A one-day baking schedule makes this healthy recipe even better! Freshly milled flour can be used for optimal flavor and nutrition.
This oat porridge bread recipe marries the health and flavor benefits of both sourdough and wholegrain flour!
With all the fiber and nutrition this sourdough bread contains, I love offering it as breakfast for my girls before the start of our homeschool day.
We also enjoy it as a sandwich bread or to serve alongside dinner.

This recipe is vegan with no eggs or dairy.
It comes out with the perfect soft and chewy texture thanks to the oatmeal porridge, extra virgin olive oil, and real maple syrup.
And of course, there is no yeast since it is naturally leavened with sourdough starter.
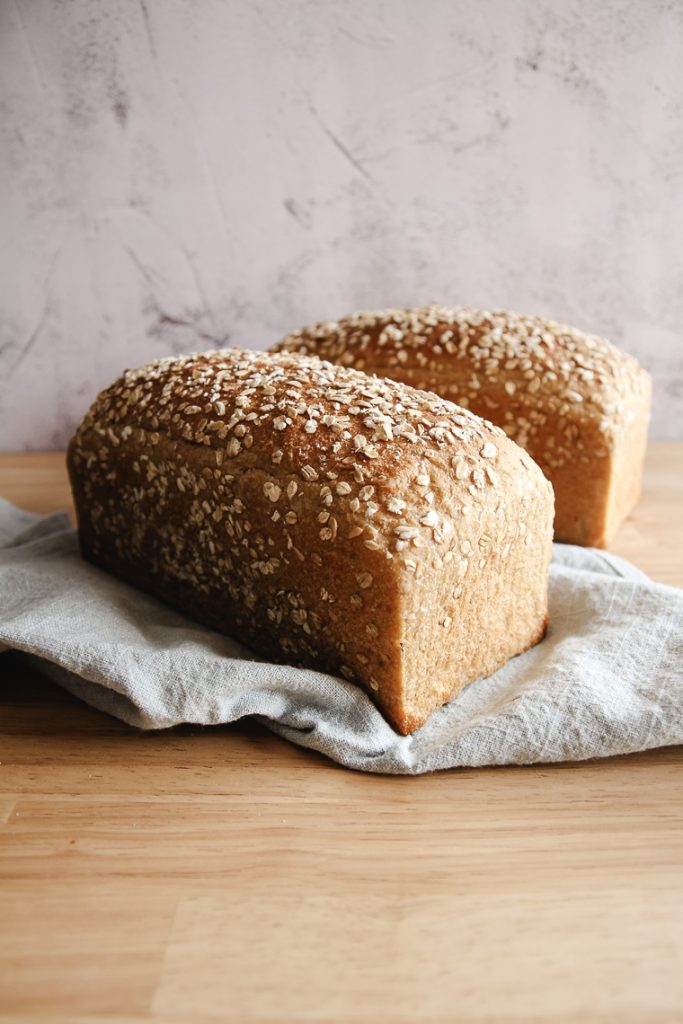
This recipe yields two pan loaves since the bread freezes beautifully, but you could always cut the recipe in half if you only want one loaf.
Starter Notes
If you use a properly maintained starter right at its peak, your bread should be only mildly sour.
You can use a white flour starter or a whole wheat starter. You can also refresh a portion of your white flour starter with whole wheat flour in preparation for this recipe.
No Stretch-and-Folds
No stretch-and-folds are required during bulk fermentation. The hands-off rise time can be so helpful on busy days.
The dough comes together best in a mixer with a dough hook. I use my Bosch Universal Plus mixer. It handles large batches of dough well.
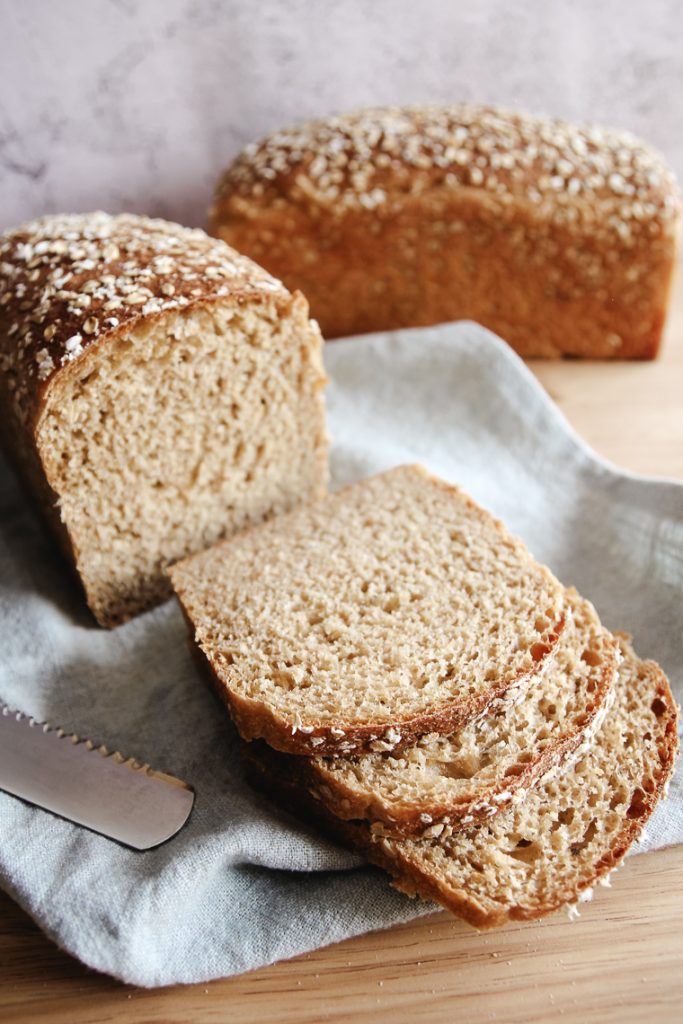
The kneading properly develops the gluten in the wheat for the perfect soft, yet slightly chewy, texture.
Oat and Flour Notes
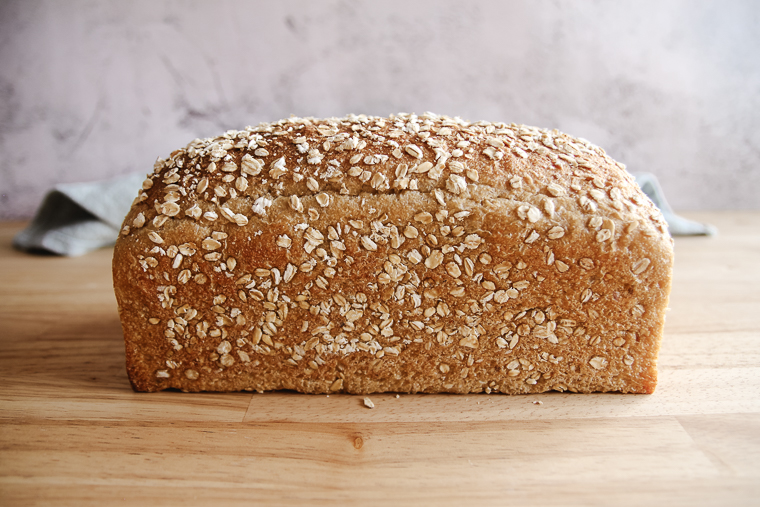
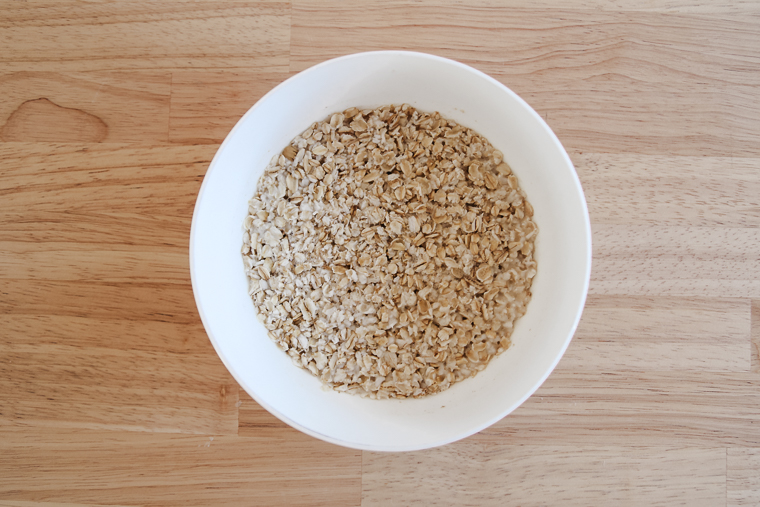
I use quick oats because I like the texture best for this maple oat sourdough bread.
It only takes a minute of cook time to prepare them for the recipe. I roll the loaves in more oats after shaping.
As I’ve already mentioned, I mill my own flour with my countertop stone mill.
I’ve tried both hard red spring wheat and hard white wheat berries for this recipe, and both are delicious! (Pictured is this post is hard white.)
Hard white wheat is still a whole grain, however it has a lighter color and more mild flavor than traditional red wheat.
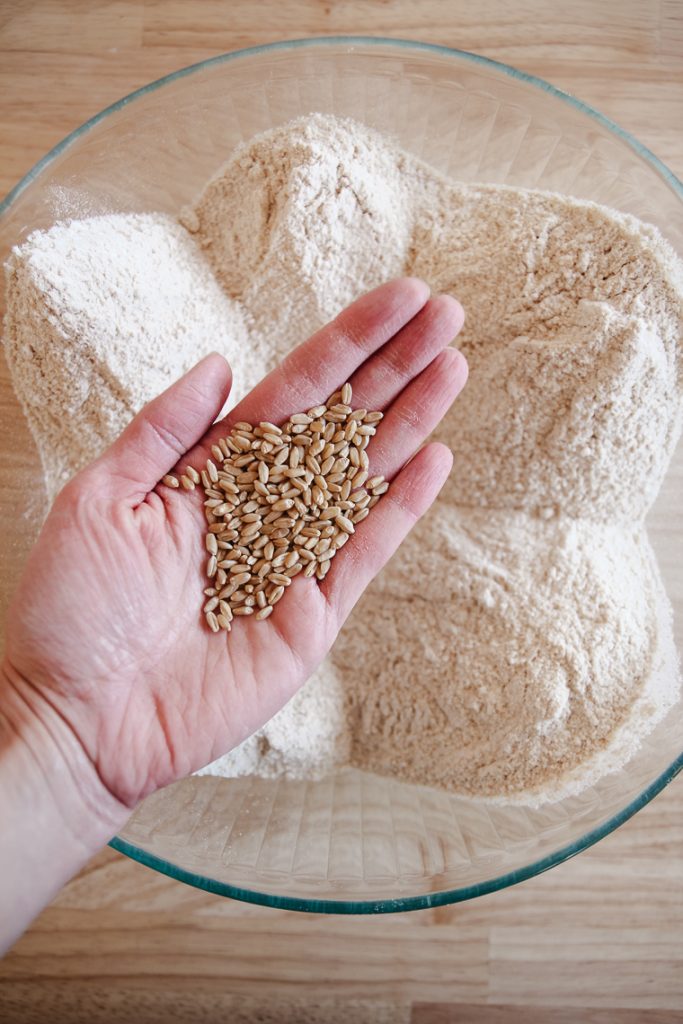
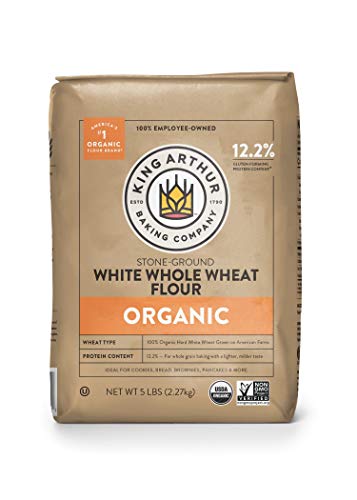
Of course, you can purchase whole wheat flour or white whole wheat flour if you don’t mill your own.
Maple Oat Sourdough Bread Baking Schedule
Although you can retard the dough in the fridge overnight after bulk fermentation (cutting bulk a little shy of doubling), I prefer to keep to a one-day schedule for the most mild sourdough flavor.
*The temperature of your dough and kitchen will affect how long each step will take.
I bulk fermented and proofed between 69 and 77°F with a final dough temp of 74°F after kneading. If your dough/kitchen is cooler, expect the dough to rise slower.
Approximate timing:
- Autolyse flour (oat porridge is prepared at this point): 1 hour, 5 minutes
- Mix remaining ingredients and knead: 20 minutes
- Warm bulk rise: 5 hours, 15 minutes
- Divide and shape: 10 minutes
- Proof (77°F): 2 hours
- Bake: 45 minutes
I fed my starter right before bed with a higher ratio of flour and water to starter so it was ready to go the next morning after the autolyse.
I started the dough early in the morning and baked almost 9 hours later.
Tips for Making Maple Oat Sourdough Bread
- Use a hard wheat flour for this recipe (I imagine you could replace a portion of the flour for a different kind of wheat or other grain, but I haven’t tested this yet). If you are milling your own wheat, mill on the finest setting.
- Watch the hydration and knead to a dramatic windowpane for the best texture! Without proper gluten development, your bread will achieve less rise and have a more dense, crumbly texture. I share details in the step-by-step instructions below.
- Make sure your starter is healthy and at its peak when you add it to the recipe.
- If your home is chilly, it might be worth placing your dough in the microwave with the door ajar so the light can keep your dough warmer.
Recommended Equipment
- Digital kitchen scale (this one is my favorite)
- Mixer fitted with a dough hook (I love my Bosch Universal Plus for bread; sometimes KitchenAid motors give out with larger batches of wholegrain dough)
- 4-quart Cambro container and lid for bulk fermentation (or a large bowl)
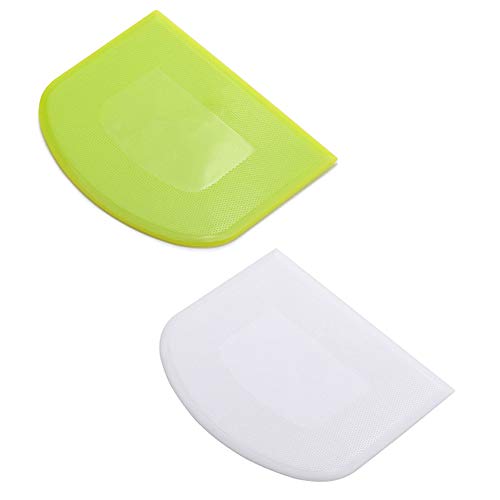
- Bench scraper
- Flexible dough scraper
- USA small pullman pans (can be used with or without the lids; a standard-size loaf pan can also be used if that’s what you have)
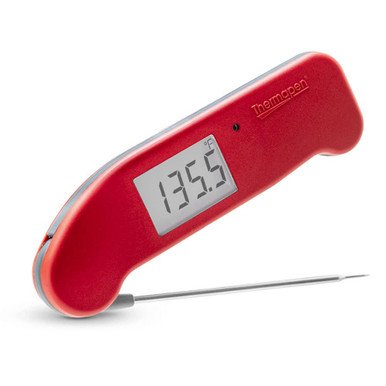
- Instant-read thermometer to test dough temp and doneness (this one is my favorite)
- Cooling rack
How to Make Maple Oat Sourdough Bread – Step by Step
Step 1 – Mill Flour, Autolyse, and Make the Oat Porridge
Since my flour is so warm after milling, I add cold water to keep it from fermenting too fast. If you are using store-bought flour, you can use lukewarm water.
Add the real maple syrup and 550g of water and mix until all the dry flour is absorbed. Cover and let the mixture rest for 1 hour (autolyse).
This rest helps the flour to fully absorb the water and begin to develop gluten for easier kneading. The dough will be quite stiff at this point.
Meanwhile, you want to prepare your oat porridge so it has time to cool down before you add it to the dough.
Just add quick oats and water to a cereal bowl and microwave for 1 minute on high. (You can do this on the stove, if you like).
The cooking process softens the oats so they won’t pull moisture from the dough.
Cover the bowl with plastic wrap and set it aside.
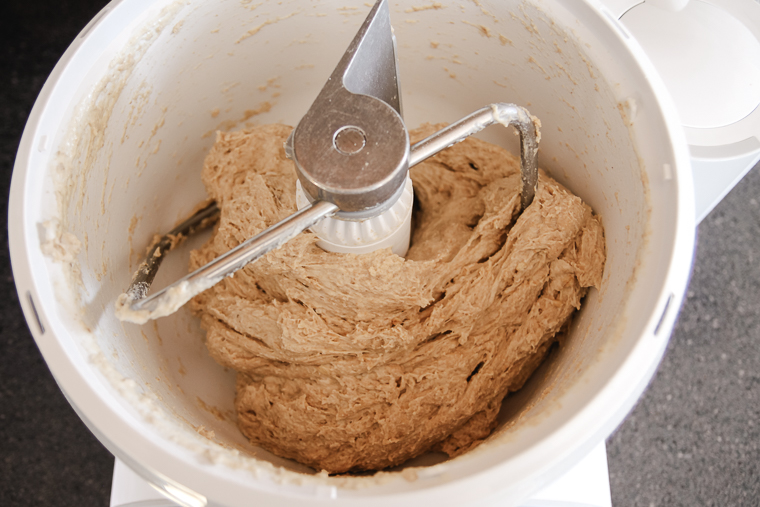
Step 2 – Mix in Remaining Ingredients and Knead
After the dough has rested, mix in the oat porridge, starter, olive oil, and salt.
Once the dough has come back together, it’s time to knead the dough.
I want to point out that flour can be fickle as far as how much water it is willing to absorb.
There can be protein differences between aged flour, freshly milled flour, batches of flour, and so forth. So we’re going to hold back some of the water at first and see if our dough can handle more.
We want the dough to be as hydrated here as we can get it without it being so loose that we have to do an extraneous amount of kneading.
Another benefit of adding less water at the beginning of mixing is that the dough ultimately develops its gluten structure faster and easier.
My method for achieving proper hydration/gluten development:
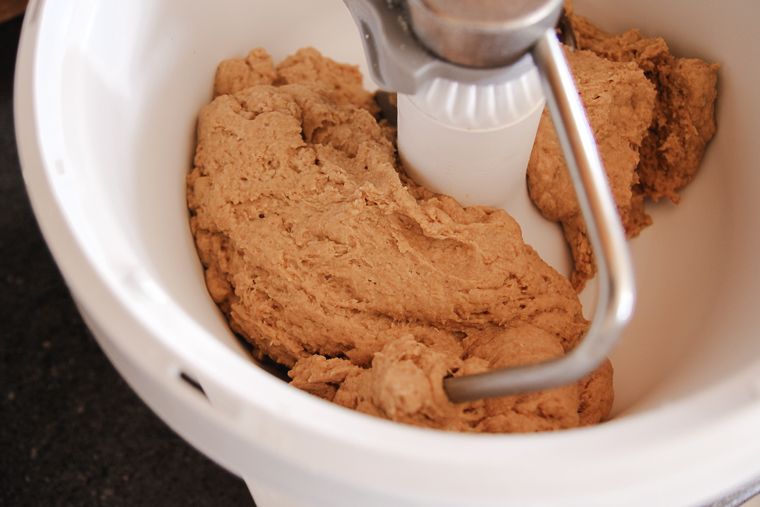
Knead on low speed, and increase the speed only if your mixer is lagging. After the first 5 minutes of kneading, observe how the dough is behaving in relation to the bowl.
If it’s cleaning itself off the sides of the bowl at this point and is tightening up (pictured below), it can likely handle more liquid (if it’s still sticking at all to the bowl after 5 minutes of kneading, however, do not add additional water!).

Add in 10 grams of water and knead. (Any time you add more liquid, it will take the dough a minute come back together.)
Check the dough again. If it’s still cleaning itself off the bowl, add 10 grams more water. If it’s at all sticking to the bowl, do not add additional water.
I like to stop at 570 grams of water.
At this point (for my flour) the dough is still cleaning itself off the sides of the bowl and hasn’t become unworkably sticky, but it has loosened considerably as if it could almost begin sticking any moment. It’s extensible, meaning if I were to pull on it, it would not feel “tight” like it’s resisting me.
Once you feel your dough has reached the proper consistency, continue kneading for a few minutes until the dough can be pulled to a thin windowpane with damp fingers (especially after it rests for a minute or two).
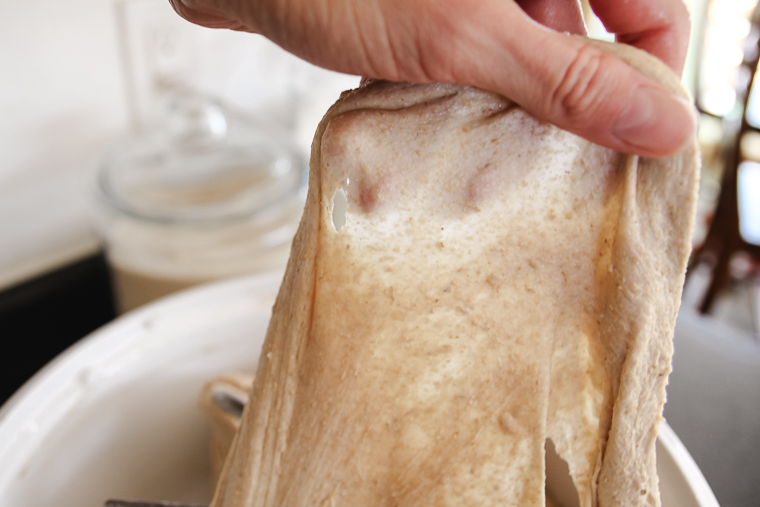
I kneaded for a total of 10 minutes, which is not bad for freshly milled flour!
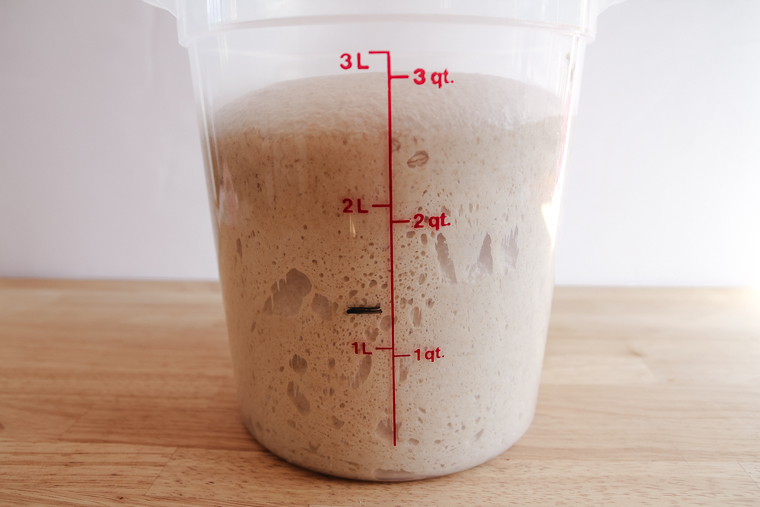
Step 3 – Bulk Ferment (Double in Volume)
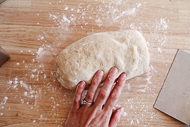
After your oat sourdough bread dough is done, dampen your hands.
Pull the dough carefully from the mixing bowl and form it into a rough ball. Place it in a container for bulk fermentation (the first rise).
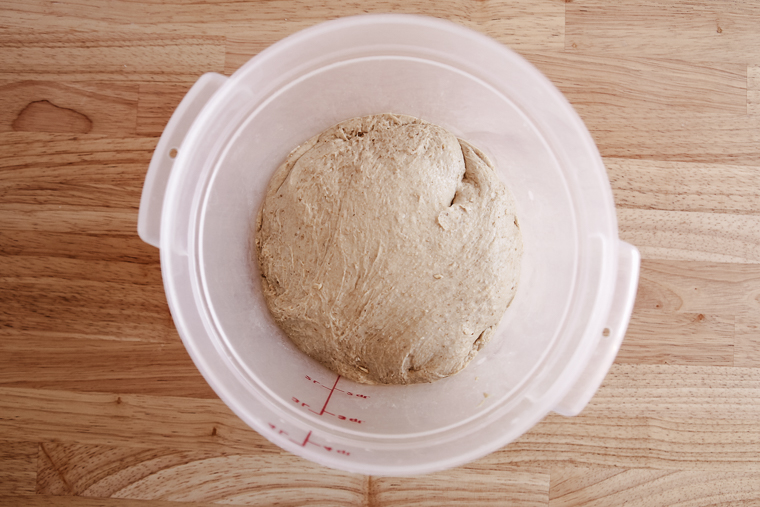
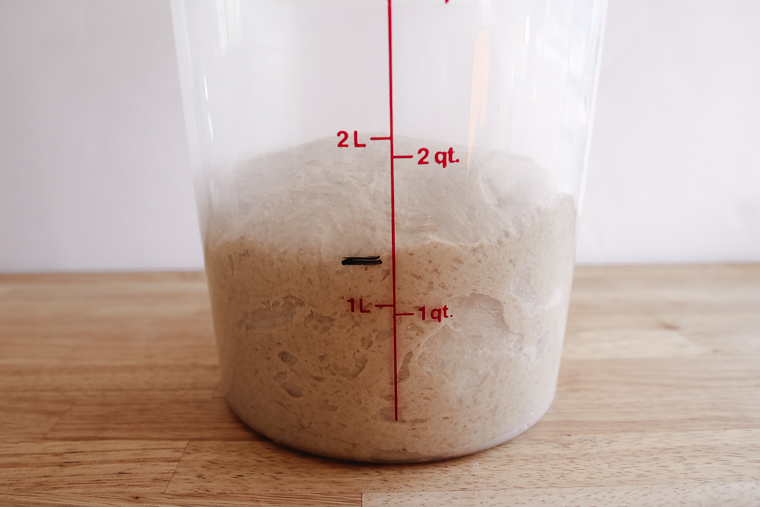
I’ve been using this 4-qt Cambro container for my doughs lately. It’s so much easier to judge how much the dough has grown. I mark the starting point with a dry-erase marker.
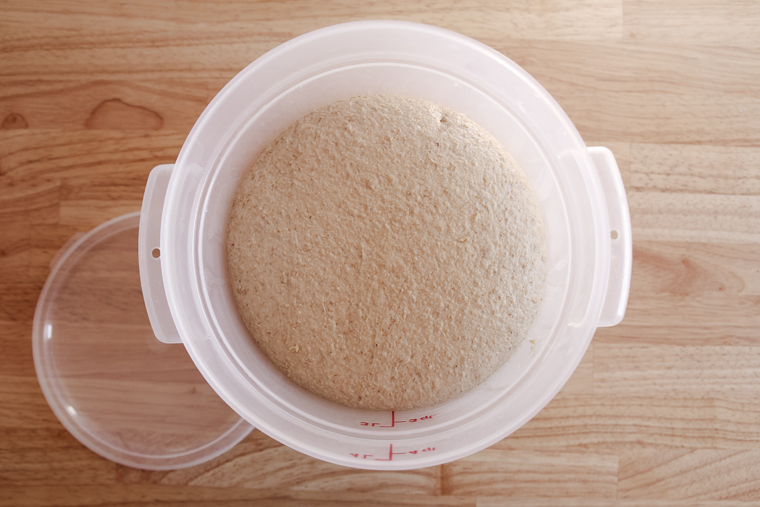
You can definitely use a large covered bowl if that’s what you have!
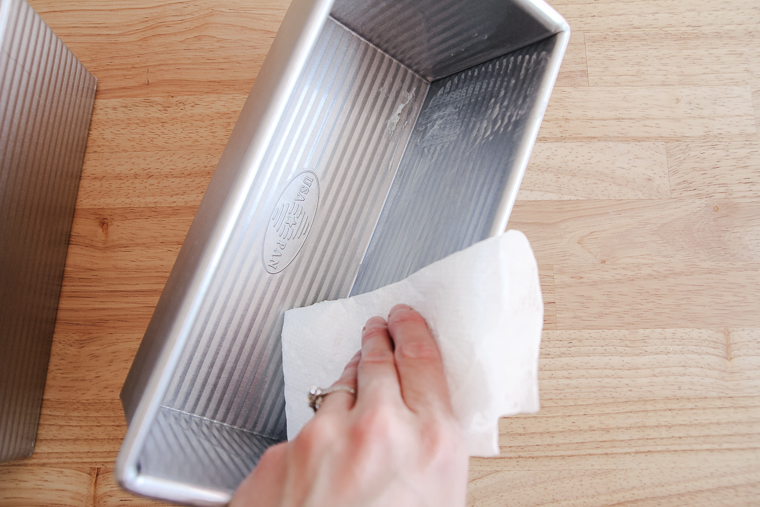
Step 4 – Grease Pans, Divide & Shape
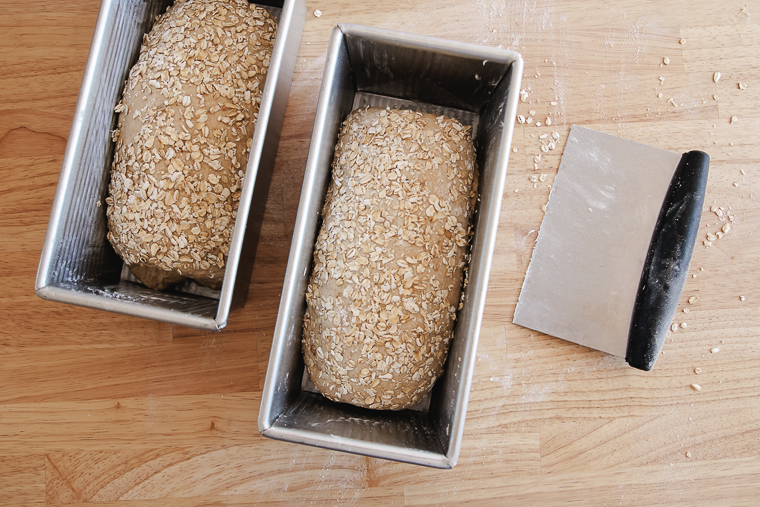
I use USA small pullman pans without the lids for this recipe (I like the shape it gives my slices). You can use the lids if you like.
Standard-size loaf pans are fine too! The bread will just show taller above the rims.
Grease your baking pans of choice with olive oil or softened butter. I just use a folded piece of paper towel to apply.
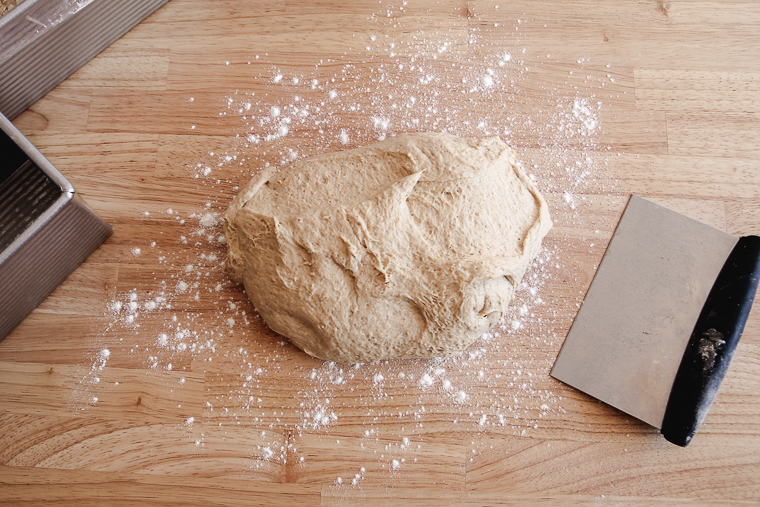
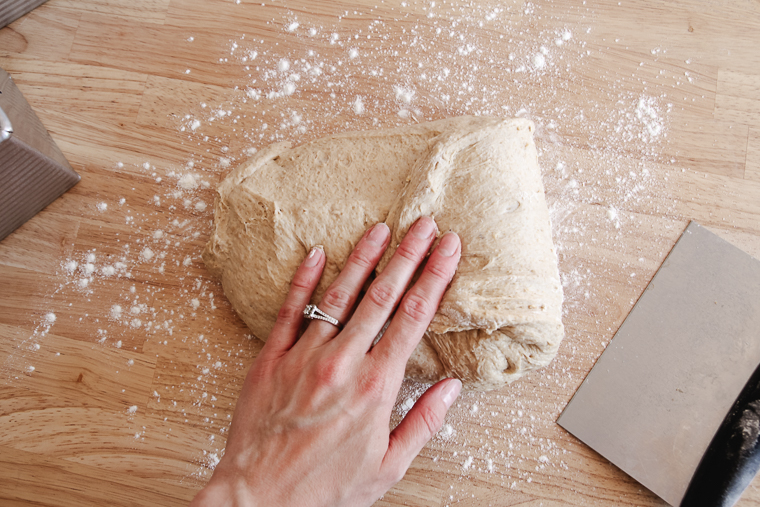
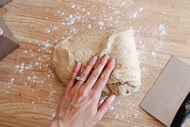
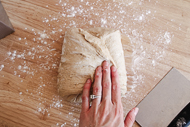
Next, turn out your dough onto a lightly floured surface–do not degas it.
Use a bench scraper to divide it in half (you can weigh each half if you want your loaves to be exactly the same.)
Make sure there’s still a little flour under the first half of the dough.
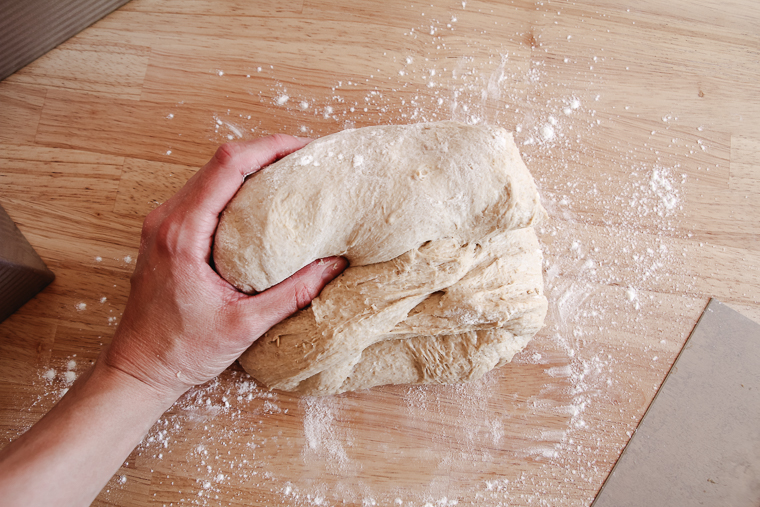
Fold the two sides over each other like a sideways letter. Then gently roll the dough down from the top (starting with an open edge) into a cylinder-shaped loaf.
Repeat with the second half of the dough.


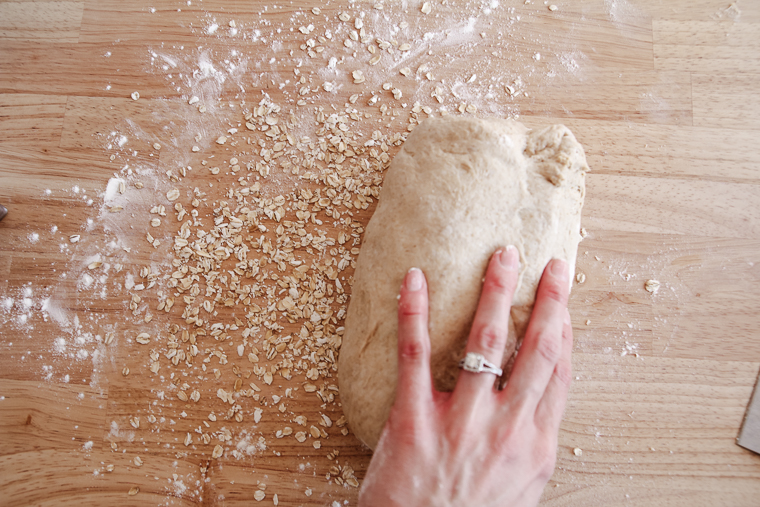
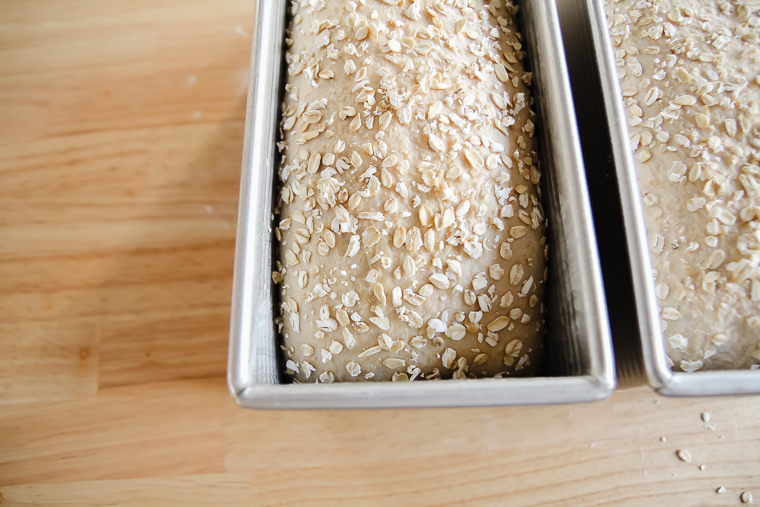
To top with oats: pat the loaves with a little water.
Sprinkle your counter with some quick oats, then roll the loaves through the oats so they adhere to the tops and sides of the loaves.

Gently set your loaves top-side-up into the prepared baking pans. Do not press the loaves down into the pans.
Step 5 – Proof
Cover the pans with plastic wrap, and allow the loaves to proof in a warm place until the dough is just below the top rims of the pans.
If you’re using standard-size 1-lb loaf pans, the loaves will need to rise an inch above the level of the pans. Do the poke test to determine when the loaves are fully proofed.
Don’t forget to preheat your oven to 425°F before the bread is done proofing.
Step 6 – Bake the Maple Oat Sourdough Bread
Bake for 15 minutes at 425°F, and then without opening your oven door, lower the temperature to 375°F for the last 30 minutes.
The bread should reach an internal temperature of at least 200°F when it’s done. You can test the centers with an instant-read thermometer.
Allow it to cool completely before slicing or storing. You can turn the loaves out of the pans after they cool for 10 minutes or so.

How to Store Maple Oat Sourdough Bread
This bread will stay fresh wrapped on the counter for about three days. Toasting will revive it if it has started to dry out.
It freezes very well whole or sliced. Leave a frozen loaf at room temperature for several hours to thaw (you can first microwave it until mostly thawed if you’re in a hurry to use it.)

Maple Oat Sourdough Bread
This wholegrain maple oat sourdough bread is softened with an easy oatmeal porridge. A one-day baking schedule makes this healthy recipe even better! Use a mixer for the best results.
Ingredients
Oat Porridge
- 65g quick oats (plus more for topping loaves)
- 150g water
Main Dough
- 550-570g water (use cold water for home-milled flour, lukewarm for store-bought flour)
- 830g whole wheat flour (see notes)
- 50g real maple syrup
- Cooled oat porridge from above
- 164g ripe sourdough starter (100% hydration)
- 40g extra virgin olive oil
- 18g kosher salt
Instructions
- Autolyse flour and prepare oat porridge: Add 550g water, flour, and maple syrup to the bowl of a mixer fitted with a dough hook. Mix on low speed until all the dry flour is absorbed. Cover and allow to rest at room temperature for 1 hour. Meanwhile, mix 65g quick oats with 150g water in a cereal bowl and microwave for 1 minute on high (or cook on the stove in a small pan). Cover and set aside to cool.
- Mix: To the autolysed flour mixture, add the cooled oat porridge, ripe starter, olive oil, and salt. Mix on low speed until well combined.
- Knead: Knead on low speed for 5 minutes to start (use a higher speed only if your mixer is lagging). If dough has cleaned itself off bowl by this time, add 10 more grams of water (if sticking at all to the mixing bowl, do not add additional water!). Mix until the dough comes back together. If dough continues to clean itself off the bowl, add another 10 grams of water and knead to combine. I usually stop at 570g of water as long my dough feels loose and extensible like it could begin sticking at any moment, but is still able to keep its structure and clean itself off the sides of the mixing bowl. Knead for a few more minutes until the dough can be pulled to a thin windowpane with damp fingers.
- Bulk ferment: With damp hands, remove the dough from the mixer, form into a ball, and place into a large bowl or Cambro container for bulk fermentation. Cover and leave at room temperature until dough has doubled in volume. (Bulk took me 5 hours, 15 minutes with a final dough temp of 74°F and an ambient temp of 69-77°F. It will take longer if your dough/room temp is cooler.)
- Divide and shape: Grease two small loaf pans or small pullman pans with olive oil or softened butter. Turn out the dough onto a lightly floured surface (do not degas) and divide in half (can weigh dough, if desired). To shape the first loaf: pull the right and left sides of dough over each other like a sideways letter. Then gently roll the dough into a cylinder shape from the top or bottom (an unfolded edge) to form a loaf. Repeat to shape second loaf.

To top with oats: Pat the tops and sides of loaves with a little water to dampen. Sprinkle quick oats in an even layer on the countertop, then gently roll the loaves through the oats, using a bench scraper in your dominant hand to help you lift and roll the loaves. Place the loaves top-sides-up in the greased pans (do not press loaves down). - Proof: Cover pans with plastic wrap and set in a warm place to proof until the dough passes the poke test (dough should rise just shy of the rims of pullman pans, but will need to rise an inch above the rims of standard loaf pans). Meanwhile, preheat oven to 425°F with a rack set in the center. (Proofing took me nearly 2 hours with an ambient temp of 77°F.)
- Bake: Remove plastic wrap. Bake together on the same rack at 425°F for 15 minutes, then without opening the oven door, lower temp to 375°F and continue baking for 30 more minutes. Internal temp of loaves should reach at least 200°F when fully baked. Place pans on a cooling rack, then turn out loaves after 10 minutes or so. Cool completely before slicing or storing. Bread stores well wrapped at room temperature for up to 3 days or can be frozen whole or sliced.

Notes
- Flour Selection: I home-milled hard white wheat berries on the finest setting on my mill. Hard red wheat would work well also. Either variety of whole wheat flour can be purchased, but do not use a soft whole wheat or a whole wheat pastry flour.
- Watch the hydration and knead to a dramatic windowpane for the best texture! Without proper gluten development, your bread won't rise well and will have a more dense, crumbly texture.
- Make sure your starter is healthy and at its peak when you add it to the recipe.
- If your home is chilly, you can place your dough in the microwave with the door ajar during bulk fermentation/proofing so the light can keep your dough warmer.
- I prefer to stick to this one-day schedule for the most mild "sourdough" flavor and quicker proofing. You can retard the dough after bulk (refrigerate when dough is a little shy of doubling), if you would prefer.
Recommended Products
As an Amazon Associate and member of other affiliate programs, I earn from qualifying purchases.
-
 OXO Good Grips Stainless Steel Scraper
 -
Flexible Dough Scrapers
-
365 by Whole Foods Market, Organic Quick Oats, 42 Ounce
-
King Arthur, Organic White Whole Wheat Flour
-
Hard White Wheat Berries
-
Bakers Math Kitchen Scale - KD8000
-
White Universal Plus Mixer (Use code ABERLEHOME for $20 off)
-
Cooling Racks
-
USA Pan Pullman Loaf Pan, 9 x 4 x 4, Aluminized Steel
-
Cambro 4 qt Container
-
Cambro 4 qt Lid
-
Thermapen ONE Instant Read Thermometer


Nutrition Information:
Yield: 10 Serving Size: 1Amount Per Serving: Calories: 386Total Fat: 7gSaturated Fat: 1gTrans Fat: 0gUnsaturated Fat: 5gCholesterol: 2mgSodium: 1969mgCarbohydrates: 73gFiber: 10gSugar: 3gProtein: 13g
*Nutrition information is not always accurate.
I’m so grateful for your comments, reviews, and questions! Your star ratings help others discover my recipes, and your feedback helps me make improvements. Thank you for your support!
Has anyone tried this with butter instead of olive oil?
Jacob, softened or melted and cooled butter should work just fine. If using salted butter, don’t forget to adjust the salt in the recipe.
I would like to make the 2 loaves at a time but my very old KitchenAid can’t handle it. Any opinion on how this would work using stretch and fold?
Hi Mary, you should be able to make the dough by hand. I would do the slap-and-fold method on the counter in lieu of the mixer, then you would likely want to do some sets of stretch-and-folds in the bowl every 30 minutes until the dough looks developed. Let me know how it goes!
Can you use old fashion oats? If so would you change how much water you use?
Hi Tiffany! I haven’t tested with rolled oats, but they would definitely need more cooking time than quick oats. I would probably boil the same amount of water for the porridge and stir it together with the oats the night before to let it soak until morning (instead of microwaving).
For anyone else who is wondering the same thing, I’ve made this recipe several times with rolled oats that I let soak for a few hours/overnight and it’s turned out fantastic every time! This is my new favorite fresh milled flour bread recipe!
I made this recipe yesterday and it was a success! I might have gotten impatient on the bulk rise at about the 5 hour mark, but let it proof on the counter for an interminable three hours after shaping, and the result was fabulous. I see many more of these loaves in my family’s future.
I’m so glad you liked the bread, Denisa! Thank you for trying the recipe. 🙂
Do you know if this recipe would work with a rye sourdough starter?
Hi Anava! The rye might alter the rise/texture slightly, but I bet it would work fine! If you try it, let me know. You could also feed a portion of your starter with whole wheat before you make the recipe. 🙂