This post may contain affiliate links. See my full disclosure. As an Amazon Associate, I earn from qualifying purchases.
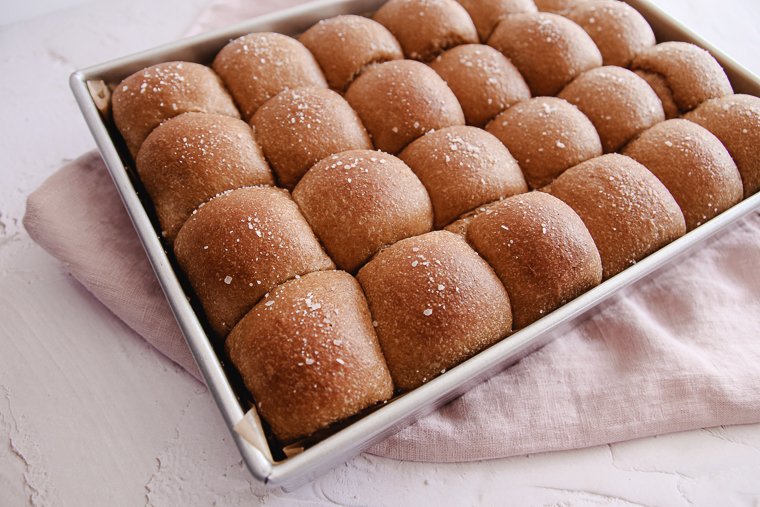
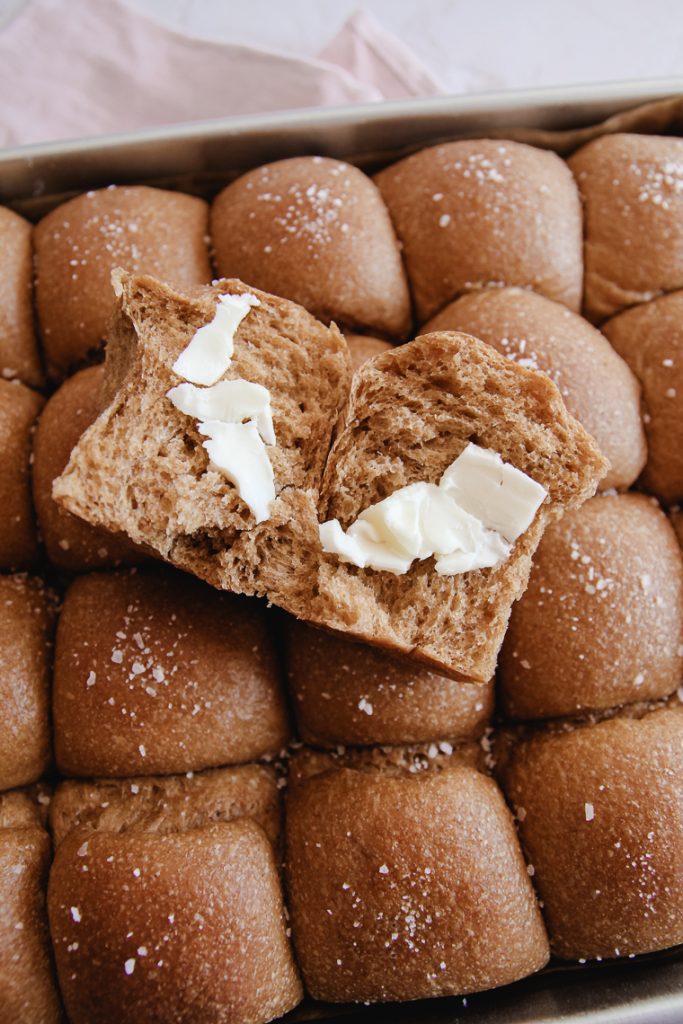
These unbelievably soft whole wheat sourdough rolls use 100% whole wheat flour and are long fermented (no commercial yeast) for soft, slightly sweet, and flavorful dinner rolls. You’ll love adding this delicious and nourishing sourdough roll recipe to your baking repertoire!
*This recipe was updated on 11/8/23

Why Bake Whole Wheat Sourdough Rolls with No Yeast?
Sourdough is the natural way to leaven bread. The beneficial yeasts and bacteria in the starter ferment the flour in your baked goods slowly.
The added time reduces the gluten content, makes the grains more digestible, and increases the nutritive properties of the finished product when compared to bread made with commercial yeast.
For most people, sourdough is the healthiest way to enjoy bread!
Using and maintaining a starter isn’t as difficult as many people believe. You may have to plan ahead a little more for the longer rise times, but the hands-on process is much the same as baking with yeast.
Make Your Own Sourdough Starter
To make homemade sourdough rolls, you will want a strong, healthy starter.
I have simple instructions for making a sourdough starter from scratch here.
Make sure you feed your established starter ahead of time so it’s active and bubbly by the time you’re ready to add it to the recipe.
This recipe calls for starter that is at 100% hydration. That simply means it’s been feed with equal weights flour and water.
You can use a white flour starter or a whole wheat starter. You can also feed a portion of your white flour starter with whole wheat prior to making this recipe, if you prefer.
More Sourdough Beginner Guides:
- How to Feed and Maintain a Sourdough Starter
- Essential Sourdough Bread Making Tools
- Sourdough Baking Terms for Beginners
What Makes These Whole Wheat Rolls Soft?
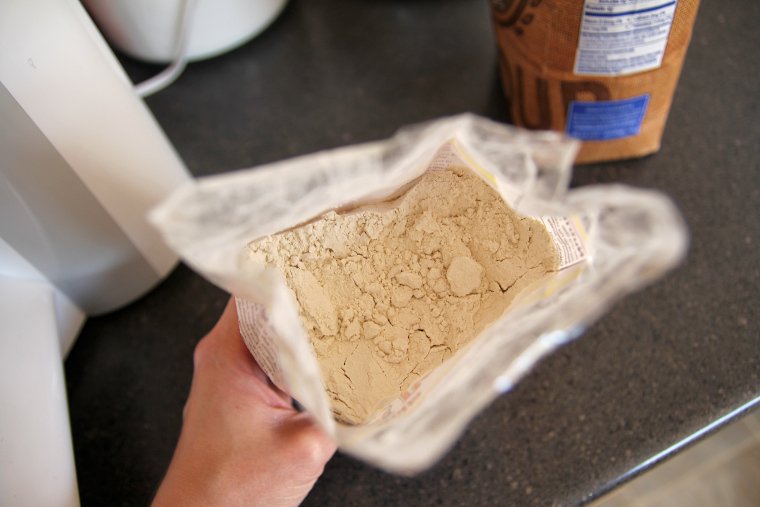
These rolls are made with 100% whole wheat flour. I’ve made them with store-bought flour or freshly milled flour.
Though whole wheat can be notorious for baking up dense, I have a few tricks up my sleeve to make these rolls incredibly soft and fluffy without adding white flour.
First, the dough is enriched with milk, eggs, and molasses (or honey, if you prefer).
I’ve also added vital wheat gluten and vinegar which both help to condition the dough for a better texture and rise. You will not taste any vinegar in the finished rolls.
You can probably find vital wheat gluten in the baking isle at your grocery store.

Finally, not adding too much flour and kneading properly will help you achieve the soft sourdough rolls you are after.
Brushing the finished rolls with melted butter will give them a soft exterior as well.
I highly recommend you use a mixer for this recipe!
Soft Whole Wheat Sourdough Rolls Baking Schedule
*The strength of your starter, the temperature in your home, and other factors will affect how long each step in the recipe will take.
Approximate timing:
- Mix and knead (including a 30-minute rest): 40 minutes
- Bulk fermentation: 4 hours
- Divide, shape, and proof: 5 hours, 15 minutes
- Bake: 17 minutes
Feed your starter several hours prior to baking the recipe and allow it to reach its peak.
I feed my starter the night before and start the dough in the morning to bake the same day. You can optionally retard the dough in the fridge after bulk fermentation to shape, proof, and bake on day 2.
Tips for Making Soft Whole Wheat Sourdough Rolls
- I like to use molasses for more depth of flavor and a deeper brown color, but honey works just as well to add sweetness to the bread.
- Don’t add extra flour to your dough.
- Follow the suggested order for mixing the ingredients and don’t skip the 30-minute rest. This will insure the dough develops to the “windowpane” stage without much kneading. I explain this more in the steps below. This is a huge key to getting the soft, fluffy texture you’re after.
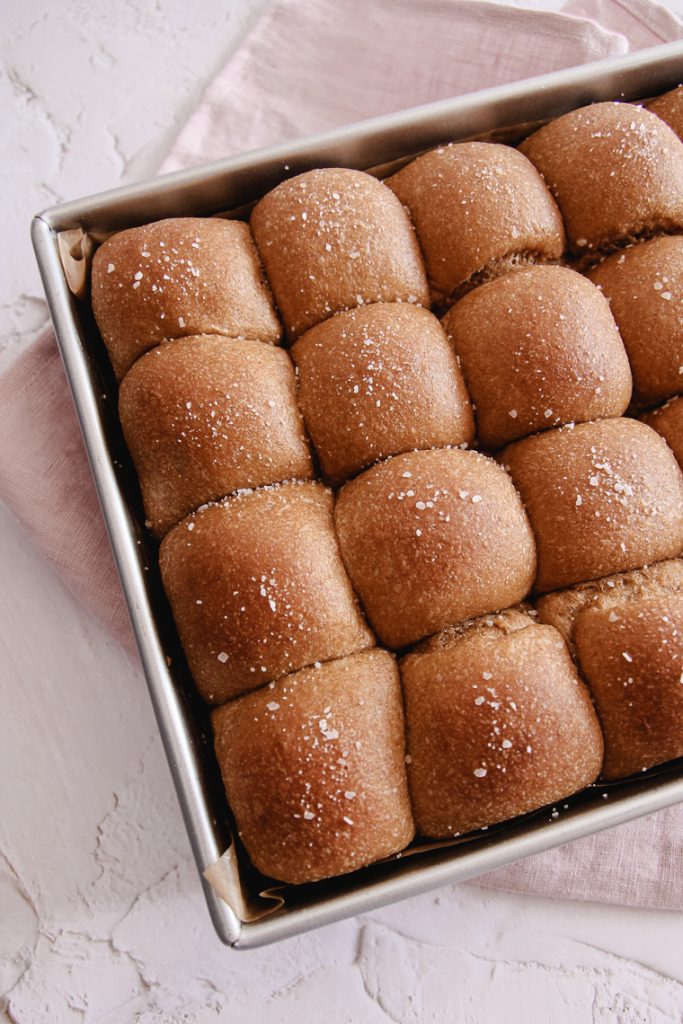
- I prefer baking in a 13×9-inch pan for pull-apart rolls. You could also bake them on a half-sheet pan lined with parchment paper.
- Place your dough in a warm place for the bulk ferment and proof. It’s a slow-moving dough, and a warm temperature makes the process go faster. I put my dough in my turned-off oven with the light on or in the microwave with the light on and the door ajar. I keep my ambient thermometer in with the dough to make sure the temperature is not getting any warmer than 80°F.
Equipment Needed
- Mixer fitted with a dough hook (I use a Bosch Universal Plus mixer)
- Large bowl or straight-sided container for bulk fermentation
- Digital kitchen scale
- 13×9-inch baking pan (USA pans are my favorite)
- Parchment paper
- Pastry brush
How to Make Soft Whole Wheat Sourdough Rolls
Step 1 – Make the Dough
Add sourdough starter, 190g milk, molasses (or honey), eggs, vinegar, vital wheat gluten, and whole wheat flour to the bowl of a stand mixer fitted with a dough hook.
Mix on low speed until everything comes together.
Cover the dough and allow it to rest at room temperature for 30 minutes. During this time, the flour will absorb the water fully, kickstarting gluten development.
After the rest, add the butter cubes and salt, and continue mixing until the butter is fully mixed in. Knead for 5 minutes.
At this point, drizzle in half of the remaining milk, and mix until the dough comes back together. Add the rest of the milk in the same manner.
(The dough will slide around the mixing bowl for a minute until the liquid mixes into the dough.)
Now check the dough.
Wet your fingers and pull the dough. It should stretch until you can see the light through it before it tears (the windowpane test pictured below), especially after it rests for a minute or two.
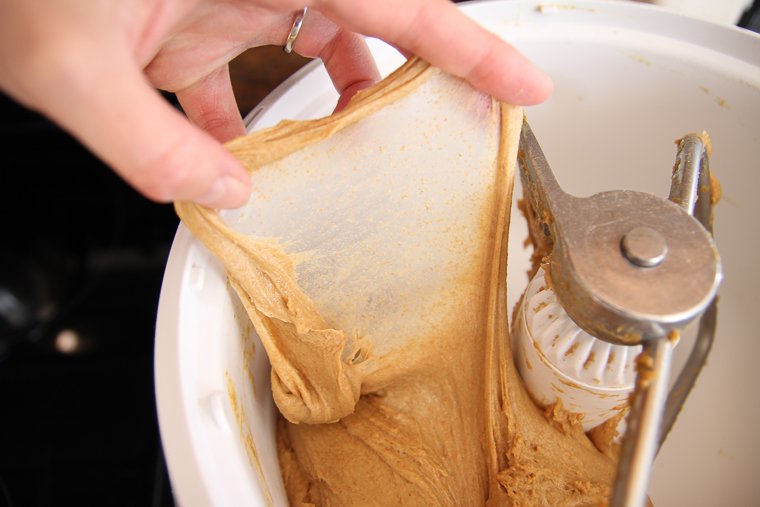
It should also look glossy and clean itself from the sides and bottom of the bowl while mixing.
If it’s not showing these signs yet, continue to knead on low speed for a couple more minutes and check again.
Step 2 – Bulk Fermentation (First Rise)
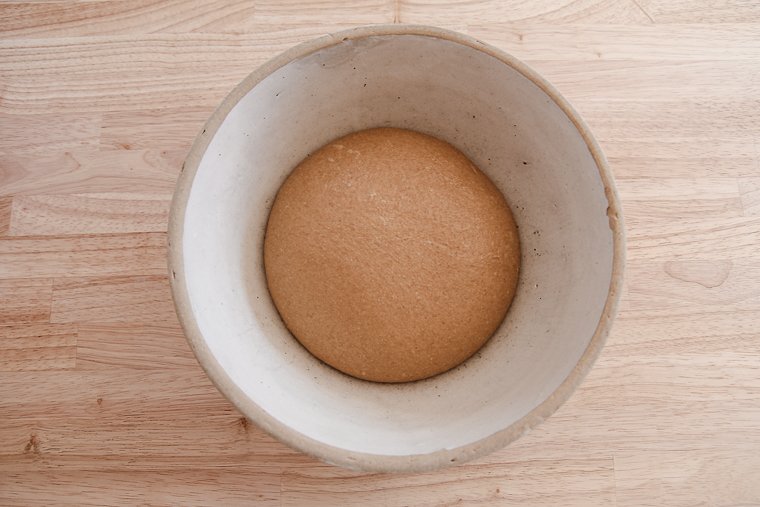
When the dough is well developed, dampen your hands, and form the dough into a nice neat ball. Place it into a large bowl or straight-sided container.
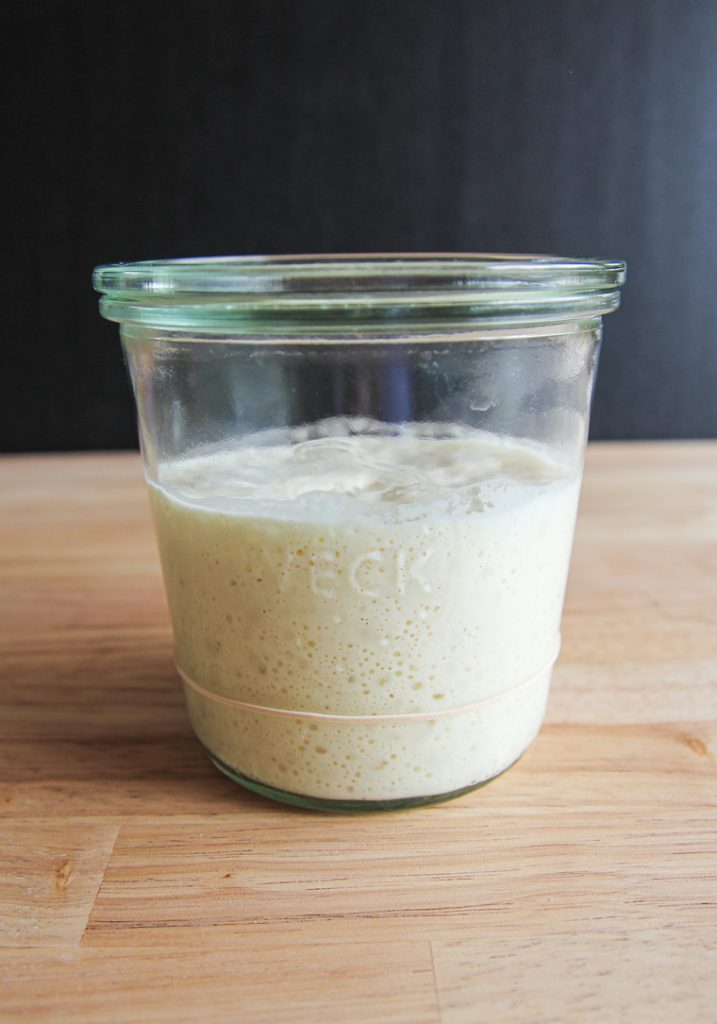
Cover and leave the dough in a warm place to rise until it has doubled in size. (If retarding overnight in the fridge, only let it rise by 1/3 its volume, as pictured below.)

Step 3 – Shape and Proof the Rolls
Butter a 13×9-inch baking pan, press a sheet of parchment paper down inside, and then butter the parchment paper.
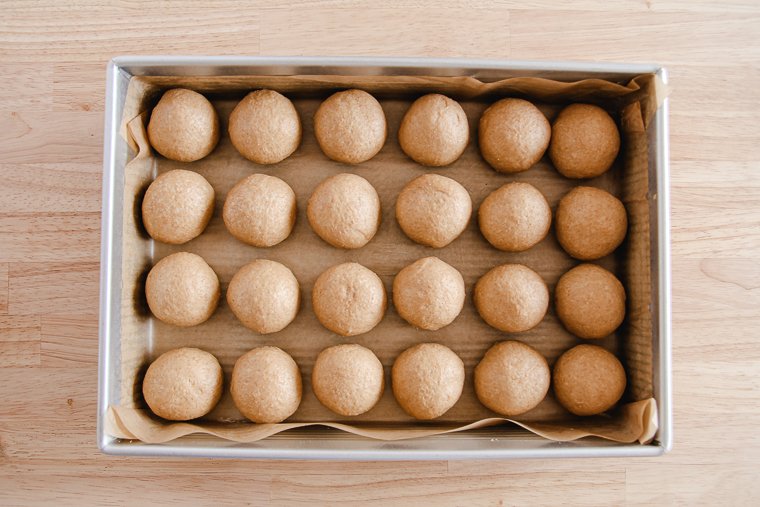
For uniform rolls, weigh out 24 portions, 54g each, before shaping, but you can eyeball them if you would prefer.
Then shape the rolls into tight balls, lightly flouring your hands if needed. (Learn how to shape rolls quickly with this video.) I do not degas the dough when shaping.
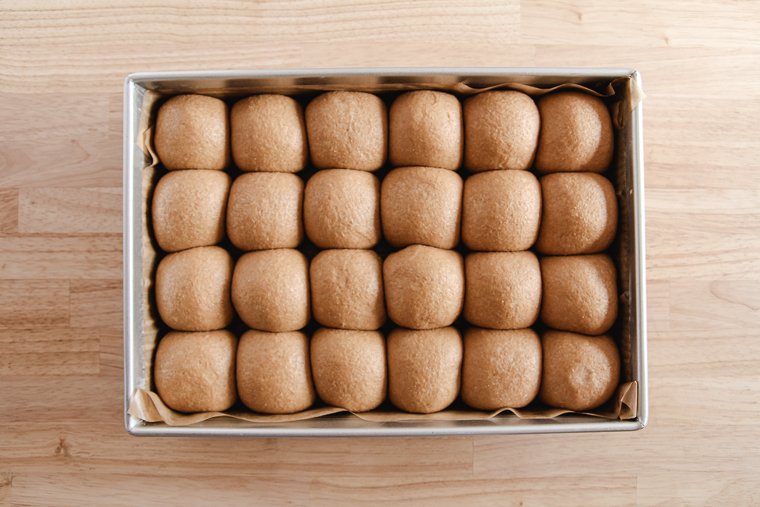
Arrange the rolls evenly in your prepared pan.
Cover your pan with plastic wrap and allow the rolls to proof in a warm place until they have doubled in size, are touching, and bounce back only slightly when poked with a damp finger.
(Proofing will take longer if your dough was cold when shaping.)
Meanwhile, preheat your oven to 375°F.
Step 4 – Bake the Whole Wheat Sourdough Rolls
Remove the plastic wrap and bake your rolls on the center rack for about 17 minutes, or until they are lightly golden on the top.
Finally, brush the rolls with melted butter right after they come out of the oven. I sprinkled mine with a little coarse kosher salt this time around. This is optional!

Serve the rolls warm, or allow them to cool completely before storing at room temperature or freezing in an airtight container.
I hope you enjoy these!

I’m so grateful for your comments, reviews, and questions! Your star ratings help others discover my recipes, and your feedback helps me make improvements. Thank you for your support!

Soft Whole Wheat Sourdough Rolls
These soft whole wheat sourdough rolls use 100% whole wheat flour and are long fermented (no commercial yeast) for soft, slightly sweet, and flavorful dinner rolls. They will take on a lighter color and milder flavor if you choose to use honey instead of molasses. A mixer fitted with a dough hook is recommended for this recipe.
Ingredients
- 200g ripe sourdough starter (100% hydration)
- 250g whole milk, warm (divided--reserve 60g for later!)
- 100g unsulfured molasses (not blackstrap molasses) or honey
- 3 large eggs (165g), lightly beaten
- 10g apple cider vinegar
- 22g vital wheat gluten
- 500g whole wheat flour (I've used Bob's Red Mill 100% Stone Ground Whole Wheat Flour or home-milled hard red or hard white wheat berries)
- 113g (1/2 cup) salted butter, cold and cut into cubes (plus extra butter for greasing pan and brushing rolls after baking)
- 12g kosher salt
Instructions
Use a fed starter at its peak.
- Mix dough: Add sourdough starter, 190g milk, honey or molasses, eggs, vinegar, vital wheat gluten, and flour to the bowl of a stand mixer fitted with a dough hook. Mix on low speed until a smooth dough forms. Cover dough and allow it to rest for 30 minutes. After resting, add butter cubes and salt. Mix on low speed until butter is fully incorporated. Knead for 5 minutes. Drizzle in the remaining 60g milk, half at a time, and continue kneading after each drizzle of milk until the dough comes back together. After all the milk is incorporated, check the dough to see if it can be pulled to a very thin windowpane with dampened fingers (especially after resting for a minute or two). If not, continue kneading for a couple more minutes and check again.
- Bulk ferment: Once dough is fully developed, form it into a ball with dampened hands and transfer to a large bowl. Cover and leave at room temperature until it has doubled in volume (this took me about 4 hours). (Alternately, allow to increase by 1/3 its size and place in the refrigerator to shape, proof, and bake the next day.)
- Shape: Butter a 13x9-inch pan, line with parchment paper, and butter the parchment paper. Divide dough into 24 pieces (each should be 54g if weighed for accuracy) without degassing. Shape the pieces into tight balls and arrange evenly in the prepared pan. Use a light dusting of flour on your hands while shaping, if necessary. (If dough was refrigerated, it will feel stiff to shape while cold. Proofing will take longer.)
- Proof: Cover pan with plastic wrap and allow rolls to proof in a warm place until they have doubled in size. They should look very puffy and be touching to fill the bottom of the pan. Meanwhile, preheat oven to 375°F.
- Bake: Remove plastic wrap and bake on the center rack for 17-19 minutes, or until lightly golden. Brush hot rolls with melted butter. Serve warm, or allow to cool completely before freezing or storing.
Notes
- This can be a slow-moving dough due to all the enrichments, but keeping it at a warm temperature helps. You can do the bulk ferment and final proof in your oven (not heated) with the oven light on (or on the proof setting) or in the microwave with the door ajar for extra warmth. Use an ambient thermometer to make sure the temperature isn't exceeding 80°F.
Recommended Products
As an Amazon Associate and member of other affiliate programs, I earn from qualifying purchases.
-
 Thermoworks SPOT Ambient Thermometer
 -
Bob's Red Mill, Whole Wheat Flour, 5 lb
-
USA Pan Bakeware Rectangular Cake Pan, 9 x 13 inch, Nonstick & Quick Release Coating, Made in the USA from Aluminized Steel
-
If You Care Parchment Paper
-
Bakers Math Kitchen Scale - KD8000
-
Bob's Red Mill, Vital Wheat Gluten Flour, 22 oz
-
KitchenAid Artisan Stand Mixers, 5 quart, Pearl Metallic
-
Set of 2 Pastry Brushes


Nutrition Information:
Yield: 24 Serving Size: 1Amount Per Serving: Calories: 121Total Fat: 2gSaturated Fat: 1gTrans Fat: 0gUnsaturated Fat: 1gCholesterol: 26mgSodium: 212mgCarbohydrates: 22gFiber: 3gSugar: 4gProtein: 5g
*Nutrition information is not always accurate.
Not sure what I did wrong. I followed the recipe and instructions and ended up with a super wet dough. Added way more flour and got a very soft dough, but after baking for 20min they were still raw
So sorry to hear the rolls didn’t turn out, Tamara!
These are the best whole wheat rolls I’ve ever made! Loved them! We have a dairy sensitivity in our house so we subbed the milk for coconut milk and the butter with avocado oil, but it turned out wonderfully! I am curious though, is there a way we could ferment it overnight or even longer and still get a good rise?
Hi B! So glad your family enjoyed the rolls! You could put the dough in the fridge overnight or longer… just bulk ferment for less time first.
I made these exactly as your recipe said ( for a change!)
I’ve made sourdough bread for years now so am used to being patient.
I baked them today after they proofed beautifully-
I did find 19 minutes was not enough as they were very uncooked- baked for another ten minutes and they seemed perfect.
Light and fluffy- looked scrumptious
But oh! So sour!! I cannot understand why- I know I used the exact amount of apple cider vinegar and my starter was freshly fed and ripe – I’ve never had my bread so sour. No idea why!
Hi Katie! If you refrigerated the dough overnight, I would suggest doing a one-day schedule next time. Just shape, proof and bake immediately after bulk fermentation. That should reduce the sourness. 🙂
Thank you so much! I so appreciate your fast response!
Hello, I would like to make these for Thanksgiving but would like to incorporate walnuts into the rolls. What would be the best way to do this? Thank you!
Hi Darci! I think you could mix in chopped walnuts right at the end of kneading (after the dough is fully developed). You might even like to toast the walnuts in a skillet first to bring out their flavor. Let me know how it goes!
Hi I am about to give these a try. I was wondering if you think subbing oat milk for dairy milk. I have a relative who cannot drink milk.
Hi Ellen! Oat milk should be just fine.
You knocked it out of the park with this whole wheat recipe! Thank you! I will be trying more of your fantastic recipes! Keep up the great baking.
Hi,
My dough passed the window frame test even though my dough was still sticky(not sure if this is the norm). I let it set overnight and it tripled in size. I used flour on my hands but the dough was too sticky. Even with a lot of flour on my hands it wouldn’t form into a tight ball. I put back into the mixer with my dough hook and added a little flour at a time. Now, it’s not passing the window frame test. I’ve kneaded about 15 minutes now. Am I going to be able to save this? Any help is appreciated. It smells amazing!!
Hi Traci, I’m sorry that happened! If the dough tripled in size it is over-fermented. This can actually cause the gluten structure to break down again making the dough very sticky and impeding its rise. You could try baking the dough in a loaf pan to salvage it. I hope next time works out better!
Thank you!
after a bit of adjustment on my end. . . .these were spectacular!!! I used honey instead of molasses the second time around. . . . . Wonderful recipe! I did sub vegan butter for real. And used my bakers powdered milk instead of milk. Thank you for giving me the courage to go 100% whole wheat!!!! And SD to boot!!!!!!
Hi there! I’m thinking I’ll make these tomorrow for Christmas eve but wondering if it’ll be ok to completely skip the vital wheat gluten? I am gluten sensitive and that stuff can be extra aggravating…even though I can eat sourdough with fresh milled wheat.
Hi Jenny! Yes, you can leave out the vital wheat gluten, but I would also leave out at least 20g of the milk to make sure the dough can come together well. Merry Christmas!
Hi Leanna,
I just made these for the first time and I am blown away with how soft and delicious they are! I have been honing my sourdough skills to help family members with gluten sensitivity. The long ferment with 100% fresh milled whole wheat has been no problem for them. I was looking for something really soft and you have provided that! Thank you for your careful work on this recipe. I used fresh milled hard white wheat. I skipped the vital gluten and instead used diastatic malt powder. I have been making bread and rolls for many years and this is the first time I have found a recipe for 100% whole wheat rolls that are perfectly soft and perfectly delicious!
What a sweet comment, Terrie! I’m so glad to hear your family can enjoy the rolls! 🙂
Hi, These rolls sound amazing but I am wondering if I can substitute Almond milk for the whole milk and Ghee for the butter? Trying to make them dairy free, if possible.
I imagine that would work, Lori! I’d like to hear how they turn out if you make them dairy free.
I have used almond milk and egg substitutes in her other recipes with no problem.
I’m relatively new at baking with a sourdough starter but despite some problems we thought they were very good. I grind my own wheat and somehow missed your note about using wheat berries but you did say that you used a bit more wheat gluten and I’m wondering what a “bit” is. I added five more grams. Thanks. Sherwood.
Hi Sherwood, yes, I’d say I used about 5 grams extra. Did your dough pass the windowpane test after kneading? If so, I’d say you had enough gluten. Thank you for trying the recipe. 🙂
Hello! Made the dough today and am excited to bake them tomorrow! I used home milled whole wheat so I needed to add a more flour to get it to come together in a ball (that’s pretty typical for every recipe I try with these particular wheat berries–Prairie Gold). I have a question about making these for sandwich buns–how would they do spaced out wider on a cookie sheet not touching? Do you think they wouldn’t have as much structure during baking? Just trying to think about how to get them just a smidge wider for sandwiches instead of as tall as a dinner roll.
Hi Holly! I think they would bake wider if spaced out on a cookie sheet as long as you proof them sufficiently. 🙂 Let me know how they come out!
I made two batches of these for our huge thanksgiving gathering. I was skeptical of the recipe at first and did a test batch and was blown away by them. Then I made a double batch and froze them. They were extremely popular at thanksgiving. These will be the only dinner rolls I make from now on. I am thinking I will using the same recipe and turn them into cinnamon rolls for Christmas. 🙂
I’m so glad you all enjoyed the rolls, Prentice! I’ll have to try making the dough into cinnamon rolls too. That’s a great idea. 🙂
I made these and turned out amazing. I used the bread machine dough setting and then put them in the fridge overnight. Shaped and proofed for 4 hours in warming oven on bread setting. Hopefully will work out again.
I’m so glad to hear that, JJ! Thanks for letting me know!
I made these for Canadian Thanksgiving and they turned out pretty good. I had to proof longer than the recipe stated for the first proof and once I took them out of the fridge they took about 5-6 hours at room temp to get to the correct size and poofiness. Mine also took longer in the oven to bake. ( more like 23 min) I would just say adjust based on your climate and you should be good!
Thanks for your feedback, Jess! I just gave this recipe an update after re-testing it and making some tweaks.
I made these. They were a fail. I’m a seasoned baker so I’m not sure what happened. I used molasses instead of honey so they were darker than the picture . They did not rise well even after 48 hours in the fridge. Very dense. But the flavor was good. Doubt I’ll try this one again.
Bummer! So sorry these didn’t work out for you, Becky! I just updated the recipe after re-testing it and making some adjustments.
I am not sure what I am doing wrong. Twice I have followed this recipe exactly because I really want to make these. I used a scale to measure everything carefully. My starter is active and bubbly. Both times when I check it after 24 hours the dough has not doubled in size and is solid. HELP!!? 🙁
Hi Kimberly! Your dough may just need more time to ferment at room temperature before it’s refrigerated, especially if your kitchen is cooler this time of year. Look for the dough to increase in volume by 1/3 before it goes in the fridge. You could try putting your dough in a turned-off oven with the light on for extra warmth which should help speed up the process. The dough will feel stiff out of the refrigerator either way, so don’t be concerned about that. I updated the post for clarity. I hope this helps!
Thank you so much! I will try them again!