


This post may contain affiliate links. See my full disclosure. As an Amazon Associate, I earn from qualifying purchases.
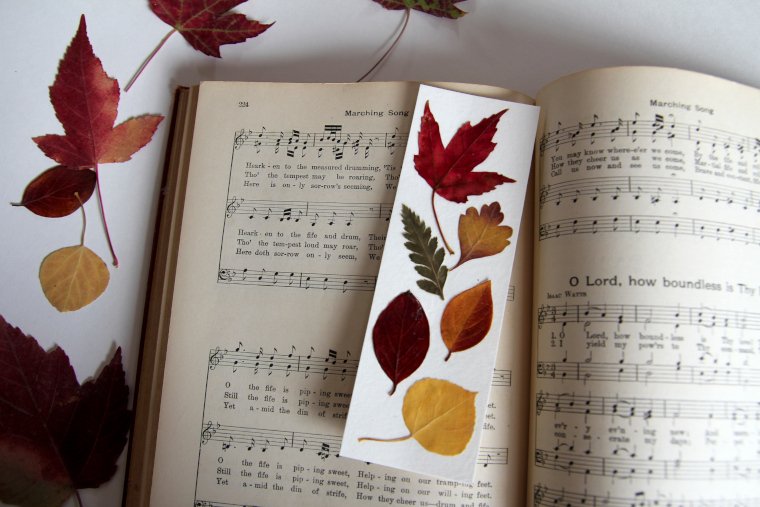
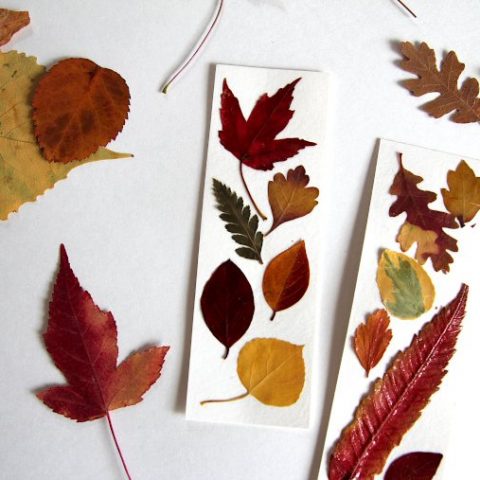
These pressed leaf bookmarks are such a simple fall nature craft, and they are a wonderful way to showcase and enjoy autumn leaves that you’ve pressed.
They would make lovely gifts or be a perfect project to compliment your homeschool nature study!
I started out by making these pressed flower bookmarks this past spring, and I knew I wanted to revisit the idea this fall with pressed leaves.
These bookmarks are finished with Mod Podge. I love how the Mod Podge preserves the leaves and deepens their vibrant colors!
You will also love this post: 20 Favorite Fall Crafts for Your Homeschool
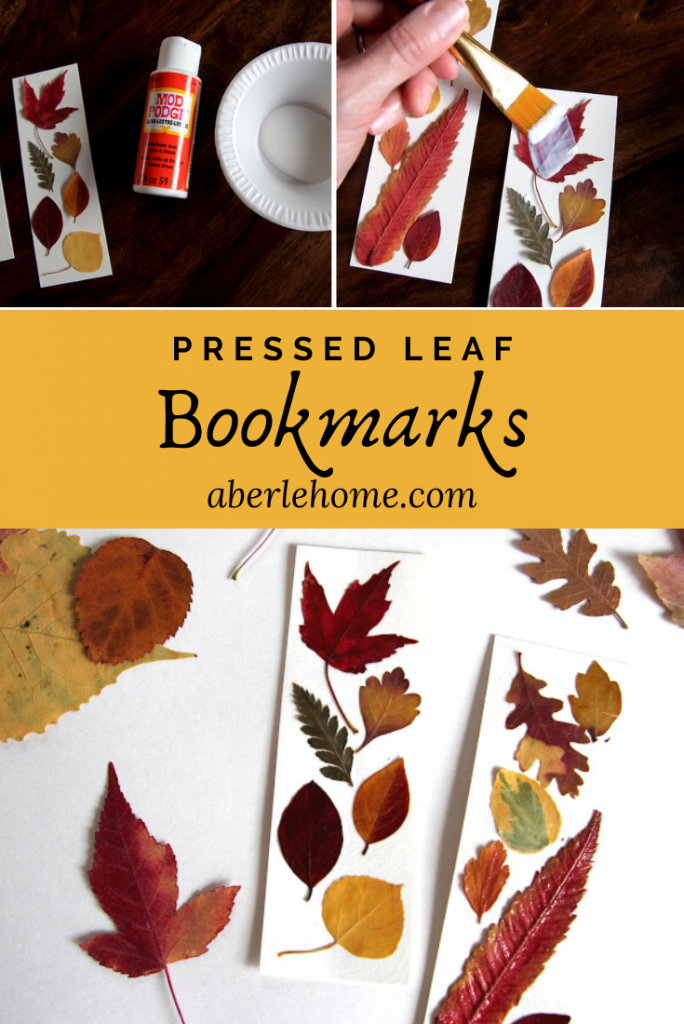
Supplies Needed
- Leaves for pressing
- Flower press or heavy book with parchment paper
- 140 lb watercolor paper cut to a 2″ x 6″ rectangle (this weight is important so your finished bookmark doesn’t wrinkle)
- Clear Mod Podge Sealer
- White school glue, if needed
- Tweezers, if needed
- Flat paint brush
- Toothpick
How to Make Pressed Leaf Bookmarks
Step 1 – Press Leaves
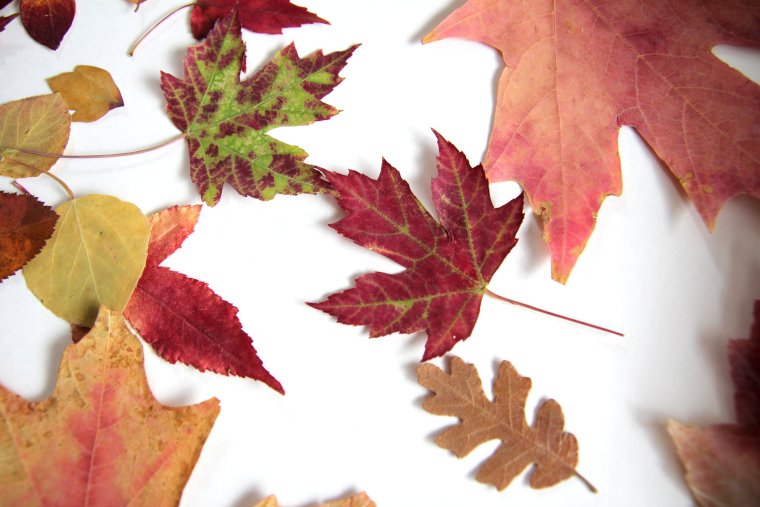
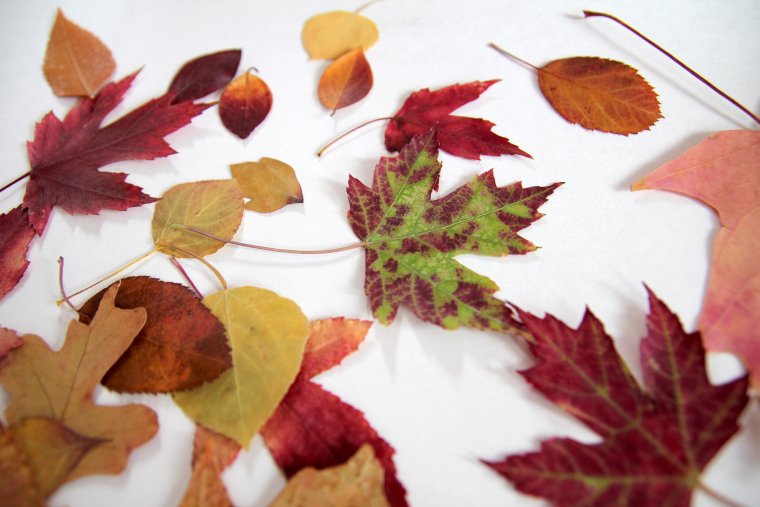
I chose mostly small, flat leaves for my project so my finished bookmark would be as flat as possible.
Make sure your leaves are in good condition—not moist with dew and not already dried and crinkly. They should be freshly fallen or picked directly from a tree or bush. I pressed a variety of colors.
Press your leaves in a single layer, face down, in a flower press or between sheets of parchment paper in a heavy book.
Flower Presses to Purchase:


Allow them to press for 7-10 days until they are completely dry and preserved.
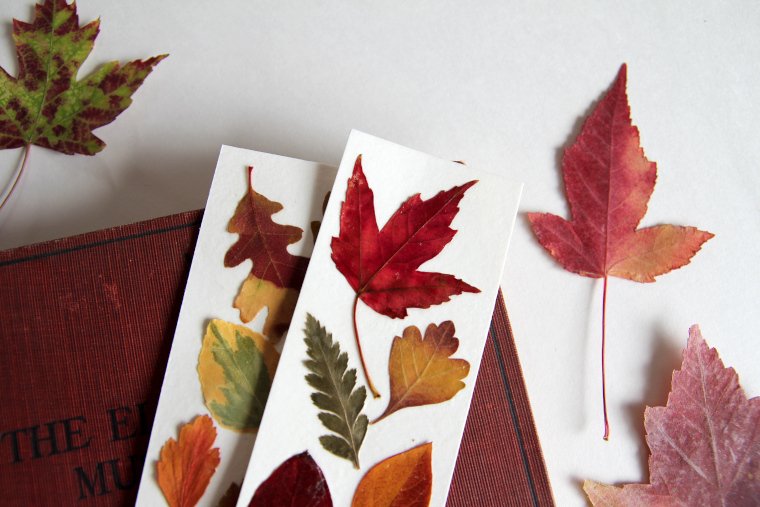
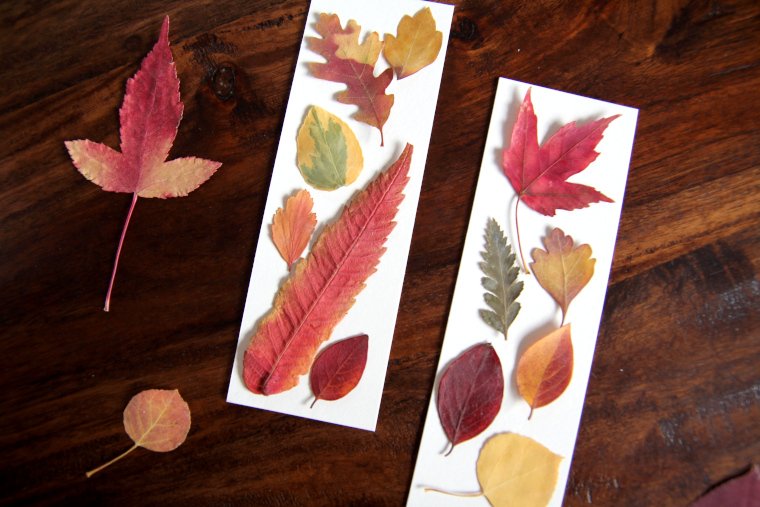
Step 2 – Arrange Leaves as Desired
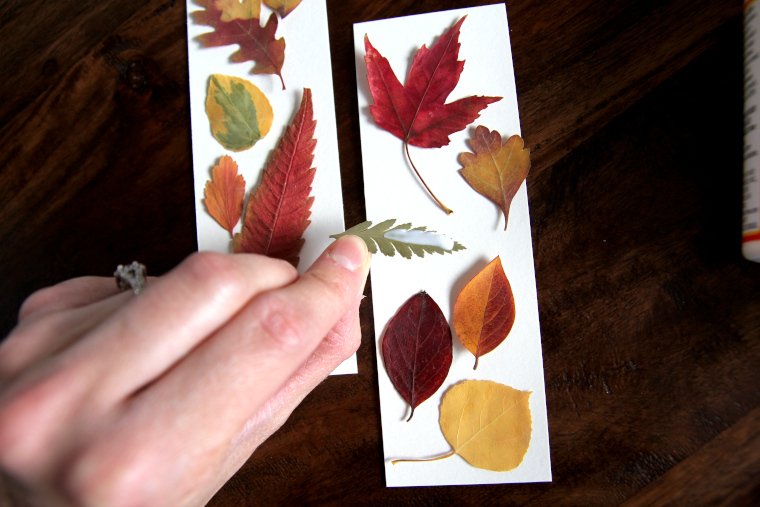
Arrange your pressed leaves on your watercolor paper rectangle until you are pleased with the layout.
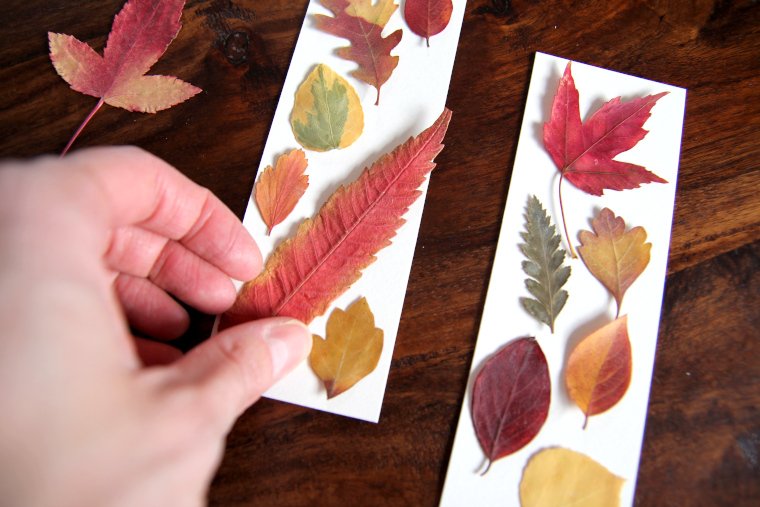
The leaves are delicate, so handle them carefully! Try using a pair of tweezers if you are having trouble.
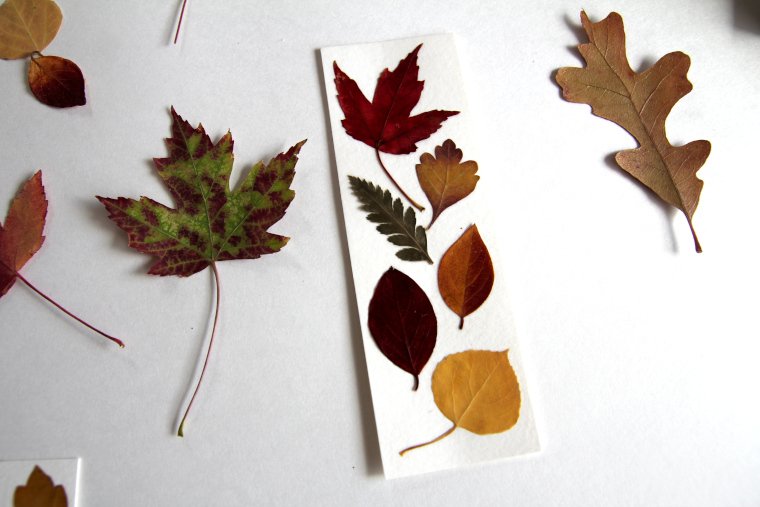
Step 3 – Mod Podge
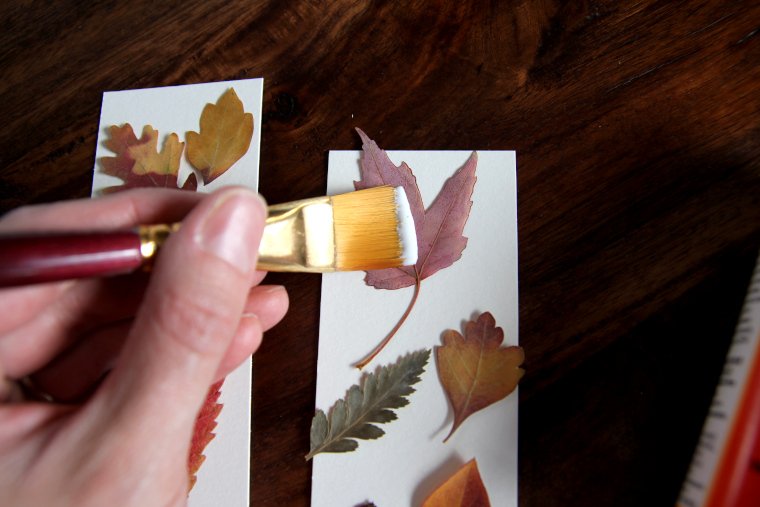
Now use your Mod Podge to glue your leaves in place on your bookmark. I dispensed some in a disposable bowl to use.
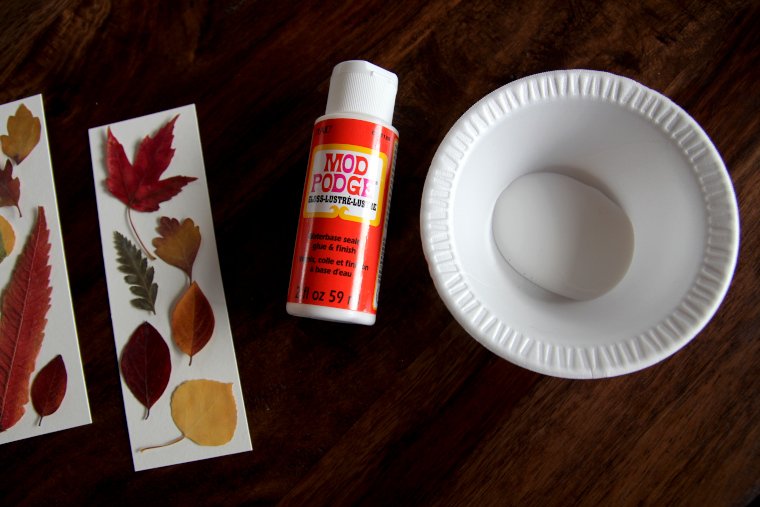
I like to apply the Mod Podge to the backs of the leaves gently with my paintbrush and stick them in place.
You may find that you need a toothpick to sneak Mod Podge under any leaf corners left unglued so they aren’t sticking up.
Try using some dots of white school glue if the Mod Podge isn’t quite doing the job.
Then use your paintbrush to gently apply Mod Podge over the top of each leaf to seal it in place on the bookmark.
Go from the center of each leaf outward to avoid bending or tearing the leaves.
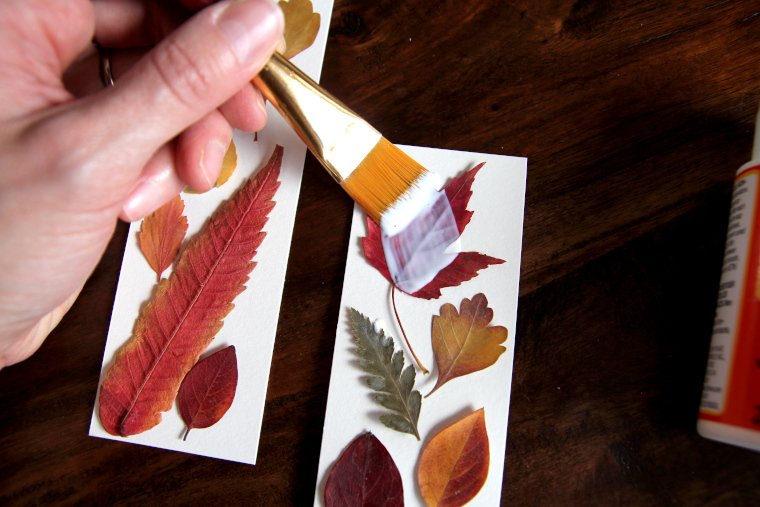
Wait until the Mod Podge is tacky, and then repeat with one more coat over each leaf.
After your second coat is tacky, apply a third coat of Mod Podge, this time over the entire face of your bookmark.
Use even strokes with your brush to smooth out the Mod Podge. The Mod Podge dries clear and is very forgiving, though, so don’t worry too much.
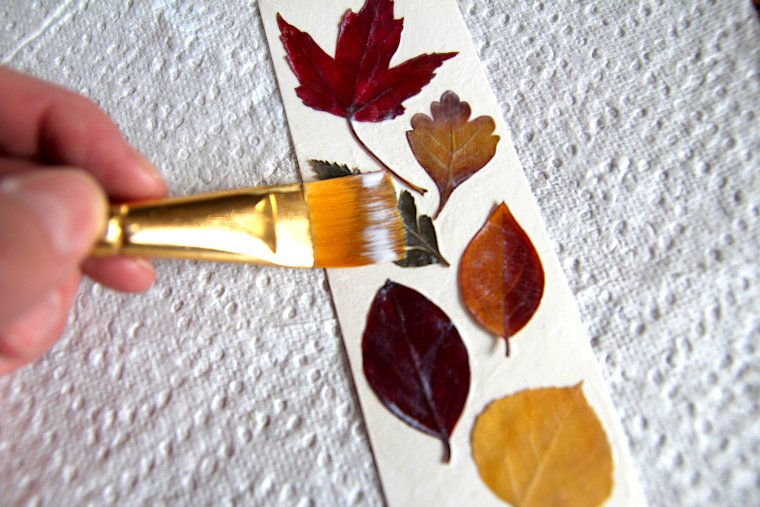
Again, make sure every leaf corner ends up sealed down to the bookmark properly.
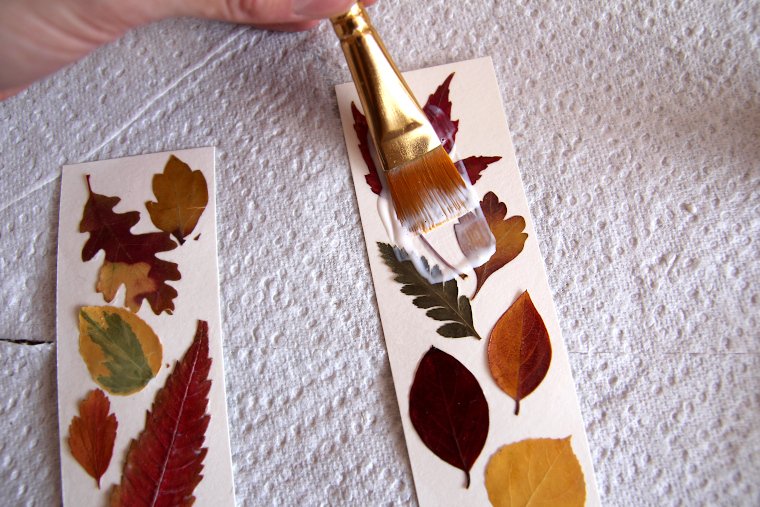
I did the final Mod Podge layer with a paper towel underneath to protect my table, but I made sure to move the bookmark right after so the paper towel wouldn’t stick to the underneath side.
Give your finished bookmark time to dry completely, and you’re done!
If you make this project and love it, I would greatly appreciate a star rating and review!
Tag your photo on Instagram @aberlehome to show me what you made!
Pressed Leaf Bookmarks
A lovely and easy craft to use and enjoy leaves you press in the fall! Perfect for all ages!
Materials
- Leaves for pressing
- 140 lb watercolor paper cut to a 2"x 6" rectangle
- Mod Podge
- White school glue, if needed
Tools
- Flower press or heavy book with parchment paper
- Flat paint brush
- Toothpick
- Tweezers, if needed
Instructions
- Choose freshly fallen leaves that are in good condition and not moist. Press leaves in a single layer, face down, for 7-10 days until they are completely dry and preserved.
- Arrange leaves on your watercolor paper rectangle until you are pleased with the layout. Handle the leaves carefully, and use tweezers, if necessary.
- Dispense some Mod Podge in a bowl and use it to glue your leaves in place on your bookmark (you can also use dots of school glue, if needed).
- You may need to use a toothpick to sneak Mod Podge under any leaf corners left unglued so they don't stick up.
- Use your paintbrush to gently apply Mod Podge over the top of each leaf to seal it in place on the bookmark. Go from the center of the leaf outward. When the Mod Podge is tacky, repeat with one more coat over each leaf. After your second coat is tacky, apply a third coat of Mod Podge, this time over the entire face of your bookmark. Use long, even strokes, and make sure every leaf corner is sealed down properly.
- Allow your bookmark to dry completely (if you were doing your project on a paper towel, make sure to remove your bookmark from the paper towel while drying so it doesn't stick).

Leave a Comment